How to Refinish Metal Chairs
Spring is finally here and I’m always excited to put lovely items (new or old) into my yard and garden areas. This year I’m going to repaint and refinish metal chairs for our outdoor seating area.
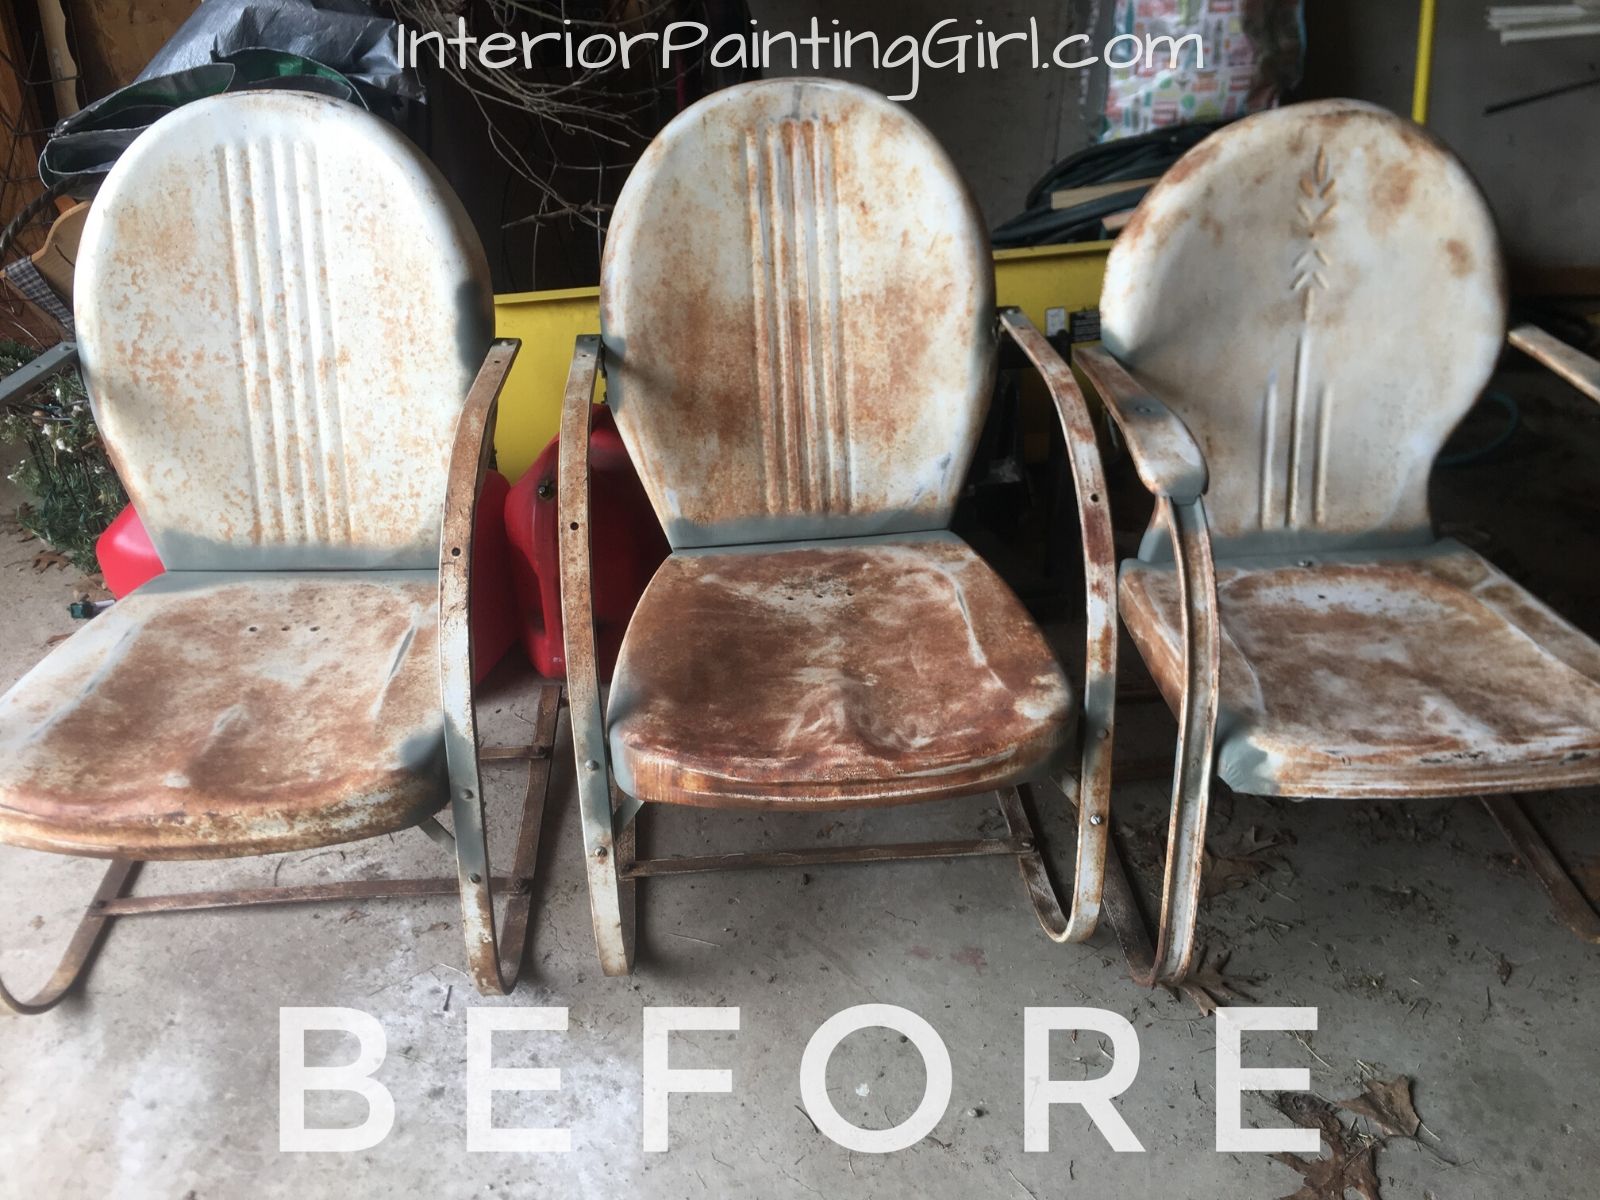
I was thrilled when my Dad found these beautiful, vintage metal chairs in someone’s burn pile. (Who burns metal chairs?)
Thankfully, he recognized their potential and rescued them for me. I was ecstatic and thankful to acquire them.
I had been hunting for vintage chairs like these to refinish for years, but the price was always more than I was willing to pay. Anyone who goes to flea markets knows that these pretty ladies can go up to $100 a piece, even unfinished! My patience paid off and I’m ready to give them their retro, pin-up flavor back.
I think the key to tackling any home improvement or craft project is to get a mental picture of the finished product in your head. This will get you excited and willing to overcome any obstacles you may encounter and the tedious steps that will need to be performed to get you to your end-result.
That said, I needed to pick the fresh new colors for my chairs. Then I could head to the home improvement store for supplies.
I browsed on Pinterest to get an idea of colors that were authentic to the era in which the chairs were made.
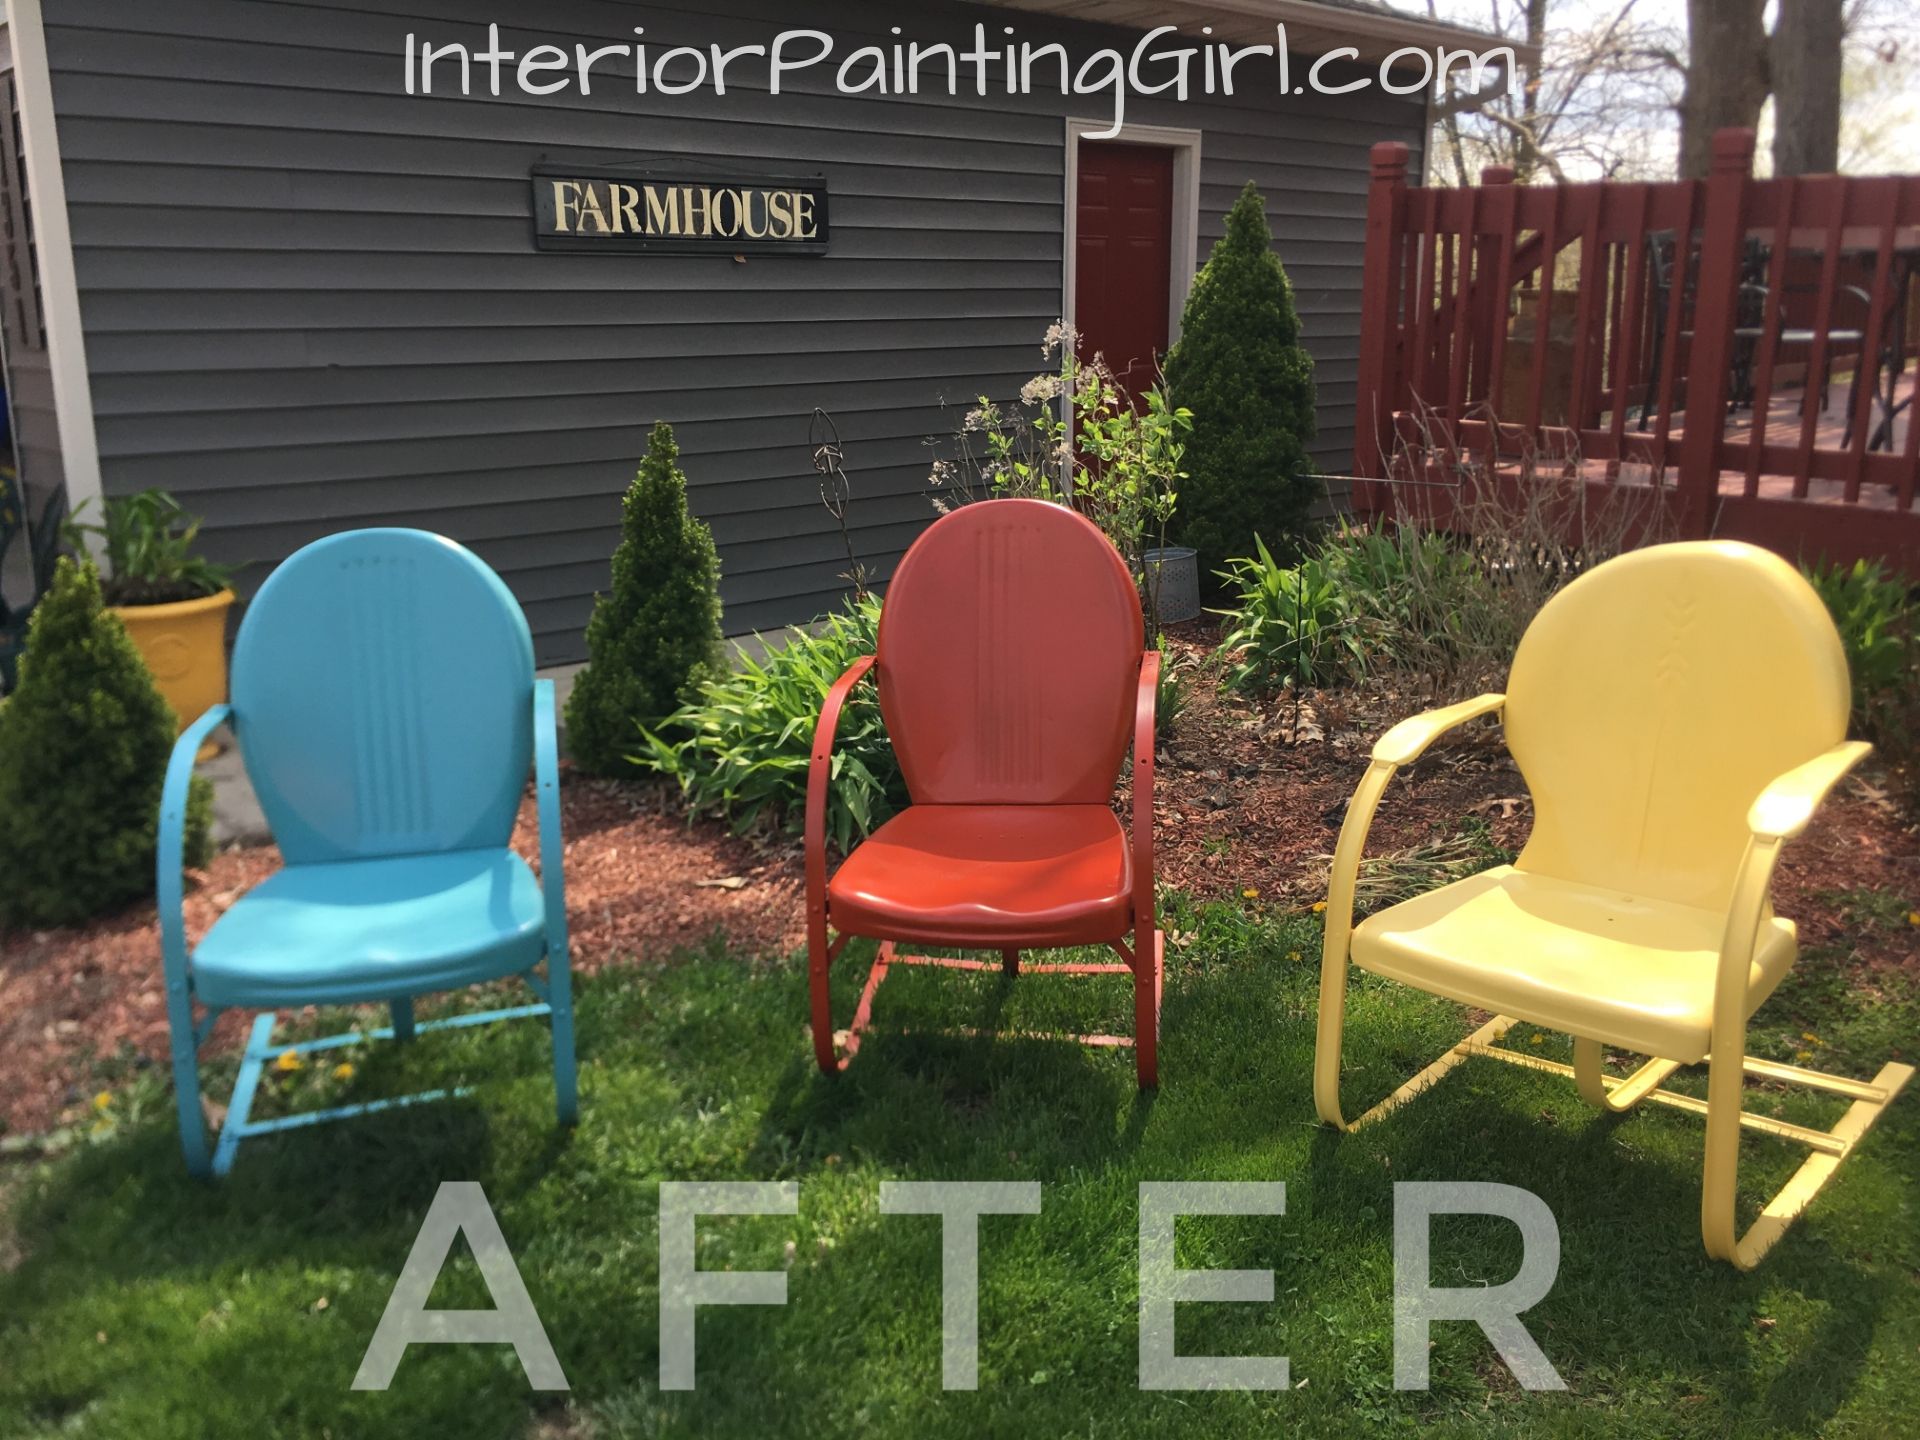
They were typically sold in bright, fun colors. Red, yellow, hunter green, jade, navy, orange and aqua!
In the end, I chose sunbeam yellow for its warmth, retro aqua because it’s my all-time favorite color, and a color called spiced paprika. This is a nod to my Dad who salvaged the chairs. He has a classic ‘57 Chevy Bel Air wagon (coincidentally the same era as the chairs) that was painted this unique orange-red color. Colors chosen! I’m off to buy supplies!
Refinish Metal Chairs Supply List:
- Small wire brush
- 60-80 grit sandpaper or angled sanding sponge
- 200 grit sandpaper (for in-between coats)
- Stops Rust or Rusty Metal spray primer (I recommend one can per chair)
- Finish coat in desired colors in a spray paint designed for metal (I recommend one can per chair)
- Dust mask
- Optional: High-Gloss Clear Coat Spray for extra shine and protection
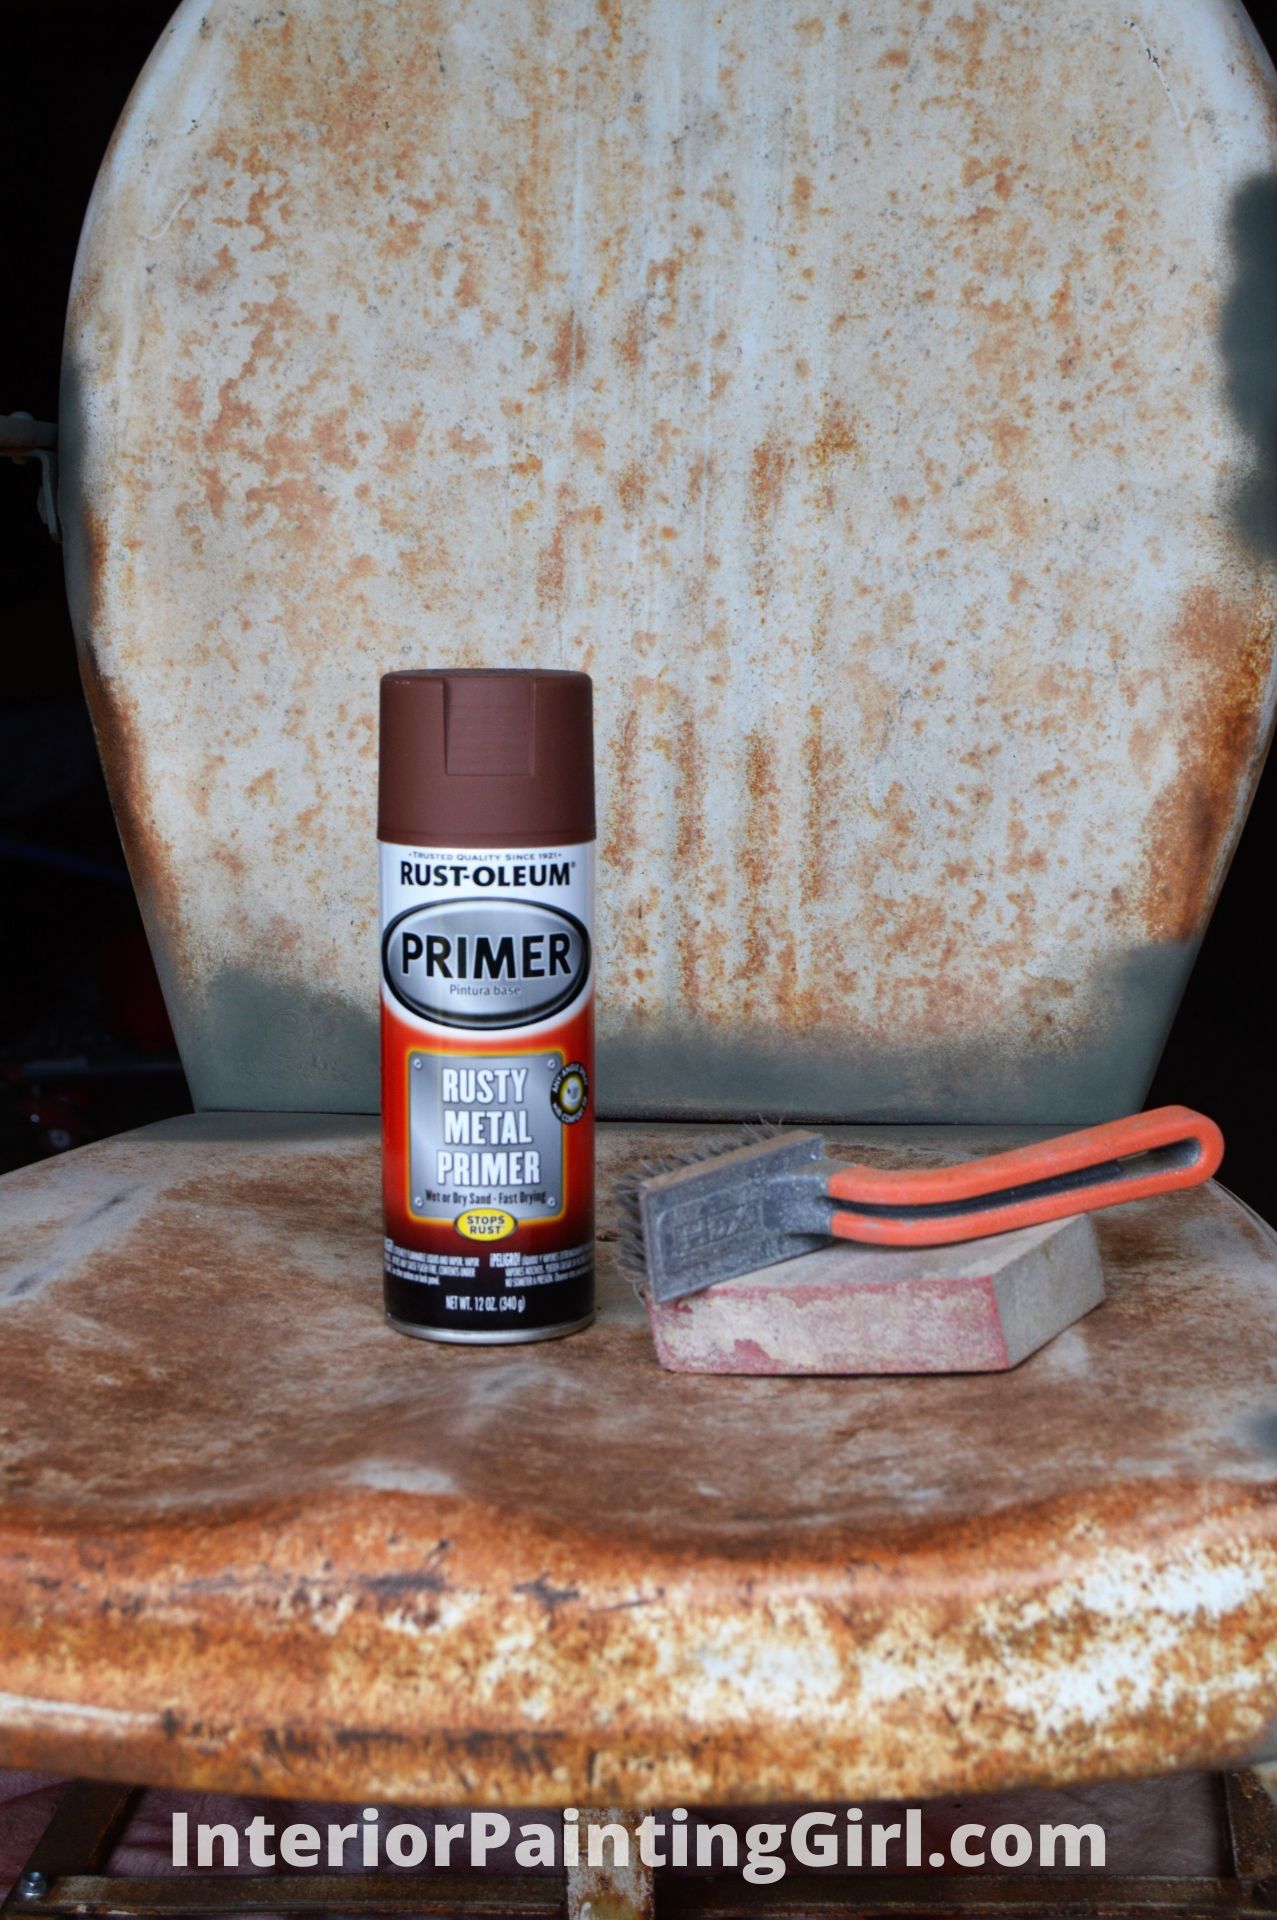
I used Rust-Oleum® paint & primer: it’s easy to use, affordable, and can be found at almost any home improvement store.
Step One : Clean & Sand
The first step to refinish metal chairs is to get rid of the dirt and grime! More than likely your chairs will have seen better days. They’ve been found in the back of the garage, attic, a garage sale, flea market, or even (in my case) a burn pile.
Some cleaners react with metals, so in this instance I recommend just giving them a washing with good old dish soap and hot water. Once you’ve washed and rid them of dirt and cobwebs, it’s time to sand.
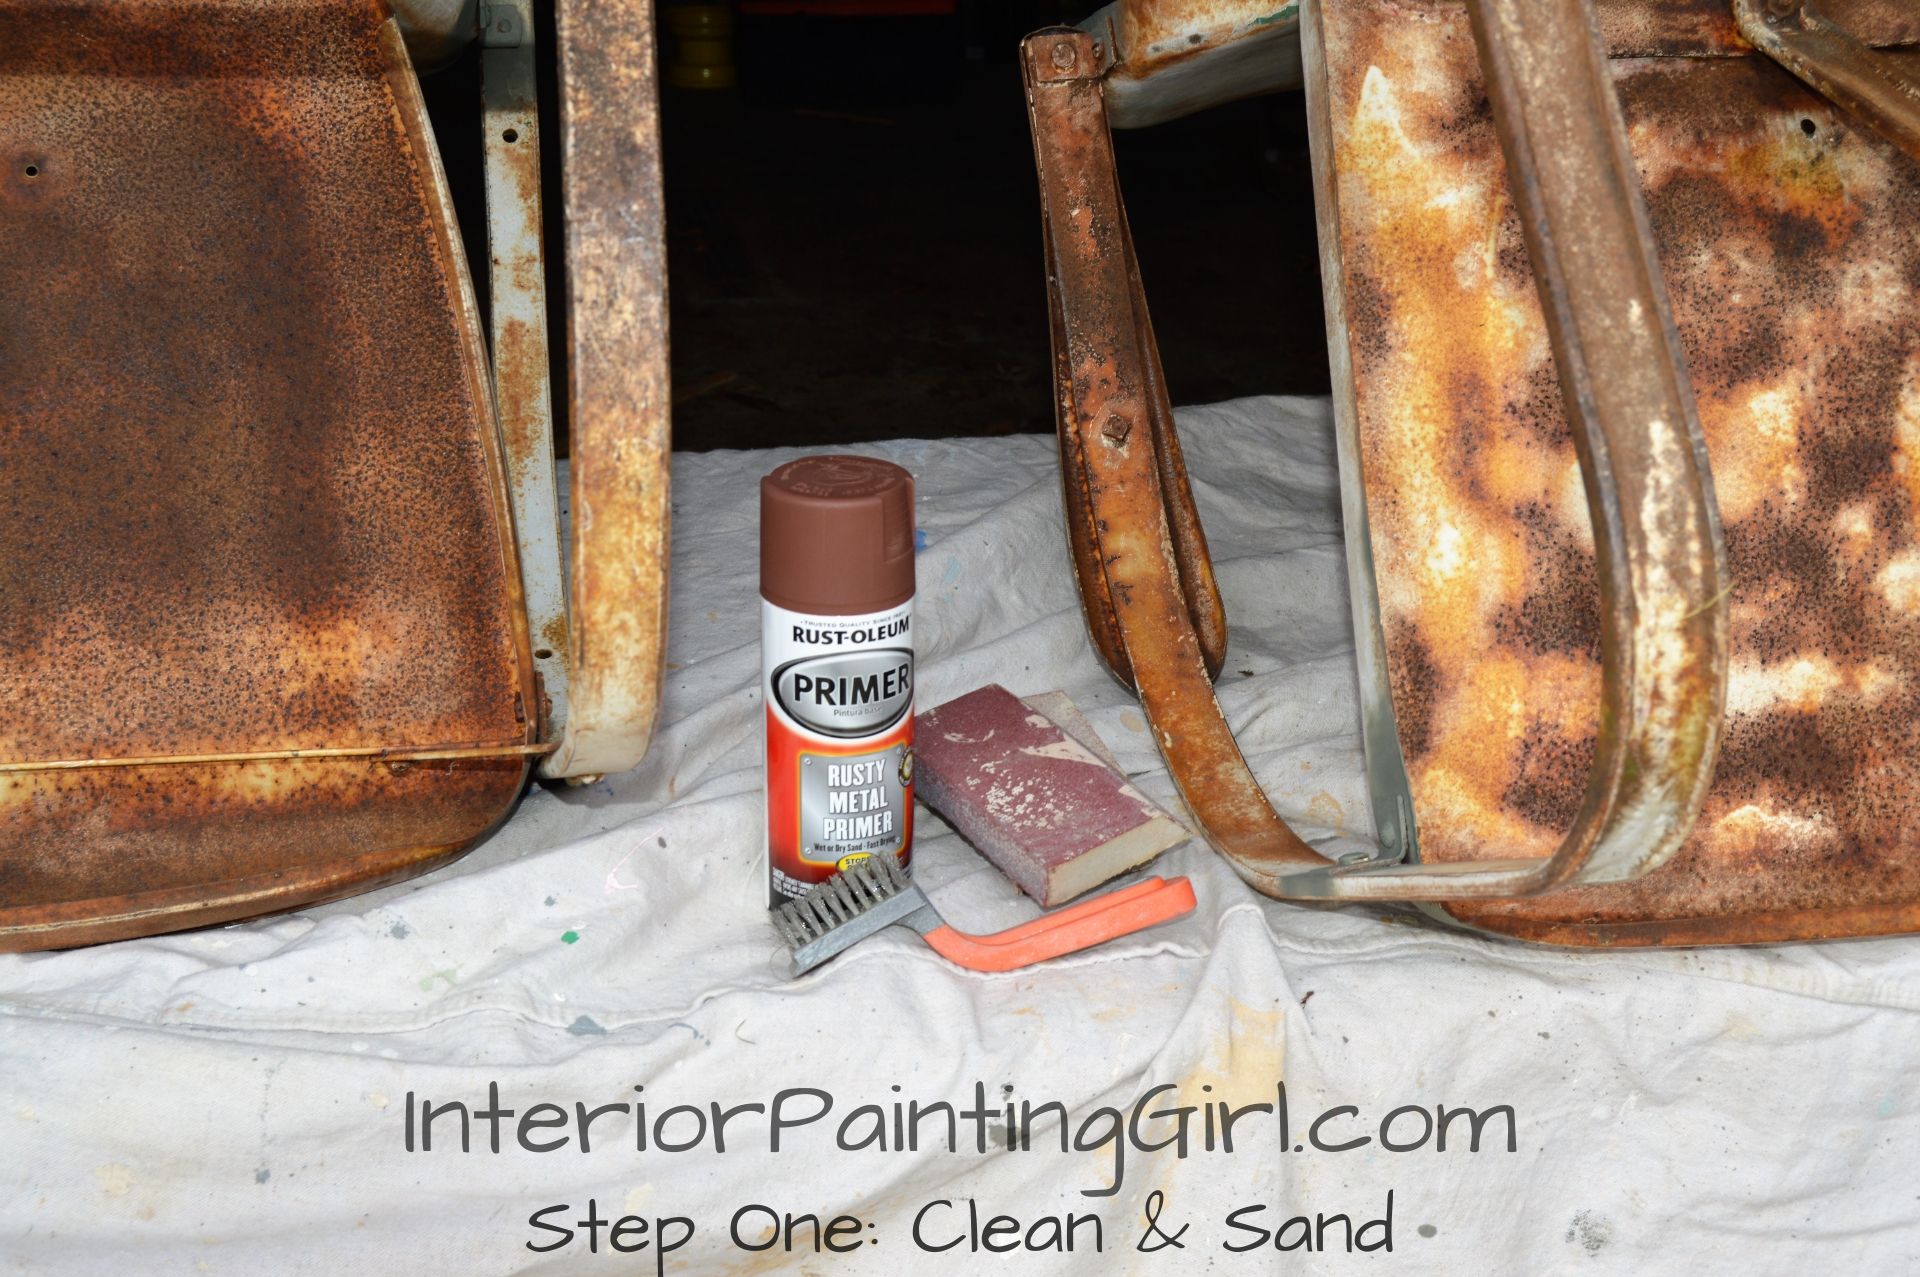
My chairs had a decent amount of rust and even some dimples and pitting. If you’re comfortable with an electric sander, you can sand the chairs with 60-80 grit sandpaper and save yourself some elbow grease.
If you’re not, no worries. You can use a piece of sandpaper or even a sanding sponge. Sand the entire chair concentrating on the rusty spots. Near the legs and tighter areas, use a small wire brush or the angled end of a sanding sponge to fit in those awkward spots. That will help.
Wash again to clean away any residue and dust created. Also, please use a dust mask to keep your lungs healthy.
Please note: It is impossible to get a perfect, flawless substrate. The chairs are aged and have likely seen some weather. I’m perfectly happy with the results of my hand sander, wire brush and weekend warrior mentality.
Rust and perhaps some pitting will remain. If perfection is what you seek - perhaps these are a family heirloom - you can always hire someone to sandblast them or use a grinding wheel.
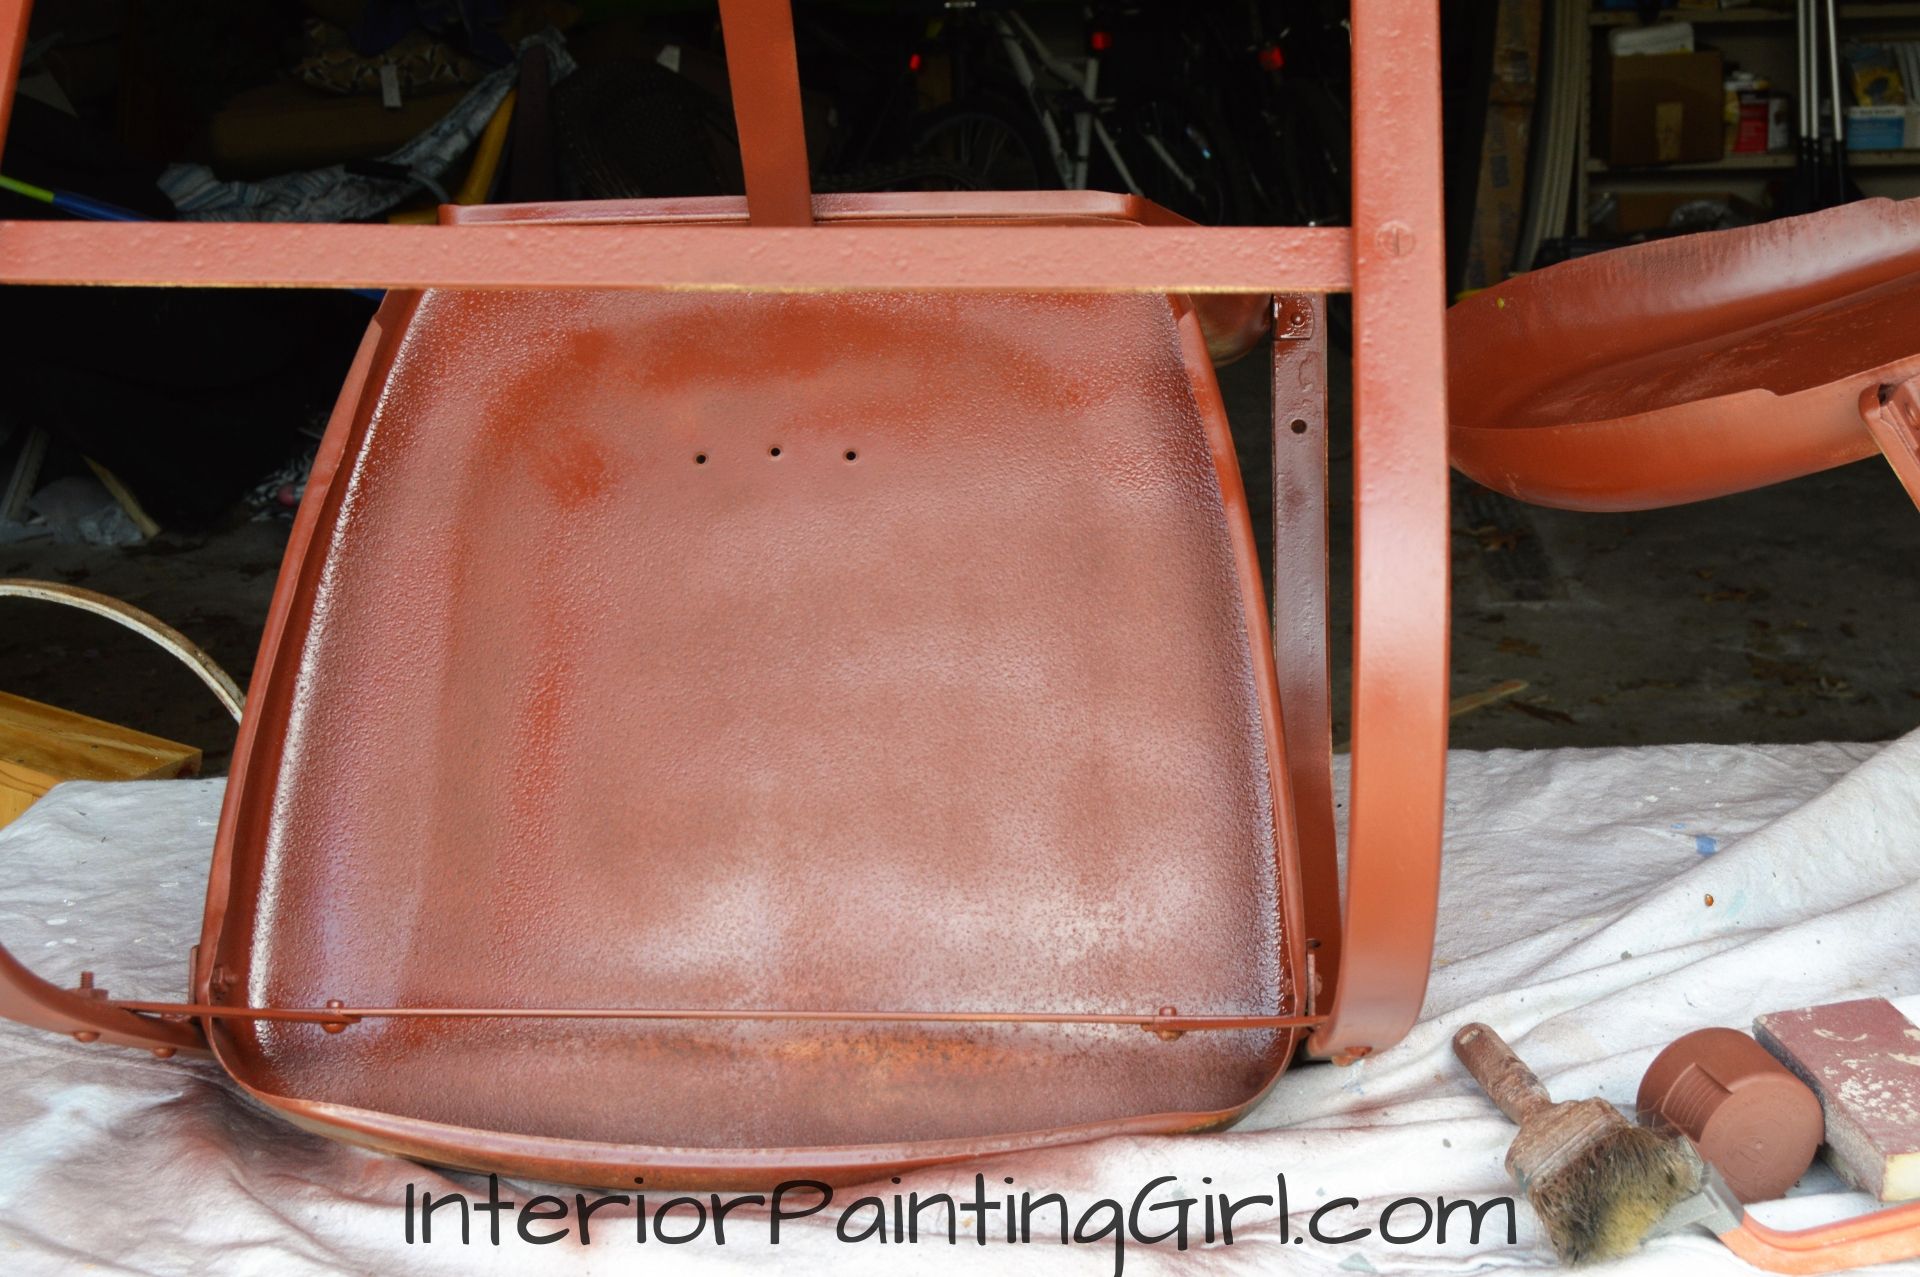
Step Two : Spray Prime the Underside
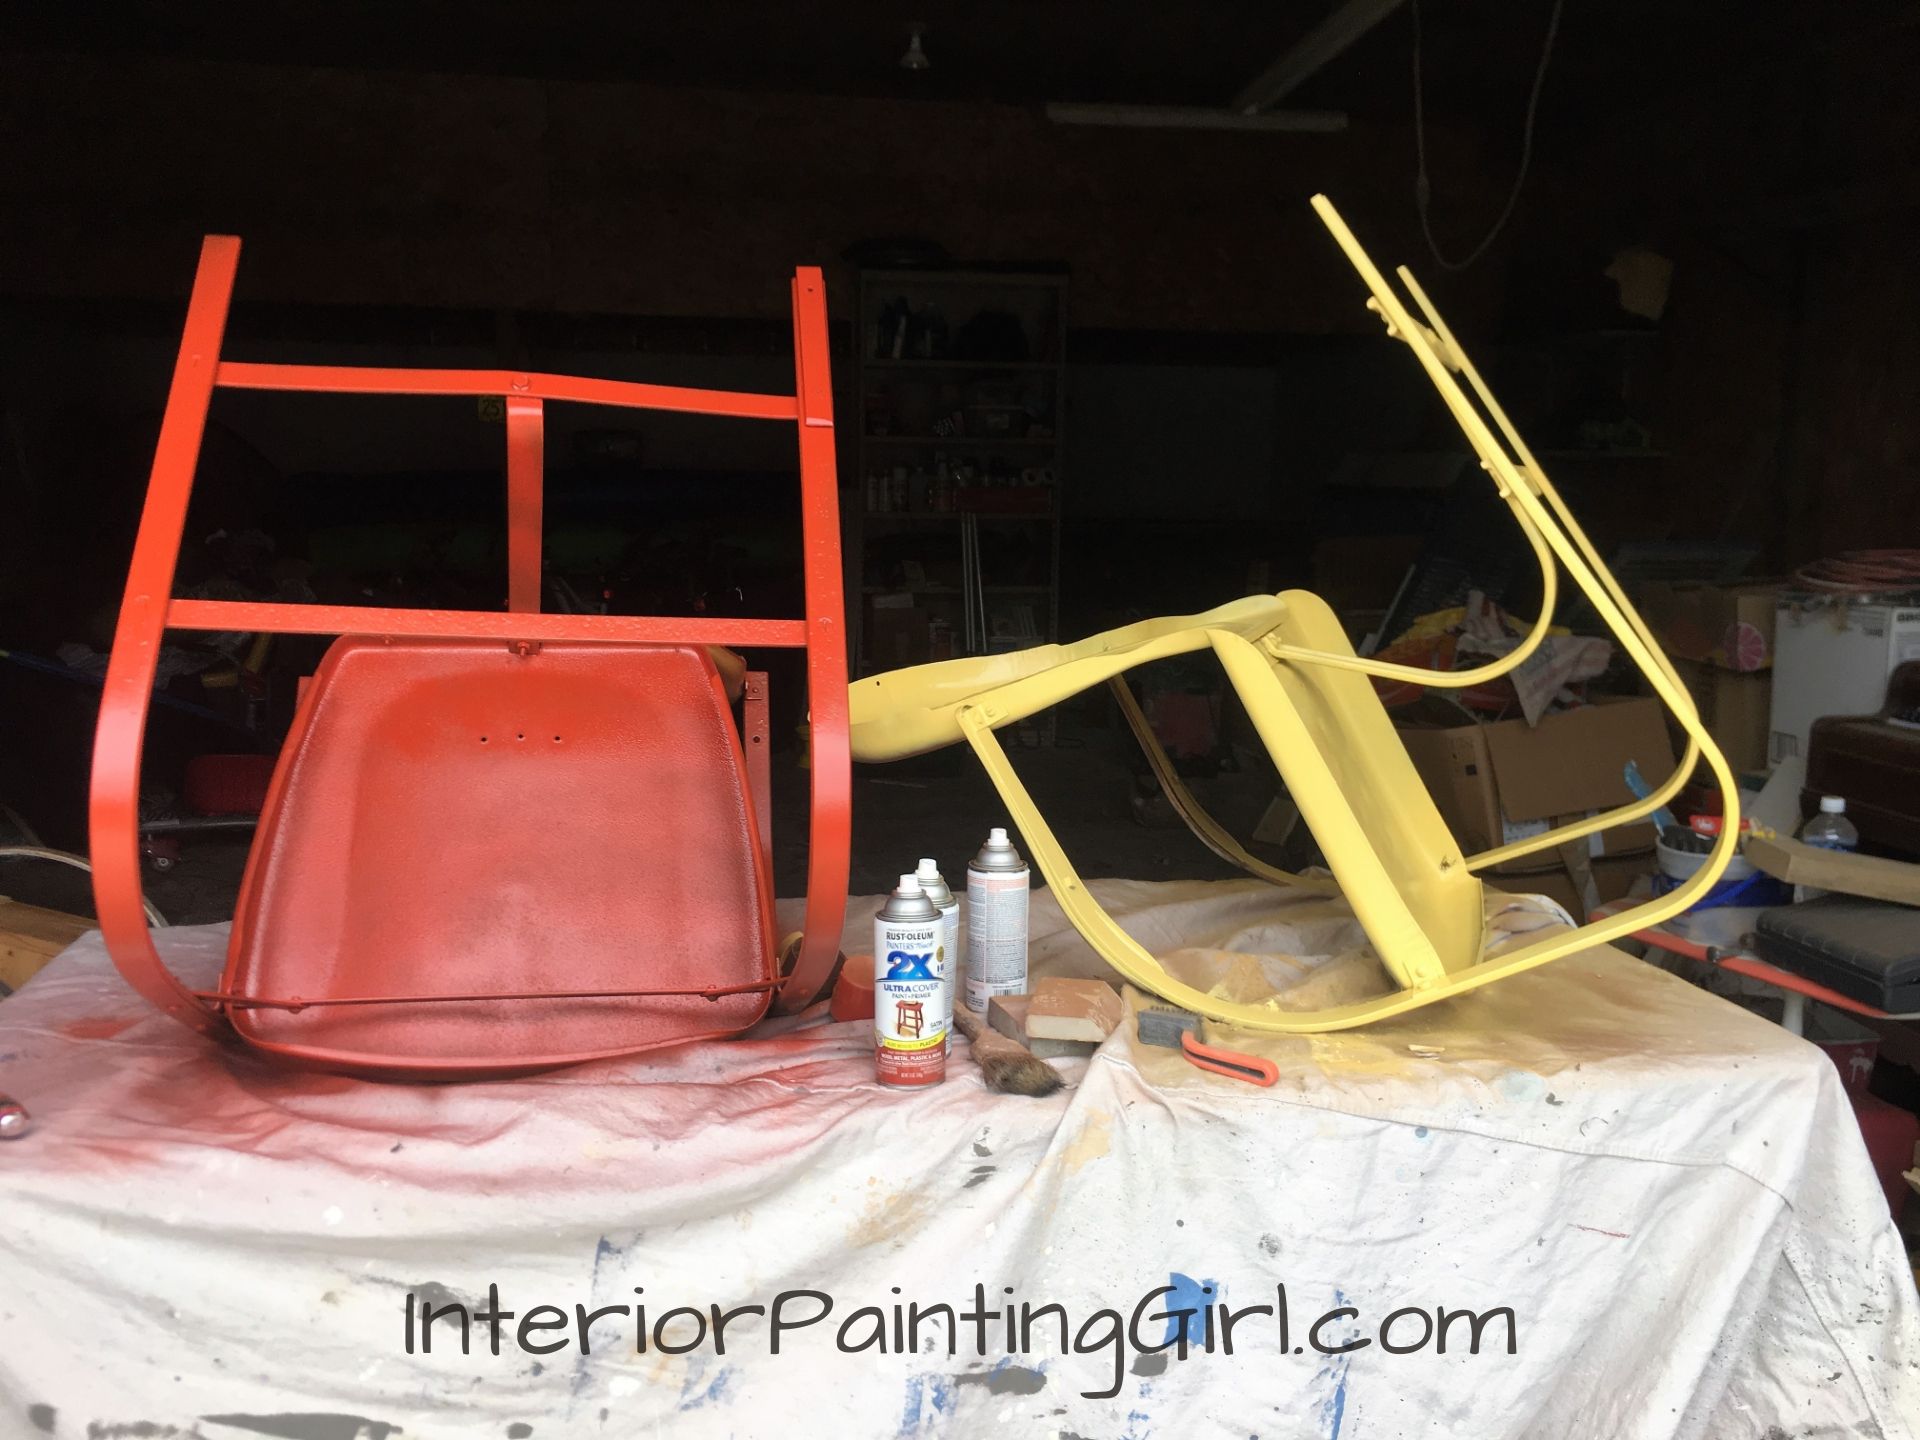
By this point your substrate should be as clean and smooth as possible. You’re ready to prime. I used a rusty metal primer that seals existing rust and stops new rust from forming. I started with the chairs upside down on a worktable covered with a drop cloth.
Shake can vigorously for several minutes before beginning. Starting on the underside will help you to establish your technique without being seen.
Once you start spraying, use a light sweeping pattern. Release your finger from the trigger before each swipe to minimize drips and runs. Keeping your finger on the trigger continuously releases too much paint at once.
You may apply several coats of primer with only a few minutes between coats.
Step 3 : Topcoat the Underside
Spray paint dries rapidly and you should be able to apply a topcoat fairly quickly. I did two chairs, both the primer and topcoat, within an hour. I’m experienced with spray paint and work quickly.
If you’re a beginner or unsure, take your time and work at a pace that suits you. This isn’t a race. The chairs have lasted 70+ years, what’s a few more days?
Continue until you’re happy with the evenness of the coverage. Let dry upside down for 48 hours before continuing onto the other side.
Please note: spray paint must be top-coated within the hour or AFTER 48 hours to prevent crackling. If you cannot perform all coats within this hour, you must wait 2 full days for a full cure to begin again
Step 4: Repeat Steps 2 & 3 on Top Side
Flip your chairs over and begin the spraying process all over again in the order of prime, paint, dry. You may at this point also apply a high gloss spray sealer if you want extra protection and a higher sheen. I’d let the chairs cure a few days before use, but other than that, this is all there is to refinish metal chairs of this type.
My chairs have now (literally) been resurrected from the ashes and are the star of the show. They’re looking hot and I’m now ready to seat my guests down with some sweet tea or lemonade and reminisce about the good ol’ days.

"I did not know how to paint or even what to paint, but I knew I had to begin." Margaret Atwood, Cat's Eye
Join my monthly email newsletter, "Dip & Swipe", for professional tips, how-to articles, color and decorating ideas, projects, and much more!
Recent Articles
-
Repurpose Old Windows
Dec 10, 21 06:32 PM
 Learn how to repurpose old windows by upcycling them into shabby chic decor.
 -
Upcycling a Toolbox
Dec 08, 21 10:22 PM
 In this craft painting project, I upcycle an old toolbox with fresh paint and an appliqué.
 -
Craft Painting Projects
Dec 08, 21 08:13 PM
 A place for all of my smaller craft painting projects and DIY projects that don't fit elsewhere.
Follow me on Pinterest @