Painting Interior Doors
Painting interior doors presents different challenges than painting walls, ceilings, or other surfaces.
Door aren’t stationary, frequently have decorative panels, and are often made of raw wood that can bleed tannins into your paint, causing discoloration.
All that said, painting interior doors is not difficult. It just requires a different approach (and a few different supplies) than traditional wall or ceiling painting.
Painting interior doors is one of those often-overlooked tasks that can really brighten up a room or space. Few things can make a room look as unfinished as a dingy, banged up door. Or a door that doesn’t match the rest of a room’s décor.

Leave it up or take it down?
The first thing you’ll need to determine is whether to paint the door in place, on its hinges, or to take the door down and place it on sawhorses.
Both options have their advantages. If you need to perform repairs before painting interior doors, it is probably easiest to take the door down and place it on sawhorses.
Painting interior doors in place saves time and physical effort. There is no need to remove hinge pins, manhandle a heavy door onto sawhorses, or clear a substantial amount of floorspace for the work.
If you work on the door in place you can paint both sides of the door easily, without waiting for one side to dry before flipping it over. (There are ways to avoid this while working on sawhorses as well, but they require a bit more work!)
Working on the door horizontally, on sawhorses, means you don’t have to tape off adjacent surfaces. It also means that you don’t have many concerns with paint runs or drips, and it may make it simpler to patch and make minor repairs to the door.
I tend to prefer to work on the door while it hangs, and my instructions will assume that you are working this way, though I will make notes as we go for those who would rather work on the door on sawhorses.
Painting Interior Doors Supply List
- Water-Based Primer
- Satin or Semi-Gloss Door/Trim Paint
- 2” Sash Brush
- Mini-roller with foam or fiber
- Roller Tray
- All Purpose Sanding Sponge (120 & 220 grit non-clogging)
- Sanding Block (120 & 220 grit non-clogging)
- Painter’s Tape
- Paint Scraper
- Paint Can Opener
- Spackle
NOTE: If your house was built prior to 1978, some of your surfaces may have lead-based paints. Lead-based paints can pose a serious health hazard if disturbed. If you suspect you may have lead-based paint you can buy easy DIY kits to determine if your paint is lead-based.
Choose a Paint Finish
As suggested by the supply list above, I suggest a satin or semi-gloss paint when painting interior doors.
Higher gloss paints dry to a harder finish and are easily wipeable, but they also highlight any imperfections in the surface of your door. If your door is new or otherwise in very good shape – without irregularities, dents, nicks, etc… - I suggest a semi-gloss paint. This will be durable and easy to clean.
Satin is a slightly lower-gloss sheen yet still remains a wipeable surface, but has a low enough reflectivity to help hide minor imperfections in the surface.

Remove all hardware
You’ll want to remove all doorknobs, deadbolts, and latches that are currently on the door. Label them and store them together (with all original fasteners).
If you are working on the door in place, tape off the hinges to protect them from being painted.
Tape off any adjacent surfaces that you to not want paint on, especially any trim next to the door hinge that could be inadvertently touched while painting the door.
Clean the Surface
Before you start painting interior doors, it’s essential that your door is clean of all dust, oils, pet hair, and grime.
Any light soap and water mixture will work, though I’ve found at a solution of TSP (Tri-Sodium Phosphate, a common cleaner) and water works excellently. TSP can be purchased in a dry powder that you mix into water.
Get into all the edges and crevices of your door, using a brush or scratch-pad as needed to ensure all buildup is removed.
Be certain when you are done cleaning to wipe the door a final time with a clean cloth to remove any soap or cleaner residue.
Note: If there are any known issues with the door itself, this is the time to deal with them. Does the door drag against the floor or catch on the doorframe?
There is no better time than BEFORE the door is painted to address those issues. An extra layer or two of paint will only make the problem worse. Make note of the areas that need attention and trim/sand as needed to ensure the right fit. If necessary, take the door down from the frame and work on it.
Scrape Away Old Paint Drips
Assuming your door has been previously painted or stained, examine the door with a light angled across it. Look for old paint drips and scrape these away with a paint scraper or putty knife.
Even if these weren’t noticeable previously, a new layer or sheen of paint could highlight them.
Patch Your Door
These preparation steps can feel tedious, but they are critical if you want a quality end result!
Using that same light source angled across the surface, identify nicks, dents, gouges, chips, or other damage to the surface of your door.
Fill in damaged areas with lightweight spackle (or wood filler if the damage is deep or substantial). Apply spackle by dipping it on the end of a putty knife and pressing it into the nick or dent, then swiping the putty knife level across the surface of the door to level the repair.
If your damage is significant, you should allow the spackling to dry and reapply, since spackle will shrink slightly as it dries.

Pre-sanding
Your next step when painting interior doors is to lightly sand the entire door with 120 grit sandpaper. This has several purposes.
It will level and smooth out any areas that you patched with spackle or wood filler. It will also eliminate any unseen or unnoticed imperfections or paint drips in the surface.
Finally, and most importantly, it will give your primer “grip” and allow it to fully adhere to the previously painted surface.
Ensure any patched areas have been sanded smooth.
I recommend using both a sanding block (which allows you to sand flat areas with ease) and a sanding sponge, which allows you to dip into the creases of door panels. If you are painting a flat door without inset panels, a sanding block alone will be sufficient.
Prime Coat
Once your initial sanding is complete, wipe down the entire door with a tack cloth to remove residual dust before you begin to prime.
Select a good quality water-based primer such as Zinsser Bull’s-Eye 1-2-3 or Kilz 2 All-Purpose. If you are painting the door a darker color – such as navy or red – you should ask at the paint store for the primer to be tinted gray. A gray base primer will help a darker-toned paint cover in fewer coats.
You want the primer to dry as slowly as possible. This will help the primer to “self-level” as it dries, rather than leaving brush marks or ridges. One way to help this is to turn your thermostat down several degrees before priming.
Start by cutting in with your paint brush along the edges and into any grooves in the paneling. Move directly into applying to the rest of the surfaces with a fiber or foam mini-roller. Fiber usually works best for applying a thicker coat of primer.
Once you’ve started, don’t stop until at least one entire side of the door has been primed. If the primer is allowed to dry between cutting in and rolling out there will be a ridge of thicker primer where the two meet that will need to be sanded down.

Painting Interior Doors - First Coat
After priming, allow at least forty-five minutes (and preferably one hour plus) for primer to dry. If you see any drips or ridges in the prime coat where overlap has occurred some spot sanding with fine 220-grit sandpaper will help even these out.
Begin by using your brush to apply paint into any recessed areas of the panels and around any hinges. Try to paint in a single direction and finish off with long, continuous brush strokes. Short brush strokes in multiple directions are far more likely to leave brush marks.
I recommend using a foam roller for rolling out the paint on the door. Foam rollers hold less paint (less likely to drip) but also apply a smoother finish.
Roll paint onto the flat areas of the panels, between panels, and along the outer edges of the door. As with the brush, apply paint in long continuous sweeps. Avoid applying too much pressure on the foam roller which could cause drips or ridging.
Avoid painting the top and bottom edges of the door. I’m referring to the narrow parts that typically cannot be seen. This allows the door to “breathe”, expanding and contracting with temperature and humidity.
Again, once you start painting, do not stop. You cut in your recessed areas and roll out your entire surface in one go, without stopping for lunch or to walk the dog. This allows the paint to all dry together and “level” itself as it dries, helping to eliminate minor brush and roller marks.
Sand Between Coats
Most doors will require two coats of paint.
That means you need to allow 4-6 hours for your first coat to dry (preferably overnight). Then you need to give your door a light sanding between coats.
You want your surface for this final coat to be as smooth and pristine as possible. And since you are using a paint with some surface gloss – especially if you are using a semi-gloss or higher-gloss paint – this sanding is critical to ensure you give your surface enough “tooth” for the final coat to adhere.
A light all-over sanding with 220-grit sandpaper and a wipe down with a damp tack cloth to remove dust will have you ready for your final coat.

Painting Interior Doors - Final Coat
Apply the final coat in the same way as your initial coat, starting with the recessed areas and then rolling out the flat areas. As before, continue to work until the entire surface is complete. Long, smooth strokes of the brush and roller in a single direction will help ensure your paint levels.
Sealant?
If desired, a clear polycrylic topcoat can be applied to the painted door, providing additional protection and durability. This topcoat would be applied in the same way as a paint, only it will dry clear. Most polycrylics will leave the surface a bit glossier than just a painted surface.
Curing
After painting interior doors, it is critical that you allow the proper amount of time for the paint to cure prior to closing the door. Closing the door before the paint has cured can damage the paint and cause transfer of the paint to other surfaces.
Latex paints dry in 1-4 hours, but take up to 30 days to fully “cure”, or reach their full hardness.
A good rule of thumb is not to close a freshly painted door for 5-7 days after painting. This should give the paint ample time to cure so it does not damage the finish or transfer to another surface.
Painting interior doors is not difficult, but a quality finish takes some time and attention to detail. The sanding and preparation steps are critical. As is your commitment to complete your door once your begin to paint without a break.
Feel free to check out our other Interior Painting Guides for more step-by-step instructions on painting everything from drywall to ceilings to trim!

"I did not know how to paint or even what to paint, but I knew I had to begin." Margaret Atwood, Cat's Eye
Join my monthly email newsletter, "Dip & Swipe", for professional tips, how-to articles, color and decorating ideas, projects, and much more!
Recent Articles
-
Repurpose Old Windows
Dec 10, 21 06:32 PM
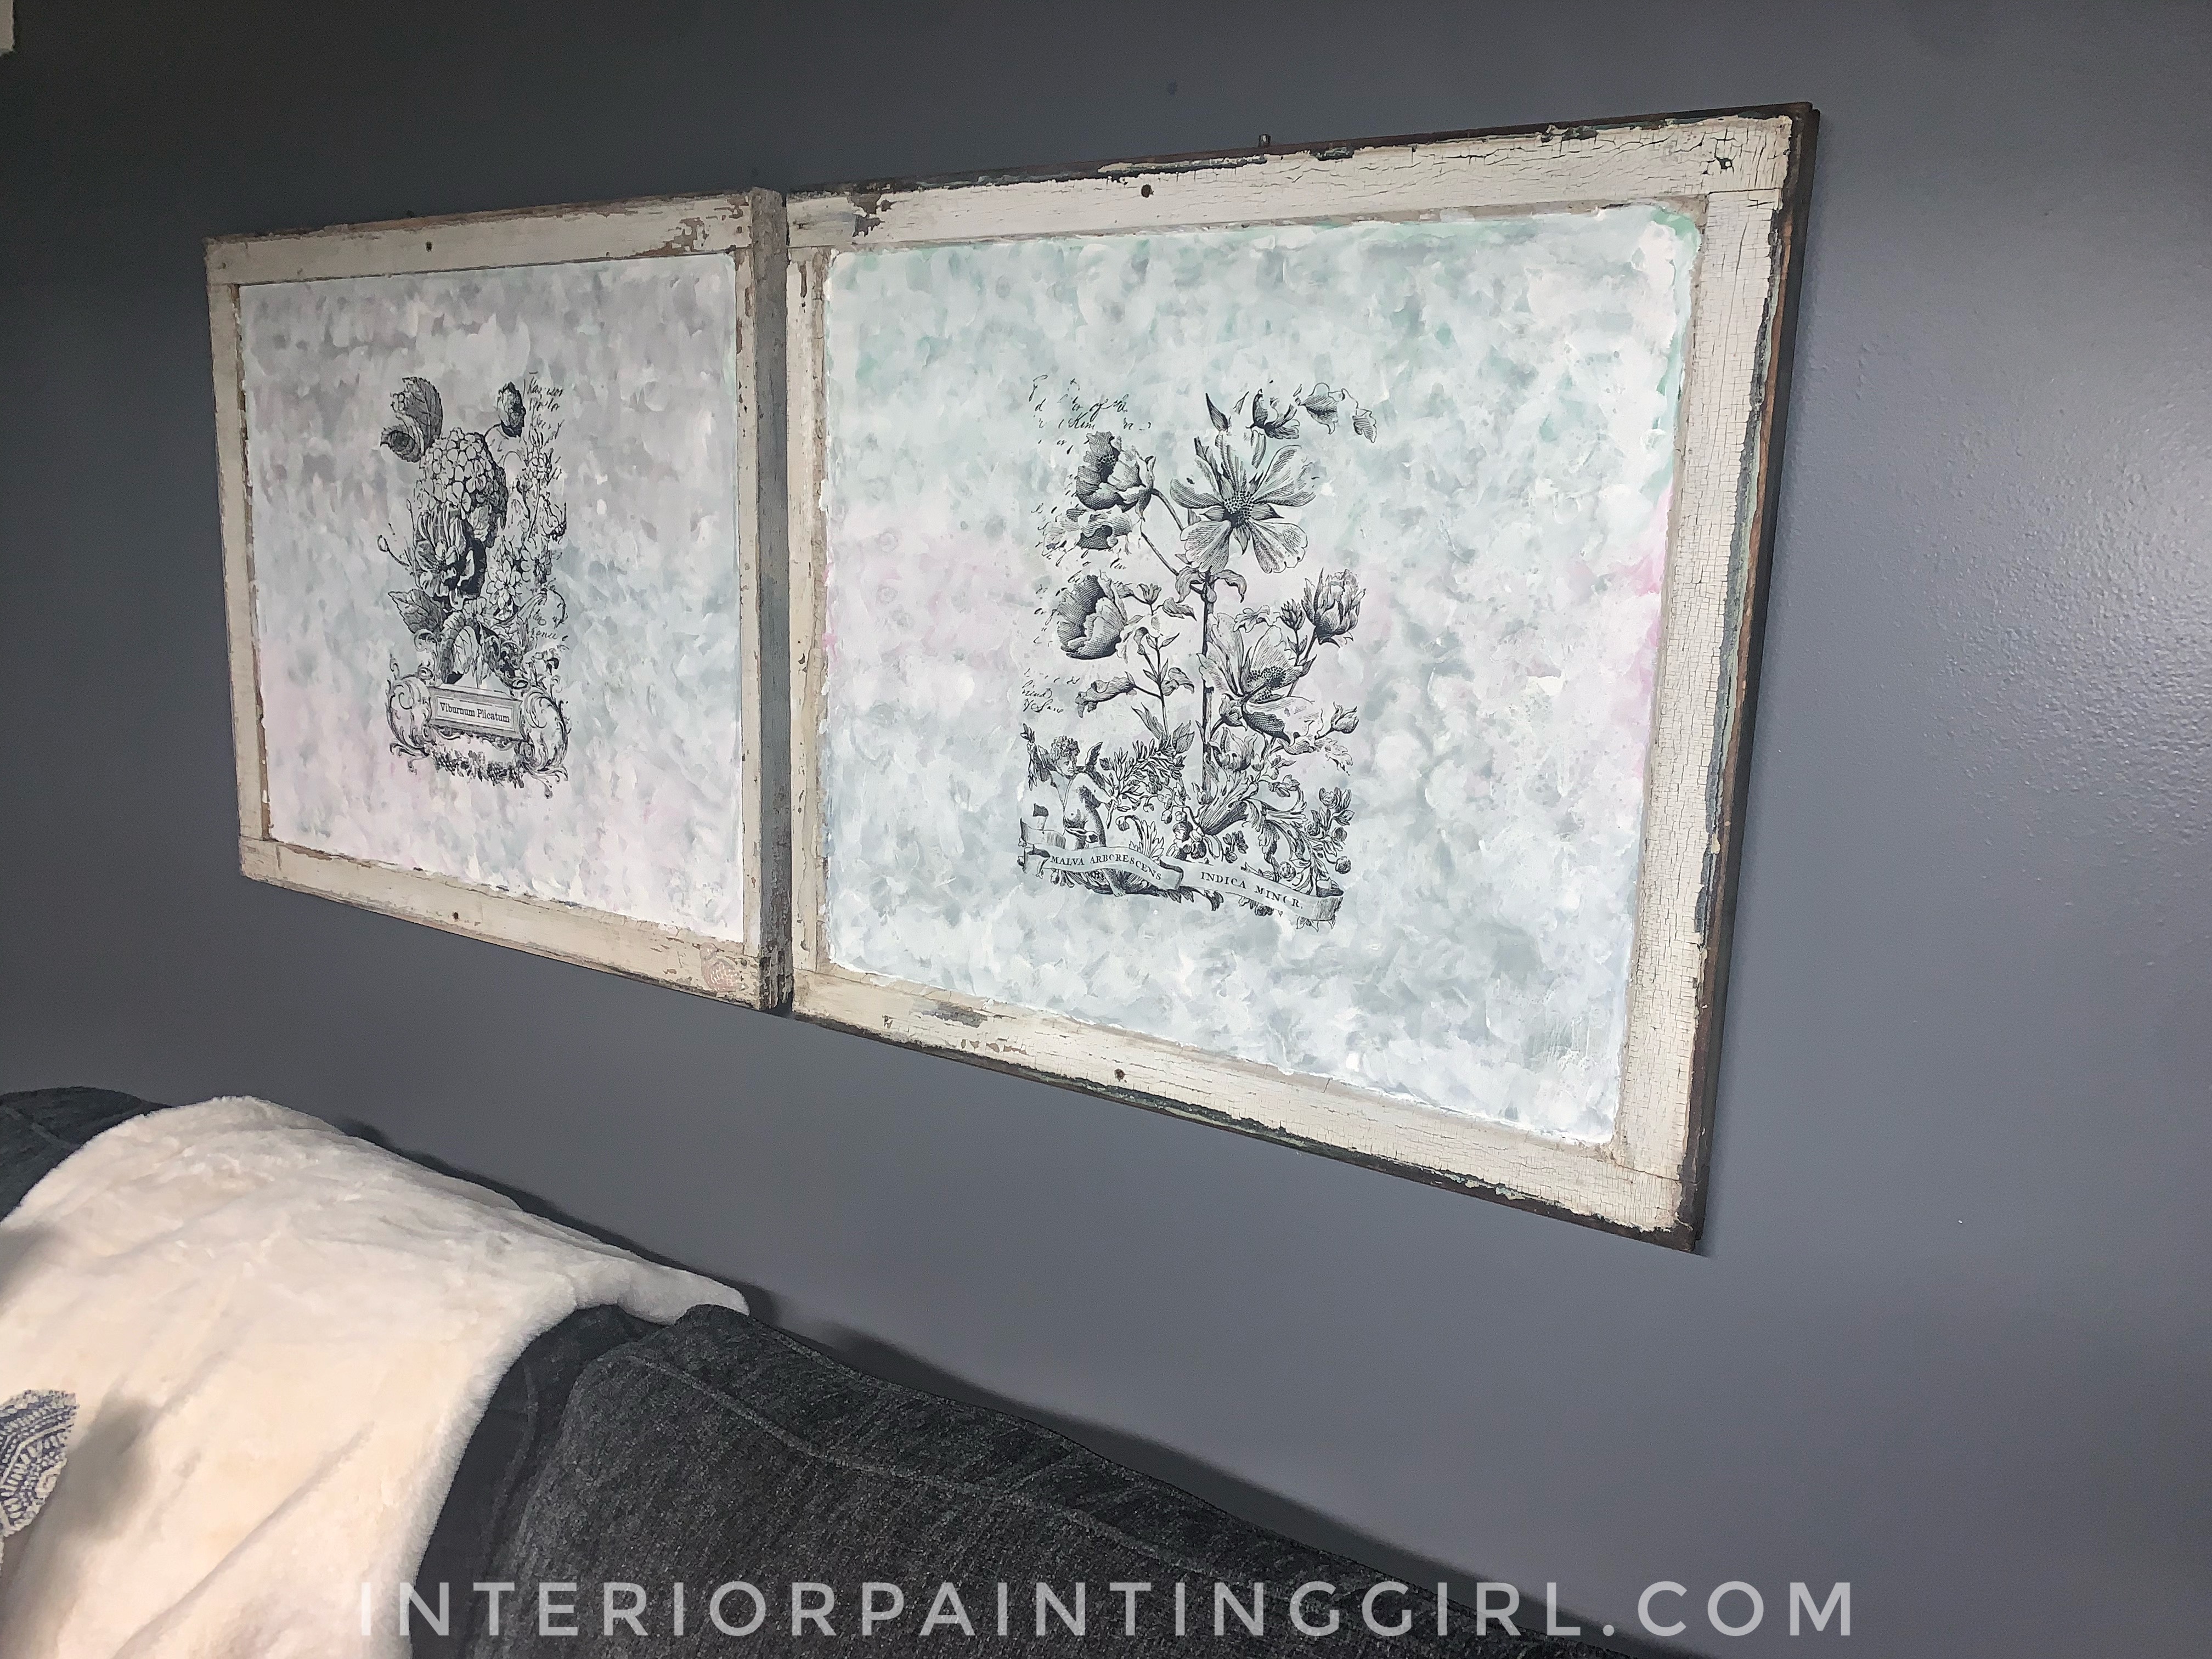 Learn how to repurpose old windows by upcycling them into shabby chic decor.
 -
Upcycling a Toolbox
Dec 08, 21 10:22 PM
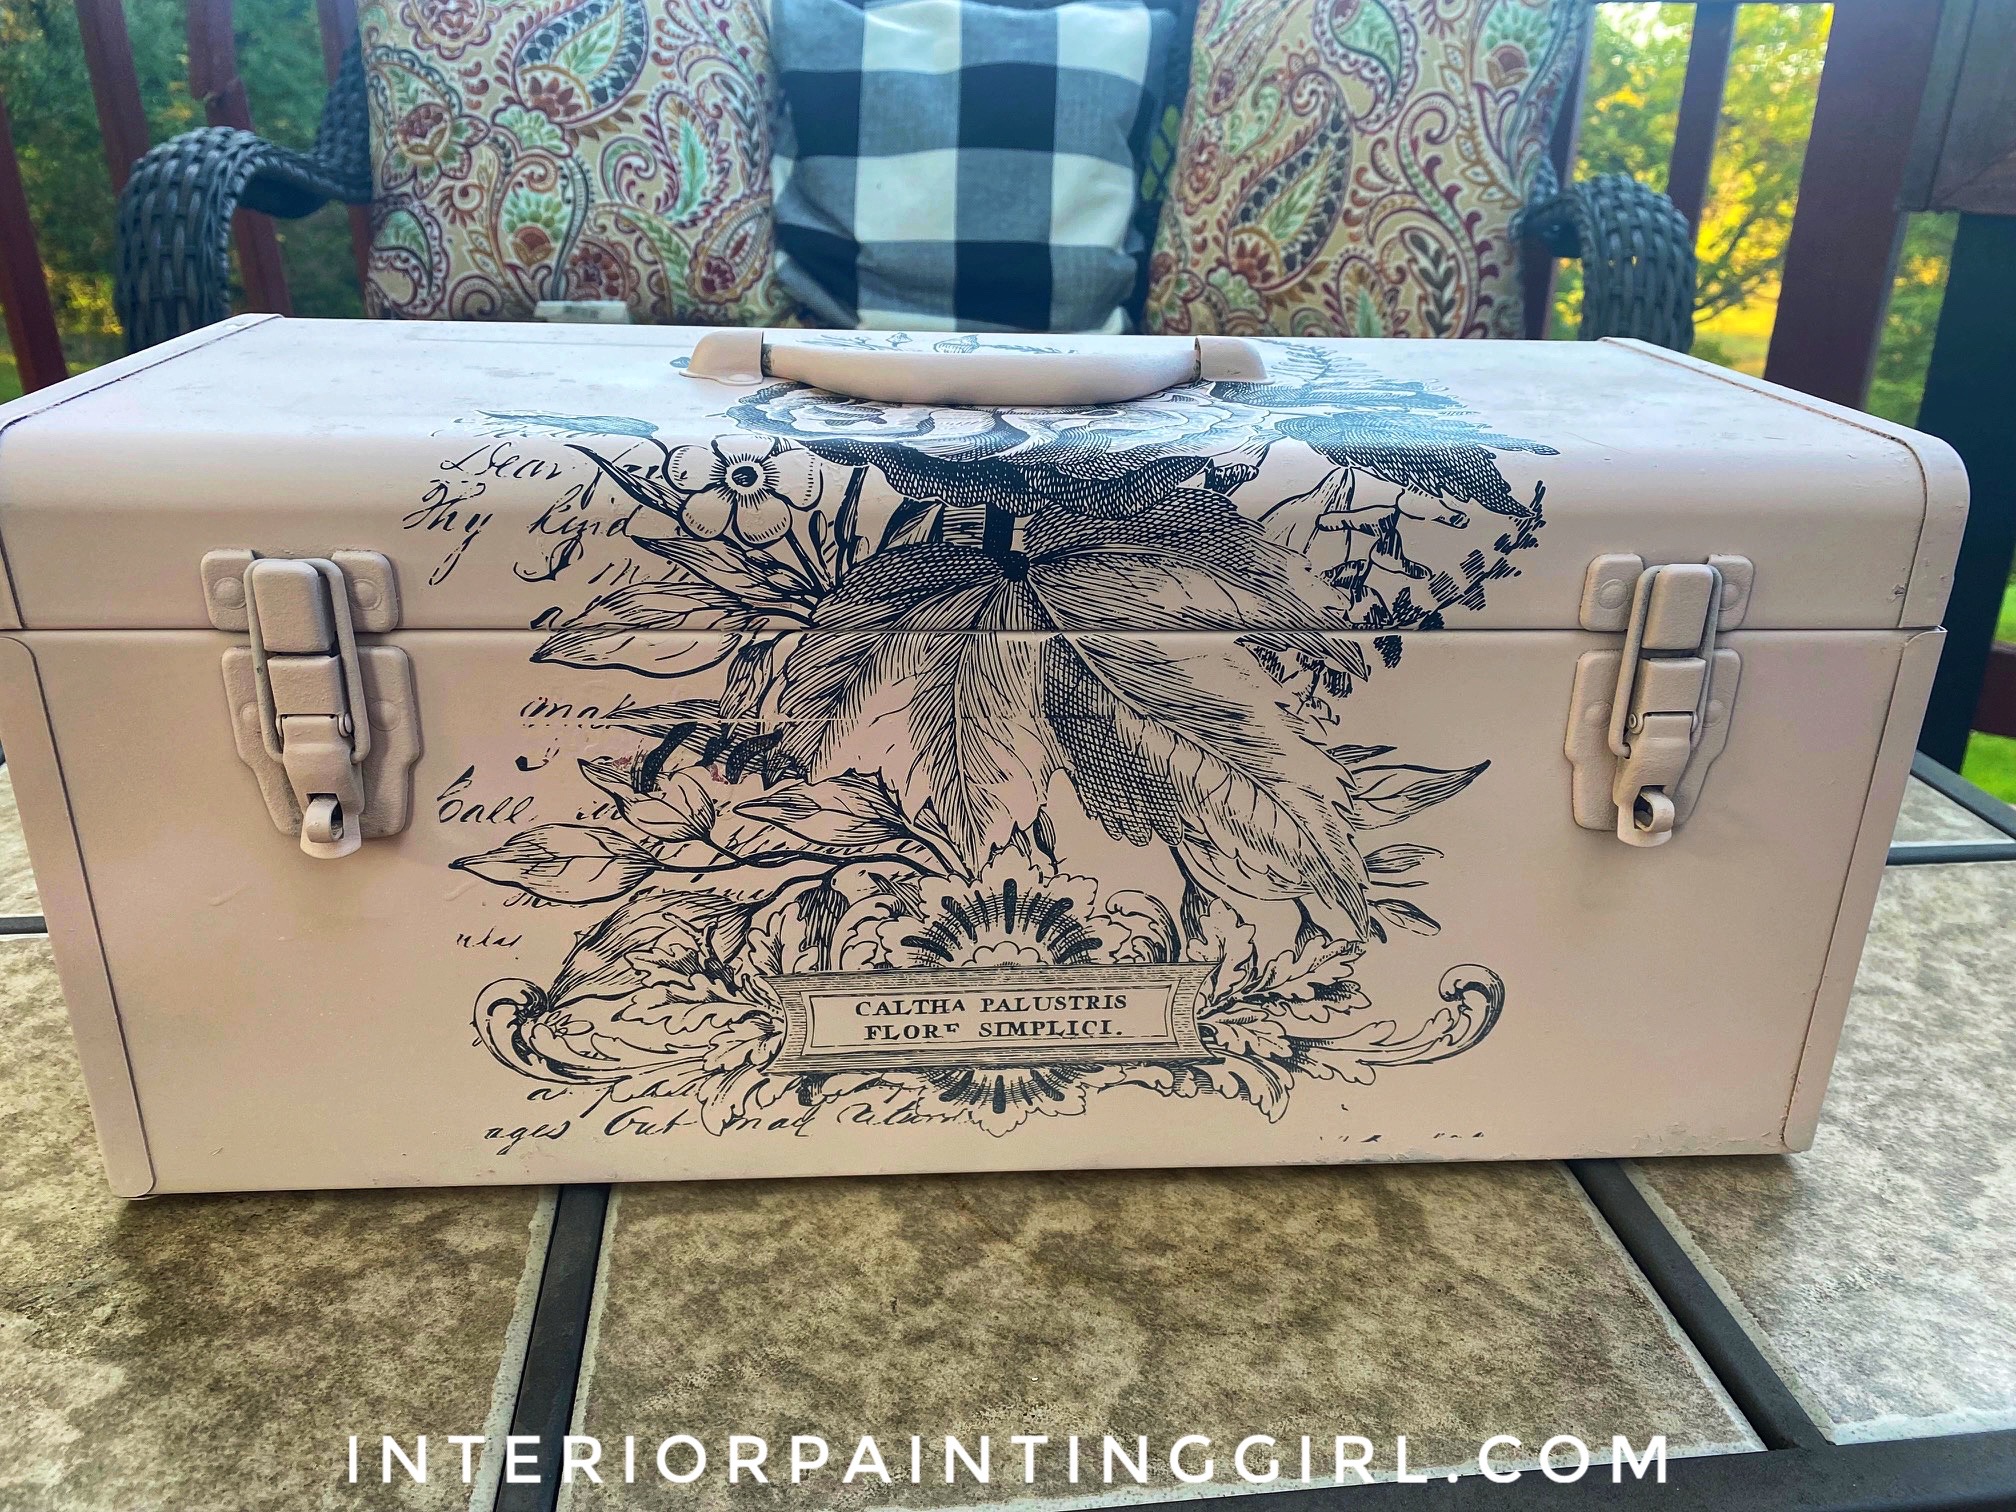 In this craft painting project, I upcycle an old toolbox with fresh paint and an appliqué.
 -
Craft Painting Projects
Dec 08, 21 08:13 PM
 A place for all of my smaller craft painting projects and DIY projects that don't fit elsewhere.
Follow me on Pinterest @