How to Paint a Ceiling
One of the most common requests I get from clients is to paint a ceiling. Homeowners are often intimidated by the prospect of working overhead, and sometimes by the various textured or “popcorn” finishes used on ceilings.
First, don’t be intimidated. Follow these steps to paint a ceiling and it will take some of the effort and guesswork out of the project.
Professional Quick Start Tips:
- Use quality flat ceiling paint to eliminate roller marks and multiple coats
- Paint the ceiling first
- Roll in the direction of natural light source in the room
- Use a ½” nap roller cover. It holds more paint and requires less dipping to keep a wet edge.
- Save your body! Use a paint extension pole
- Cover everything! Paint will splatter
- If you’re painting popcorn ceilings, you should seal with a product called Zinsser Gardz. It will keep your popcorn from falling off. The water in paint soaks and loosens the popcorn.
Painting a ceiling does have challenges that walls do not.
For starters, you are not working on a vertical plane. You are working horizontally, and almost directly overhead. This can be (no pun intended) a pain in the neck.
Secondly, ceilings are sometimes not smooth finished. They are given a sprayed-on textured or popcorn finish that is “low effort” during the building stage. See below for some specific tips on how to deal with painting this type of ceiling.
If you intend to paint an entire room (ceiling and walls), paint the ceiling first. Then you can avoid the “wall draping” part of step two, a laborious process to protect your walls from splattering paint.
Supply List
Paint Supplies:
- Flat Finish Ceiling Paint
- Water-Base Primer (or oil-base under special circumstances, see the “Paint A Ceiling” section below)
Painting Tools:
- 1/2” Nap Roller Cover
- Roller Frame
- 2” Angled Nylon/Poly Brush
- Extension Pole for Roller Frame
- 2” Delicate Painter’s Tape
- A roll of painter’s plastic
Step 1: Preparation
Since most ceilings are already painted with flat paint and do not have the general bumps and stains that walls tend to accumulate, it is usually a fairly simple job to prepare to paint a ceiling.
There are occasions, however, when there may be small screw or nail holes, hairline cracks, or serious stains (smokers, oily kitchens) that require some preparation.
Regardless of the condition of your ceiling, it will need to be cleaned to remove dust, cobwebs, or general stains that accumulate on ceilings.
If you have popcorn or textured ceilings, do not use water or a mop to clean. Dry clean the surface with a broom to remove dust and cobwebs. These surfaces are often not sealed or previously painted and utilizing water or a mop will cause it to break apart.
If your ceiling only requires minor cleaning (as most ceilings do), a light mixture of dish soap and water, applied with a sponge-headed mop, will do the trick. Allow to dry.
If you have any moldy areas, usually found in bathrooms or kitchens, you’ll need to use a bleach cleaner to kill the mold before application of paint.
Those with more stubborn stains or very oily surfaces may need to try a hardier solution of TSP (tri-sodium phosphate, widely available) and water to prepare the surface for painting.
Patch any small nail holes, screw holes, or small hairline cracks with lightweight spackle. Let dry and sand flush.
Step Two: Protect the Walls
To paint a ceiling, cover everything in the room that you do not want paint splattered on! Painting a ceiling throws specks of paint everywhere.
One of my top interior painting tips is to clear the room of anything that can be removed. Cover everything that can't be removed with painter’s plastic or heavy drop cloths – furnishings, décor, floors. This includes the walls, unless you intend to paint them directly afterwards.
The process of covering walls with plastic is called draping. It is a fairly simple process, but time consuming.
Begin by “taping off” the areas where your walls and ceiling meet, but don’t press the bottom part of the tape against the wall. Using painter’s plastic, press the top edge of the plastic to the underside of the tape, allowing the plastic to “drape” down the walls beneath the tape. Delicate painter’s tape is less tacky and a better fit for using on previously painted surfaces.
This will protect your walls from getting speckled with ceiling paint.
Go back and ensure that you press the tape firmly into place all along the top edge, otherwise paint may bleed beneath the surface onto your walls.
Step 3: Paint a Ceiling
If your ceiling is new, unfinished, it will need to be primed entirely before beginning to paint.
Also, if the paint already on your ceiling has a glossy paint finish (does it “shine” when light hits it?) it will need to be primed so your new paint finish will adhere.
A standard water-base primer (such as Zinsser
1-2-3 or Kilz) is fine for those scenarios, but you’ll need to use an oil base
primer if there are any spots or stains from fire or, more commonly, water
damage.
A flat finish ceiling paint is the preferred product. Each major manufacturer has a variety of ceiling paint (some have several grades). Select a quality brand name paint like Sherwin Williams or Benjamin Moore.
Besides their flat finish, ceiling paints are often thicker than standard wall paint to help reduce the splatter of working overhead.
Little attention is paid to ceilings during construction and they have imperfections and seams that a glossier paint will draw attention to. Flat paint will help hide any imperfections left by your roller.
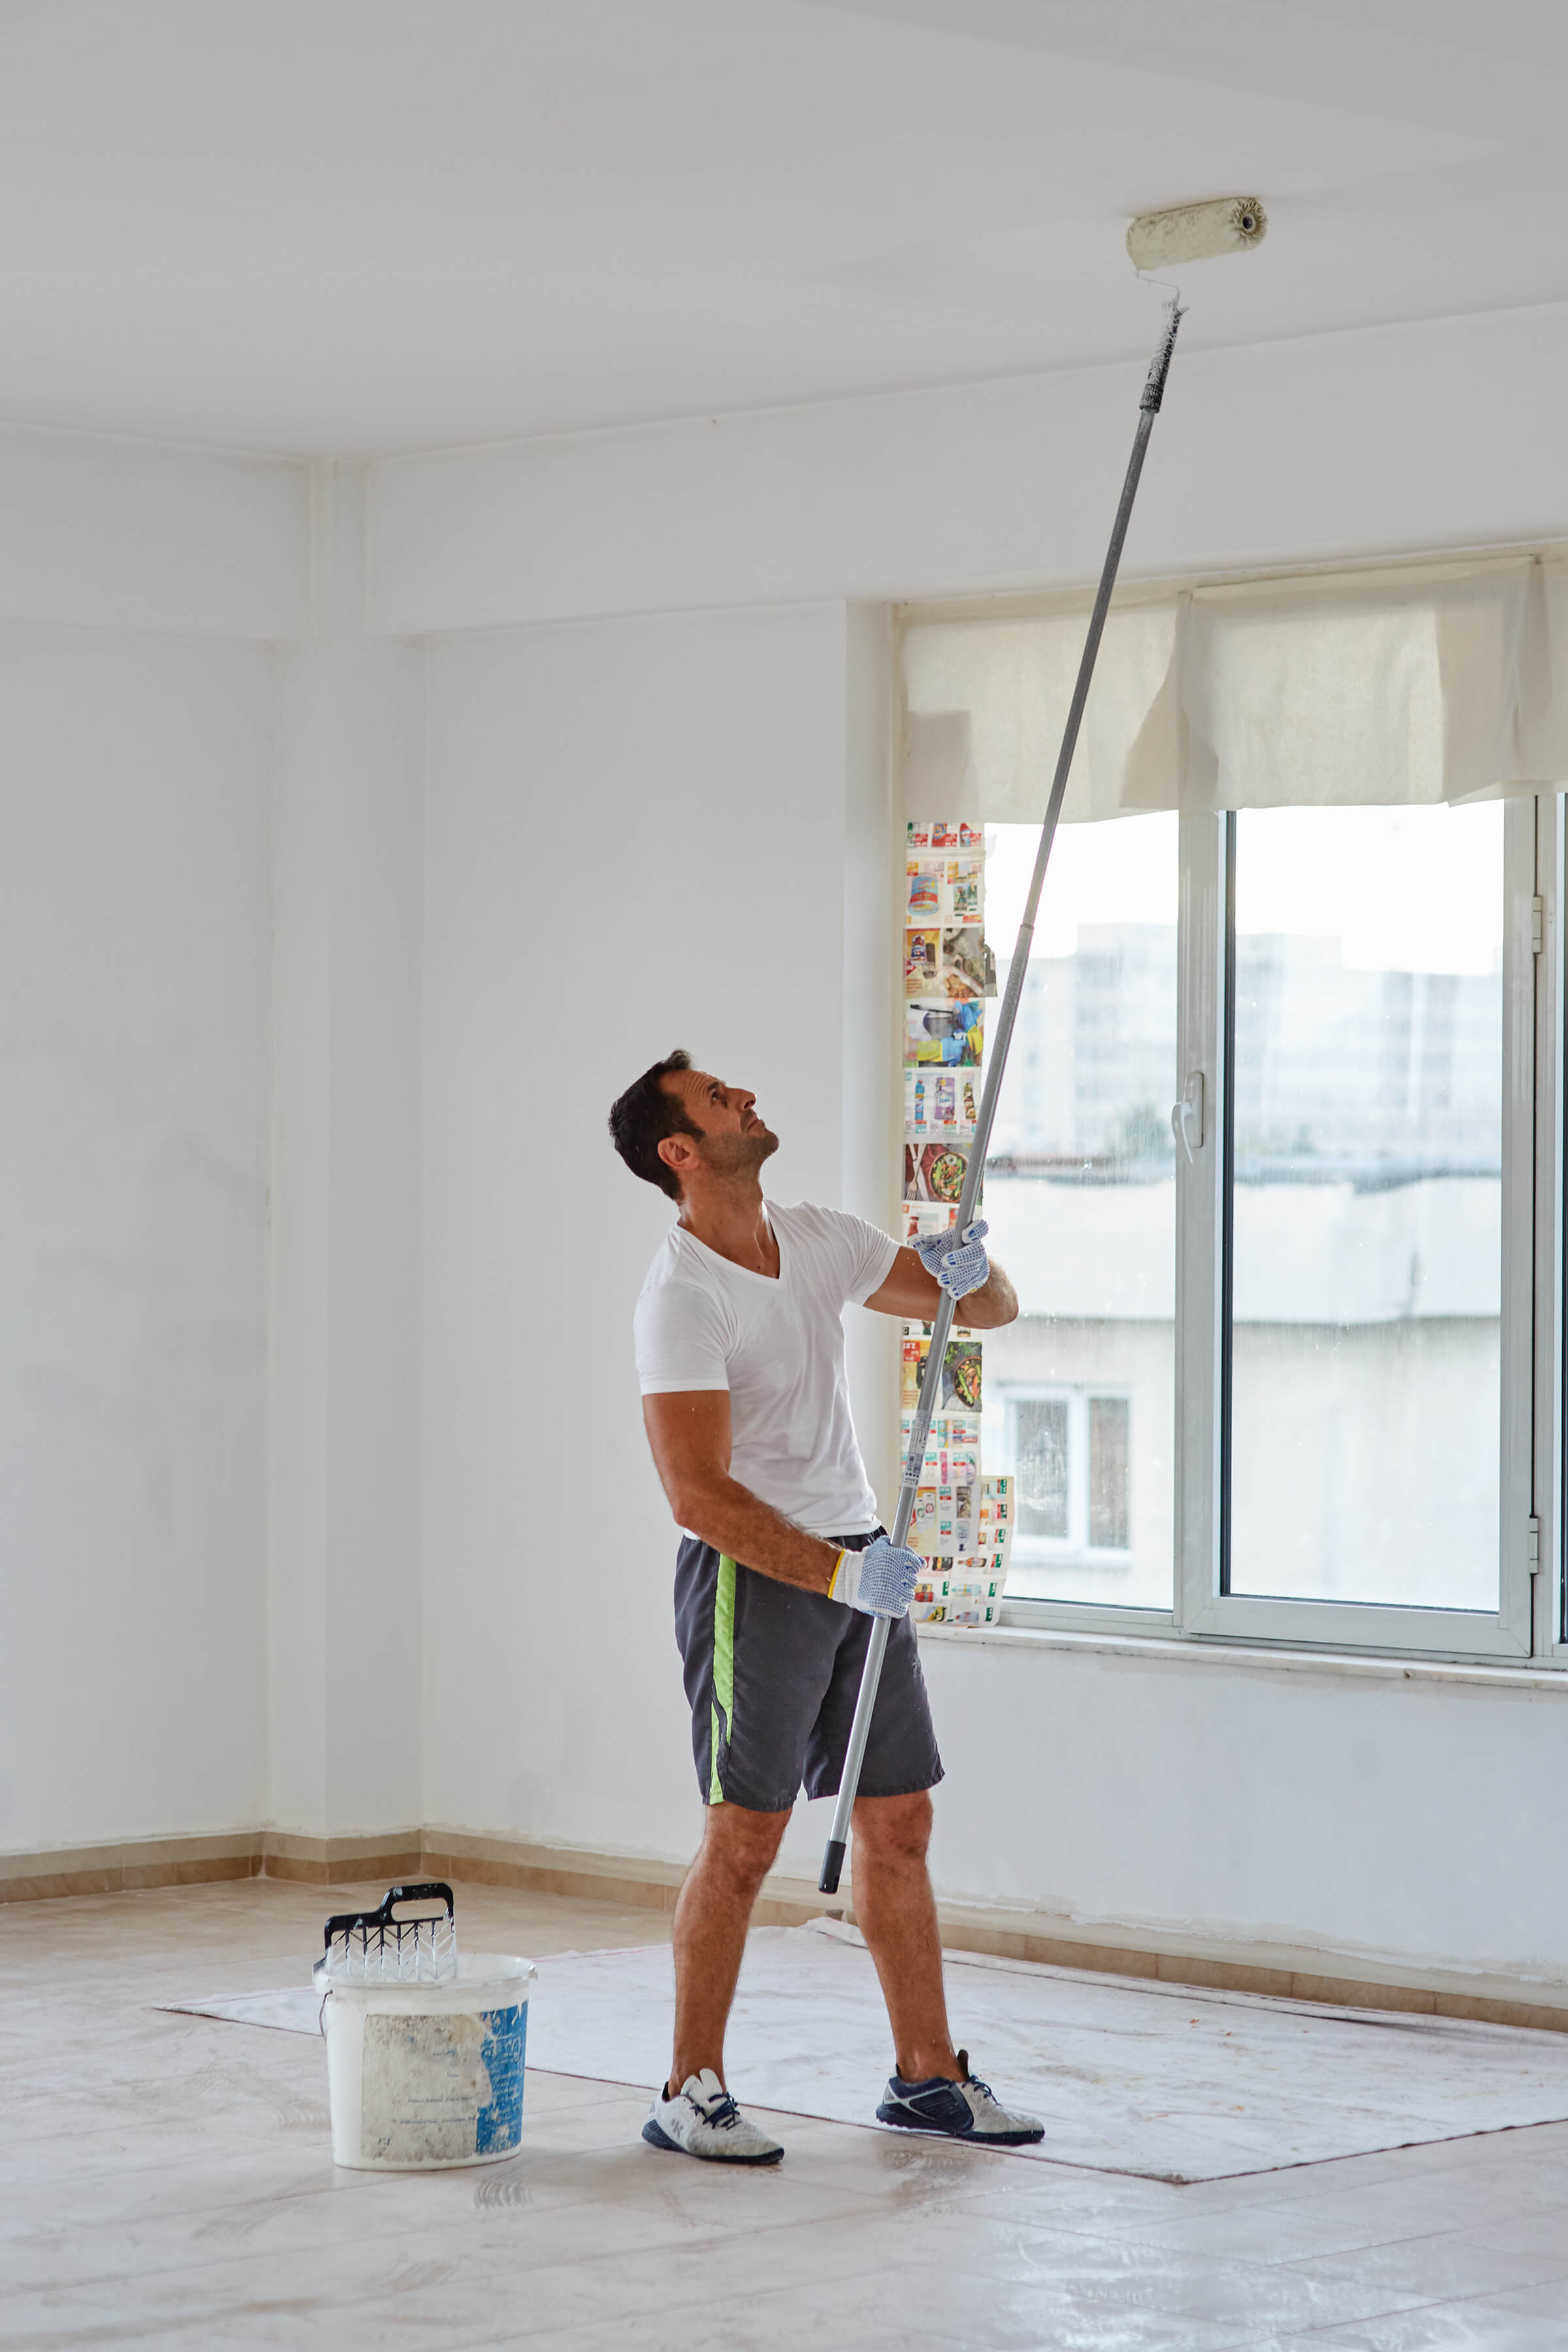
If you are going to paint a ceiling, invest in a paint extension pole for your roller! This is key. A extension pole will eliminate the need to climb up and down ladders all day. It will also allow your body to work within its “comfort zone”, at chest height and close to the body, rather than fully extended with arms overhead.
I know this seems a simple suggestion, but I’ve seen too many people try to paint ceilings with a plain old roller and ladder. Spend $20 on an extension pole and save hundreds on trips to the chiropractor.
Begin by cutting in with your paint brush along the edge of the ceiling. You should cut in about the width of your brush – 2” or so from the taped edge where the ceiling meets the wall.
You won’t be able to roll right up to the edge of the surface, so the brush will allow you to get right up to the angle of the wall.
Cut in all the way along one wall and 4-5 feet in on the adjoining walls, then immediately begin rolling paint in the same direction as your completed cut in.
Cut in only one section at a time with the brush as you go. Don’t cut in the entire room all at once, cut in only what you can blend with your rolled sections while it is still wet.
One key to great-looking paint job is to maintain a wet edge as you paint. This ensures that your paint blends together and dries smooth and level rather than in ridges where paint overlaps.
Work in only one direction when painting ceilings. Find the biggest source of natural light in the room and roll in the direction of the light rays. This will ensure any roller marks work with your light source.
Where natural light is not a concern, choose the shortest part of the room (for example, in a 12’x8’ room, the 8’ run) and roll the paint straight across, from one wall to the other.
Once you have painted a four- or five-foot-wide section, go back and “finish off” what you have already painted while the paint is still wet.
To “finish off” a section, you simply take the roller back over top of what you have already painted, from one wall to the other in a continuous stroke. Use very little pressure…you’re not attempting to apply paint, only to level out any lines or ridges left by the edges of the roller.
Lastly, keep moving to maintain the wet edge. Roll the paint on, “finish off” each section, then move on to your next section, all while the paint is still wet.
Allow the first coat several hours – or better yet, overnight – to dry.
If necessary, apply a second coat. Don’t be discouraged if you need multiple coats of ceiling paint. Standard ceiling white has minimal pigmentation and sometimes will require more than a single coat.
Step 4: Remove the Tape
When you are finished painting, remove the tape along the adjoining walls and trim work by gently running a utility knife or a razor blade along the top edge where the tape and paint meet to separate the paint and tape, then pull the tape off very slowly.
See my separate paint clean up tips for some easy clean-up instructions. With proper care, nearly all of your painting supplies can be reused again and again!
It is worth the time and effort to paint a ceiling. It is a great way to revitalize a drab, lightless space.
You will be amazed how much livelier a space appears by painting a ceiling with a fresh, bright coat of white or cream. It is also a great place to add color without “suffocating” the room in color.

"I did not know how to paint or even what to paint, but I knew I had to begin." Margaret Atwood, Cat's Eye
Join my monthly email newsletter, "Dip & Swipe", for professional tips, how-to articles, color and decorating ideas, projects, and much more!
Recent Articles
-
Repurpose Old Windows
Dec 10, 21 06:32 PM
 Learn how to repurpose old windows by upcycling them into shabby chic decor.
 -
Upcycling a Toolbox
Dec 08, 21 10:22 PM
 In this craft painting project, I upcycle an old toolbox with fresh paint and an appliqué.
 -
Craft Painting Projects
Dec 08, 21 08:13 PM
 A place for all of my smaller craft painting projects and DIY projects that don't fit elsewhere.
Follow me on Pinterest @