10 Common Interior Painting Mistakes
Interior painting mistakes happen to ALL of us! Experience and practice are our best teachers. I’ve been painting for more than 20 years and I still encounter things I’ve never seen before.
If there’s one thing I can offer you, it’s my mistakes, as well as those I’ve seen made time and time again by homeowners.
Probably a quarter of a painting contractor’s business comes from homeowners who’ve attempted to do it themselves but made one of the interior painting mistakes listed below.

Top Ten Interior Painting Mistakes
#1 : Letting the Pets In
This is one of those interior painting mistakes that always gets a laugh, but it’s common enough to be no laughing matter!
We all love our pets, and they’re used to having the run of the space, but only toddlers and men are more destructive to interior painting projects. Kidding! Only kidding!
Kind of.
I’ve had my share of run-ins with affectionate and rambunctious pets. They’ll tiptoe through your paint tray or thump tails excitedly against wet painted walls. I once had a cat attack the handle of my paint roller as it was resting in the tray, sending a shower of paint onto a lace curtain.
They are best contained in some other part of the house for the day or allowed to frolic out in the sun and wind while the project is underway.
And just remember to take them entirely out! Both their physical selves and the remnants they (and their human owners) leave behind. Hair, dander, and dust left on the floor can easily become airborne if a fan or furnace kicks on, or just through the traffic and activity of the job.
Once disturbed, that material can become fossilized and evident within your paint. So be sure to clean your room thoroughly of hair, dust, and grime before painting.
#2 : Using the Wrong Tape
One of the most common interior painting mistakes I see is using the wrong type tape for the project. There are different tack levels made for different jobs. The most common offense is using a tape that’s too tacky, or adhesive, on newly painted surfaces.
Never use a variety of tape other than genuine Painter’s Tape (3M and Frog Tape are two common brands). Not standard masking tape, shipping tape, electrical tape, and absolutely never duct tape!
There are also several varieties of Painter’s Tape available, from standard to delicate. If you’ve just painted trim and need to tape that off when proceeding onto the walls, you’ll need to use Delicate painter’s tape or you’ll risk peeling the new paint off of the trim.
This would also apply if you’re doing a painted stripe finish. Once your walls have been painted and you measure out your stripes, use Delicate painter’s tape to tape off the stripes or you could peel the new paint off the walls. Delicate painter’s tape is an excellent choice for painted surfaces that haven’t had time to cure or bond.
#3 : Not Scoring Painter's Tape Before Removing
We are often anxious to finish cleanup once the job is done and so peel away the painter’s tape without thinking. But while the paint was drying the paint and tape have formed a bond to one another.
Grrr! Chunks of your new paint comes away with the tape. That’s infuriating.
To avoid this, run a sharp utility knife along the seam where the tape and paint meet so you’ll be able to pull the tape off clean and neatly.
#4 : Picking the Wrong Paint Sheen
Another of those common interior painting mistakes I’ve run across is choosing the wrong sheen for your purpose. Interior paints are available in different “sheens” or finishes (flat, eggshell, satin, semi-gloss, etc…). The higher the sheen, the glossier the paint will look when dry.
Selecting a paint sheen might be a matter of personal preference, but it important to keep in mind that there are sheens that work better than others in certain scenarios.
Using a flat paint on ceilings is almost always best. There are many reasons for this – ceilings are not as perfectly finished as walls, natural window light shines across a ceiling, ceilings are more challenging to paint, etc… The point is, flat paint dries matte and that helps to hide roller marks and imperfections in the drywall.
Glossier paints, by reflecting light, highlight any imperfections or lap marks. That means it’s important to use lower gloss paint on any imperfect walls as well – such as old plaster or repaired drywall.
It is an equally common interior painting mistake to use too flat a paint in bathrooms. Bathrooms see a lot of moisture and condensation. Even bathrooms equipped with exhaust fans and windows rarely do a sufficient job of wicking away all of that excess steam and water.
The result? Moisture will create lines or the appearance of drip marks on your paint. The upside of higher sheen paints is their durability and wipeability. They can withstand the moisture and be easily washed.
I recommend a satin or semi-gloss finish in a bathroom. This will enable you to wash away any of the moisture marks and protect the drywall from moisture penetration that can cause mold and mildew issues.
#5 : Not Using Quality Materials
If you don’t paint often, you may think that buying cheap tools makes sense. One time use, right? Just the opposite is true. Cheap tools equal expensive interior painting mistakes.
You will not get a quality finish without quality tools.
Cheap paint brushes they may lose their bristles in your paint finish and they assuredly will leave heavy brush strokes. Cheap roller covers shed fibers into the paint finish, equating to a lovely fuzzy wall texture that can only be sanded away and repainted.
Another common mistake is opting for the lowest grade paint. There’s always a good, better, best selection and I would never recommend the lower end of that spectrum.
The lower the cost, the thinner the coverage. You WILL end up applying multiple coats to attain the look you’re after and it still won’t have the durability and longevity of a middle or upper grade paint.
Save yourself time and misery and opt for quality materials.
#6 : Not Keeping Supplies Damp & Covered
You’ve just purchased a quality paint brush and roller for your new paint project. Everything is ready, you load the brush and begin cutting in.
In the meantime, the windows are open or there’s a fan running, you’ve left the lid off your open paint can, and your brush and roller have begun to dry out or become “crispy”. In the right conditions, this can happen in as little as five minutes.
Assuming you are using water-based paint (and you should be), keep a spray bottle of clean water on hand and periodically lightly mist your roller or brush. Cover your tray (and materials) with a damp cloth or towel anytime you have to leave it unattended for longer than 5 minutes.
As with a loaf of fresh bread or your favorite chips, air is the enemy. Pour only the amount of paint you need into the can or tray. Put the lid back on your paint can at all other times.
You may also cover your tools and trays at the end of the day with plastic or aluminum foil, store them in a cool dry place, and they’ll be ready for you to continue the next day.
#7 : Switching Paint Manufacturers Mid Job
I was once guilty of this and learned from my interior painting mistakes, so I’m hoping to save you some future trouble.
Scenario: You underestimate how much paint for your project and must run for more, but the original store is miles further away. You can swing by this store that’s nearer to home and have them match the color, right? Paint is paint.
Um, no. Modern paints are NOT the same from brand to brand, nor even from product lines within the same brand. If you try to compensate with a color match of different paint, it WILL be noticeable, even if it appears the exact same color in the can.
Take the original paint can lid with the color formula on it back to the same paint supplier. You’ll be glad you did.
#8 : Selecting Paint Colors at the Paint Store
What could be the harm in this? They have all the decks and colors on display. What could be easier?
Even though paint stores have tried to mimic natural lighting in their displays, you’re likely seeing the samples illuminated with cold fluorescent lighting. This doesn’t replicate how the color will be viewed in your home under more natural lighting conditions.
At the very least, take your color samples outdoors to see them in ordinary lighting. This will help you visualize a color’s true impact. Even better? Take the samples home with you and view them in the lighting they will be used in.
 - THAT Interior Painting Girl")
#9 : Going to the Paint Store Unprepared
It’s a great idea to make yourself a list BEFORE you go to the paint store. Without one, you’re likely to forget a key element of your project AND buy a bunch of things you don't need. There’s nothing more aggravating than multiple trips to the store for the same project.
It can be overwhelming combing paint aisles for the things you need. There is likely to be alternative options even if you do know what you want. Preparing a list beforehand is key.
You may not always be able to rely on the expertise of the worker behind the counter. They may know their department but they often lack real world experience.
Each of our Interior Painting Guides have lists of tools and materials to help you. Most paint stores will also have a generic paint project list at their counters if you happen to go unprepared.
#10 : Not Priming Patched Drywall
This is a straightforward and simple one. You spend hours patching and sanding your walls to be sure they look great. Days later, your paint dries and all those patched areas show up as slightly glossier or visible spots within the painted wall.
If you patch or spackle any areas during your painting project, you’ll need to sand and spot prime those areas. Spackle and drywall mud absorb paint differently than the walls. If you do not prime these areas prior to painting, you WILL see them through your finished topcoat.
The best way to avoid interior painting mistakes is to be aware of them! Consider sharing some of YOUR interior painting mistakes with me!

%20-%20THAT%20Interior%20Painting%20Girl)
"I did not know how to paint or even what to paint, but I knew I had to begin." Margaret Atwood, Cat's Eye
Join my monthly email newsletter, "Dip & Swipe", for professional tips, how-to articles, color and decorating ideas, projects, and much more!
Recent Articles
-
Repurpose Old Windows
Dec 10, 21 06:32 PM
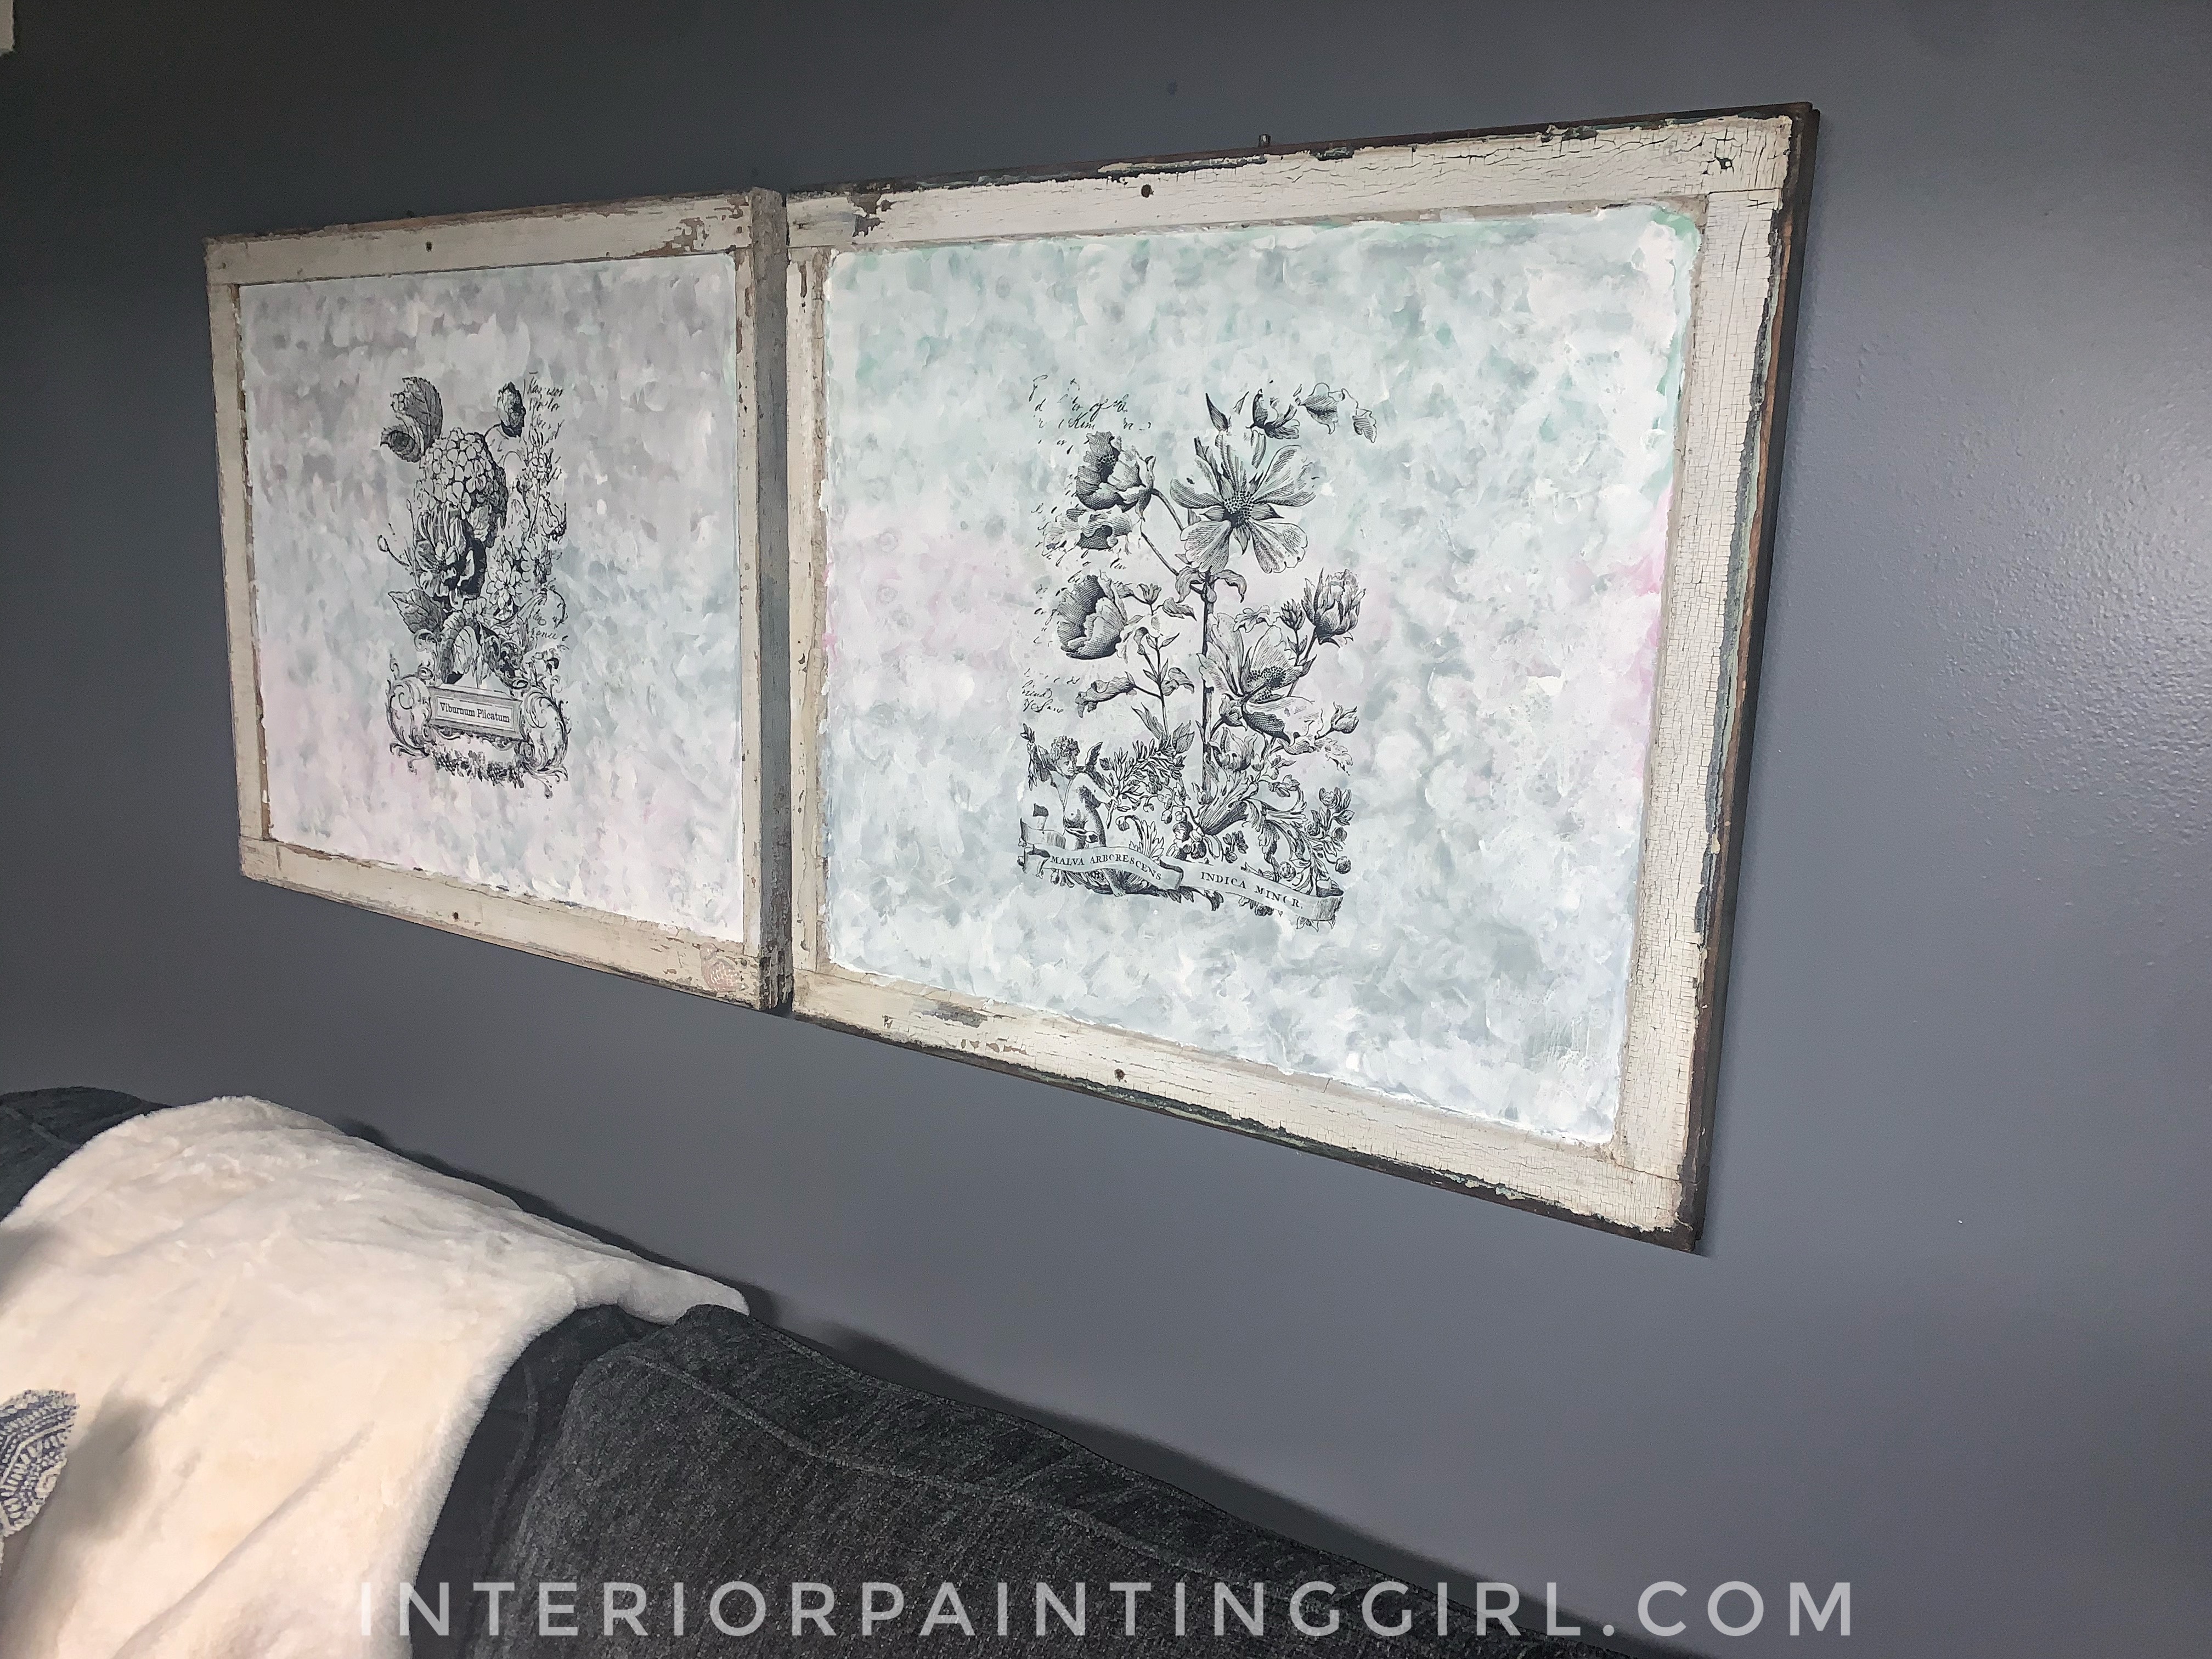 Learn how to repurpose old windows by upcycling them into shabby chic decor.
 -
Upcycling a Toolbox
Dec 08, 21 10:22 PM
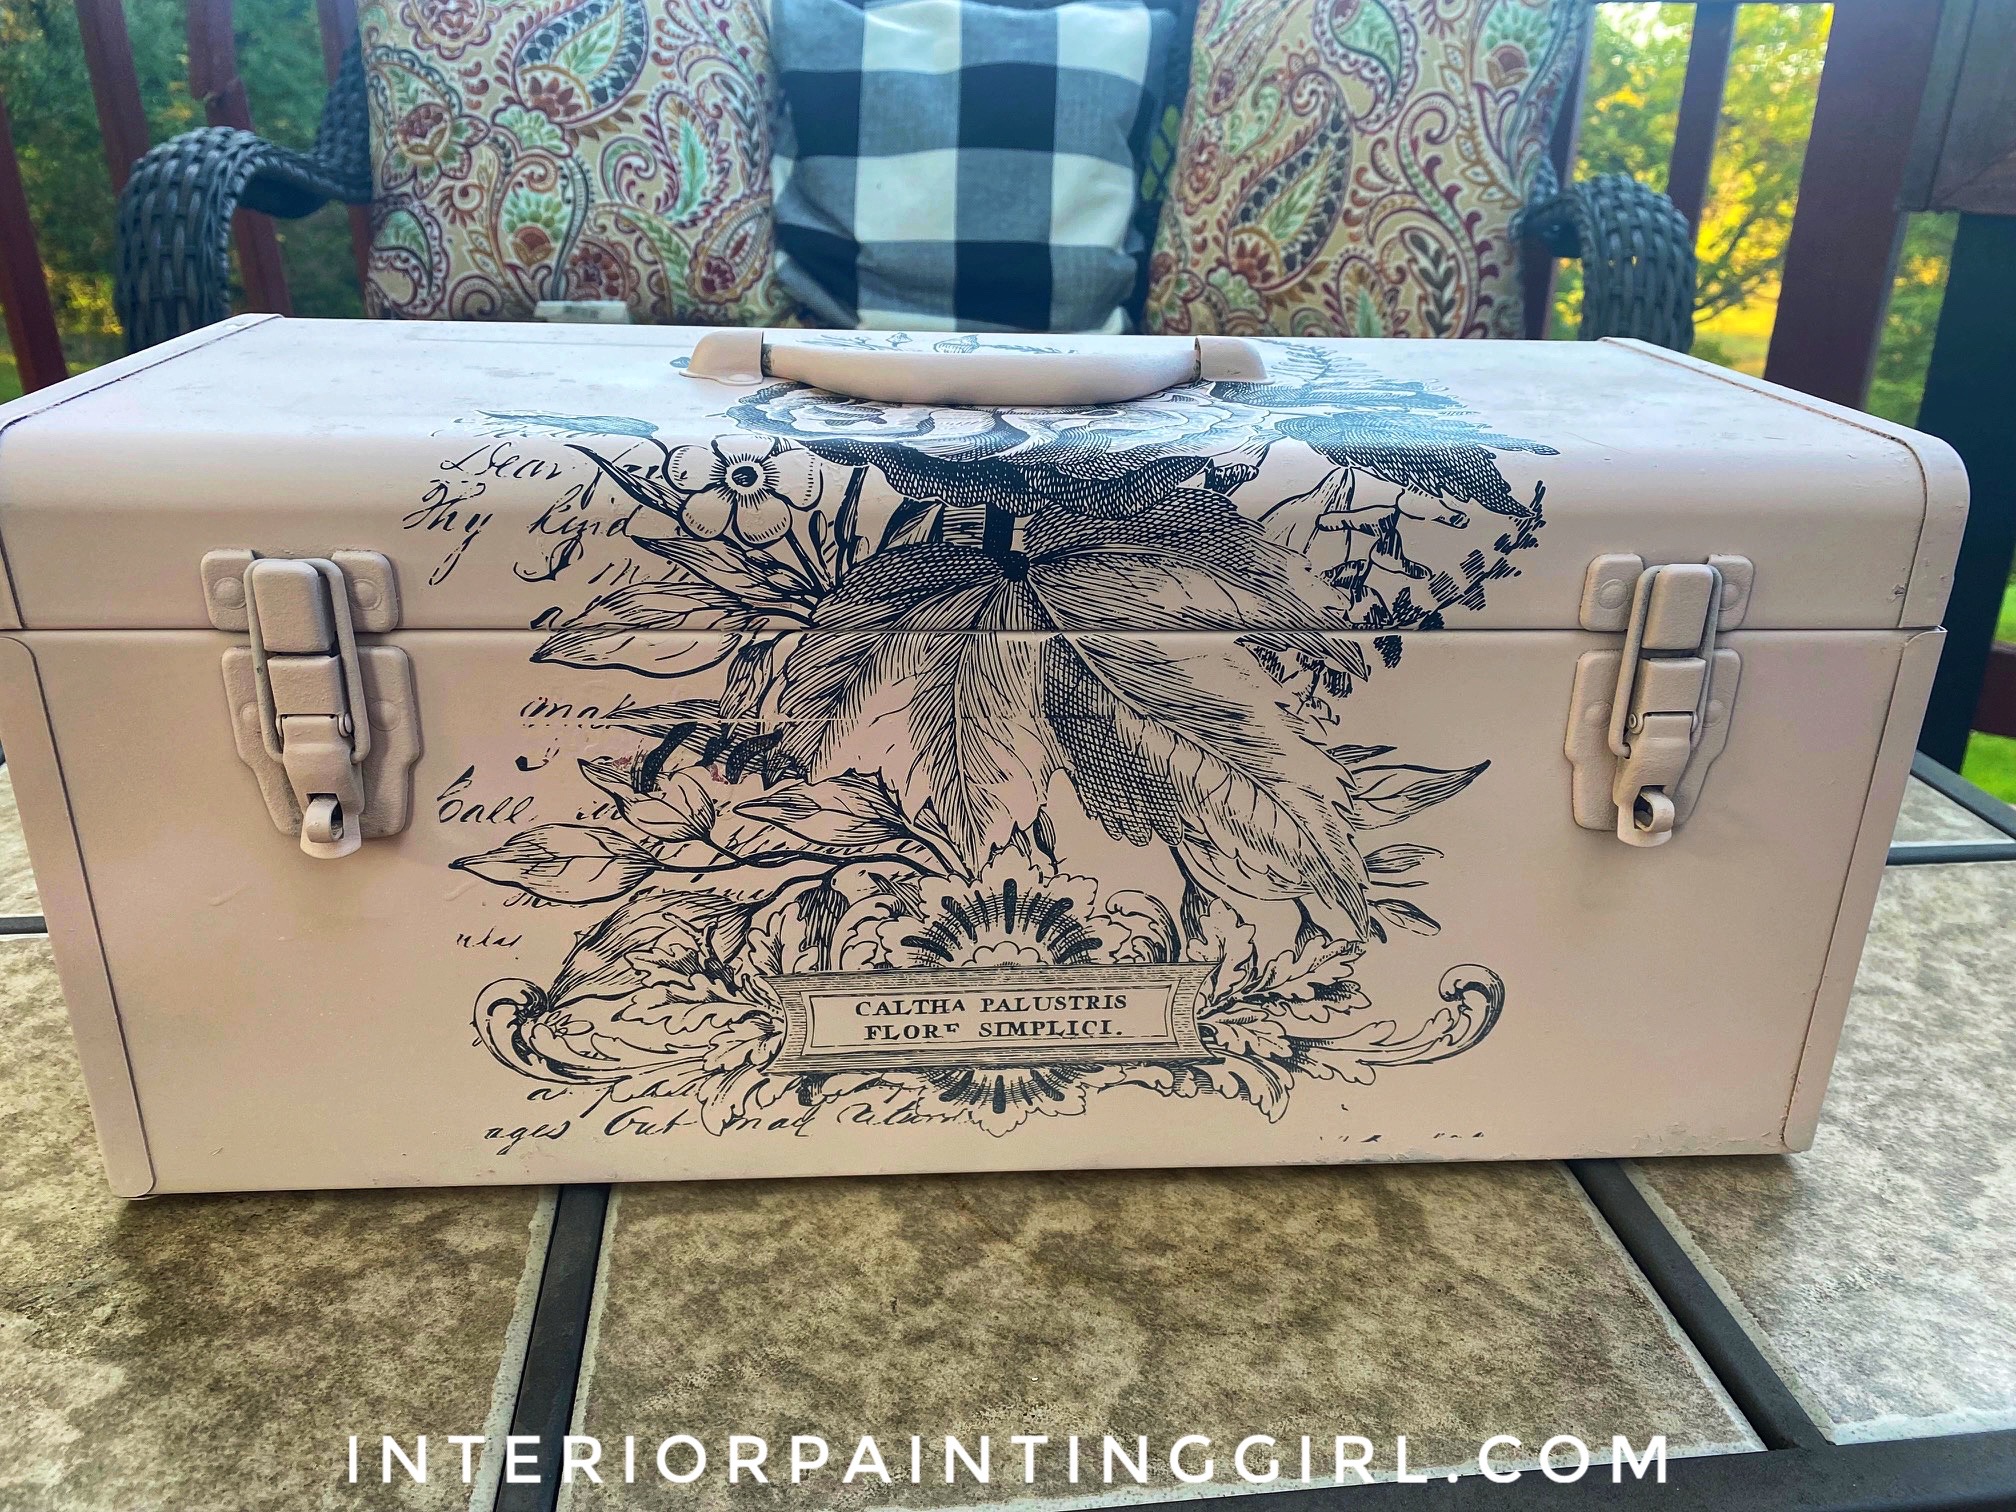 In this craft painting project, I upcycle an old toolbox with fresh paint and an appliqué.
 -
Craft Painting Projects
Dec 08, 21 08:13 PM
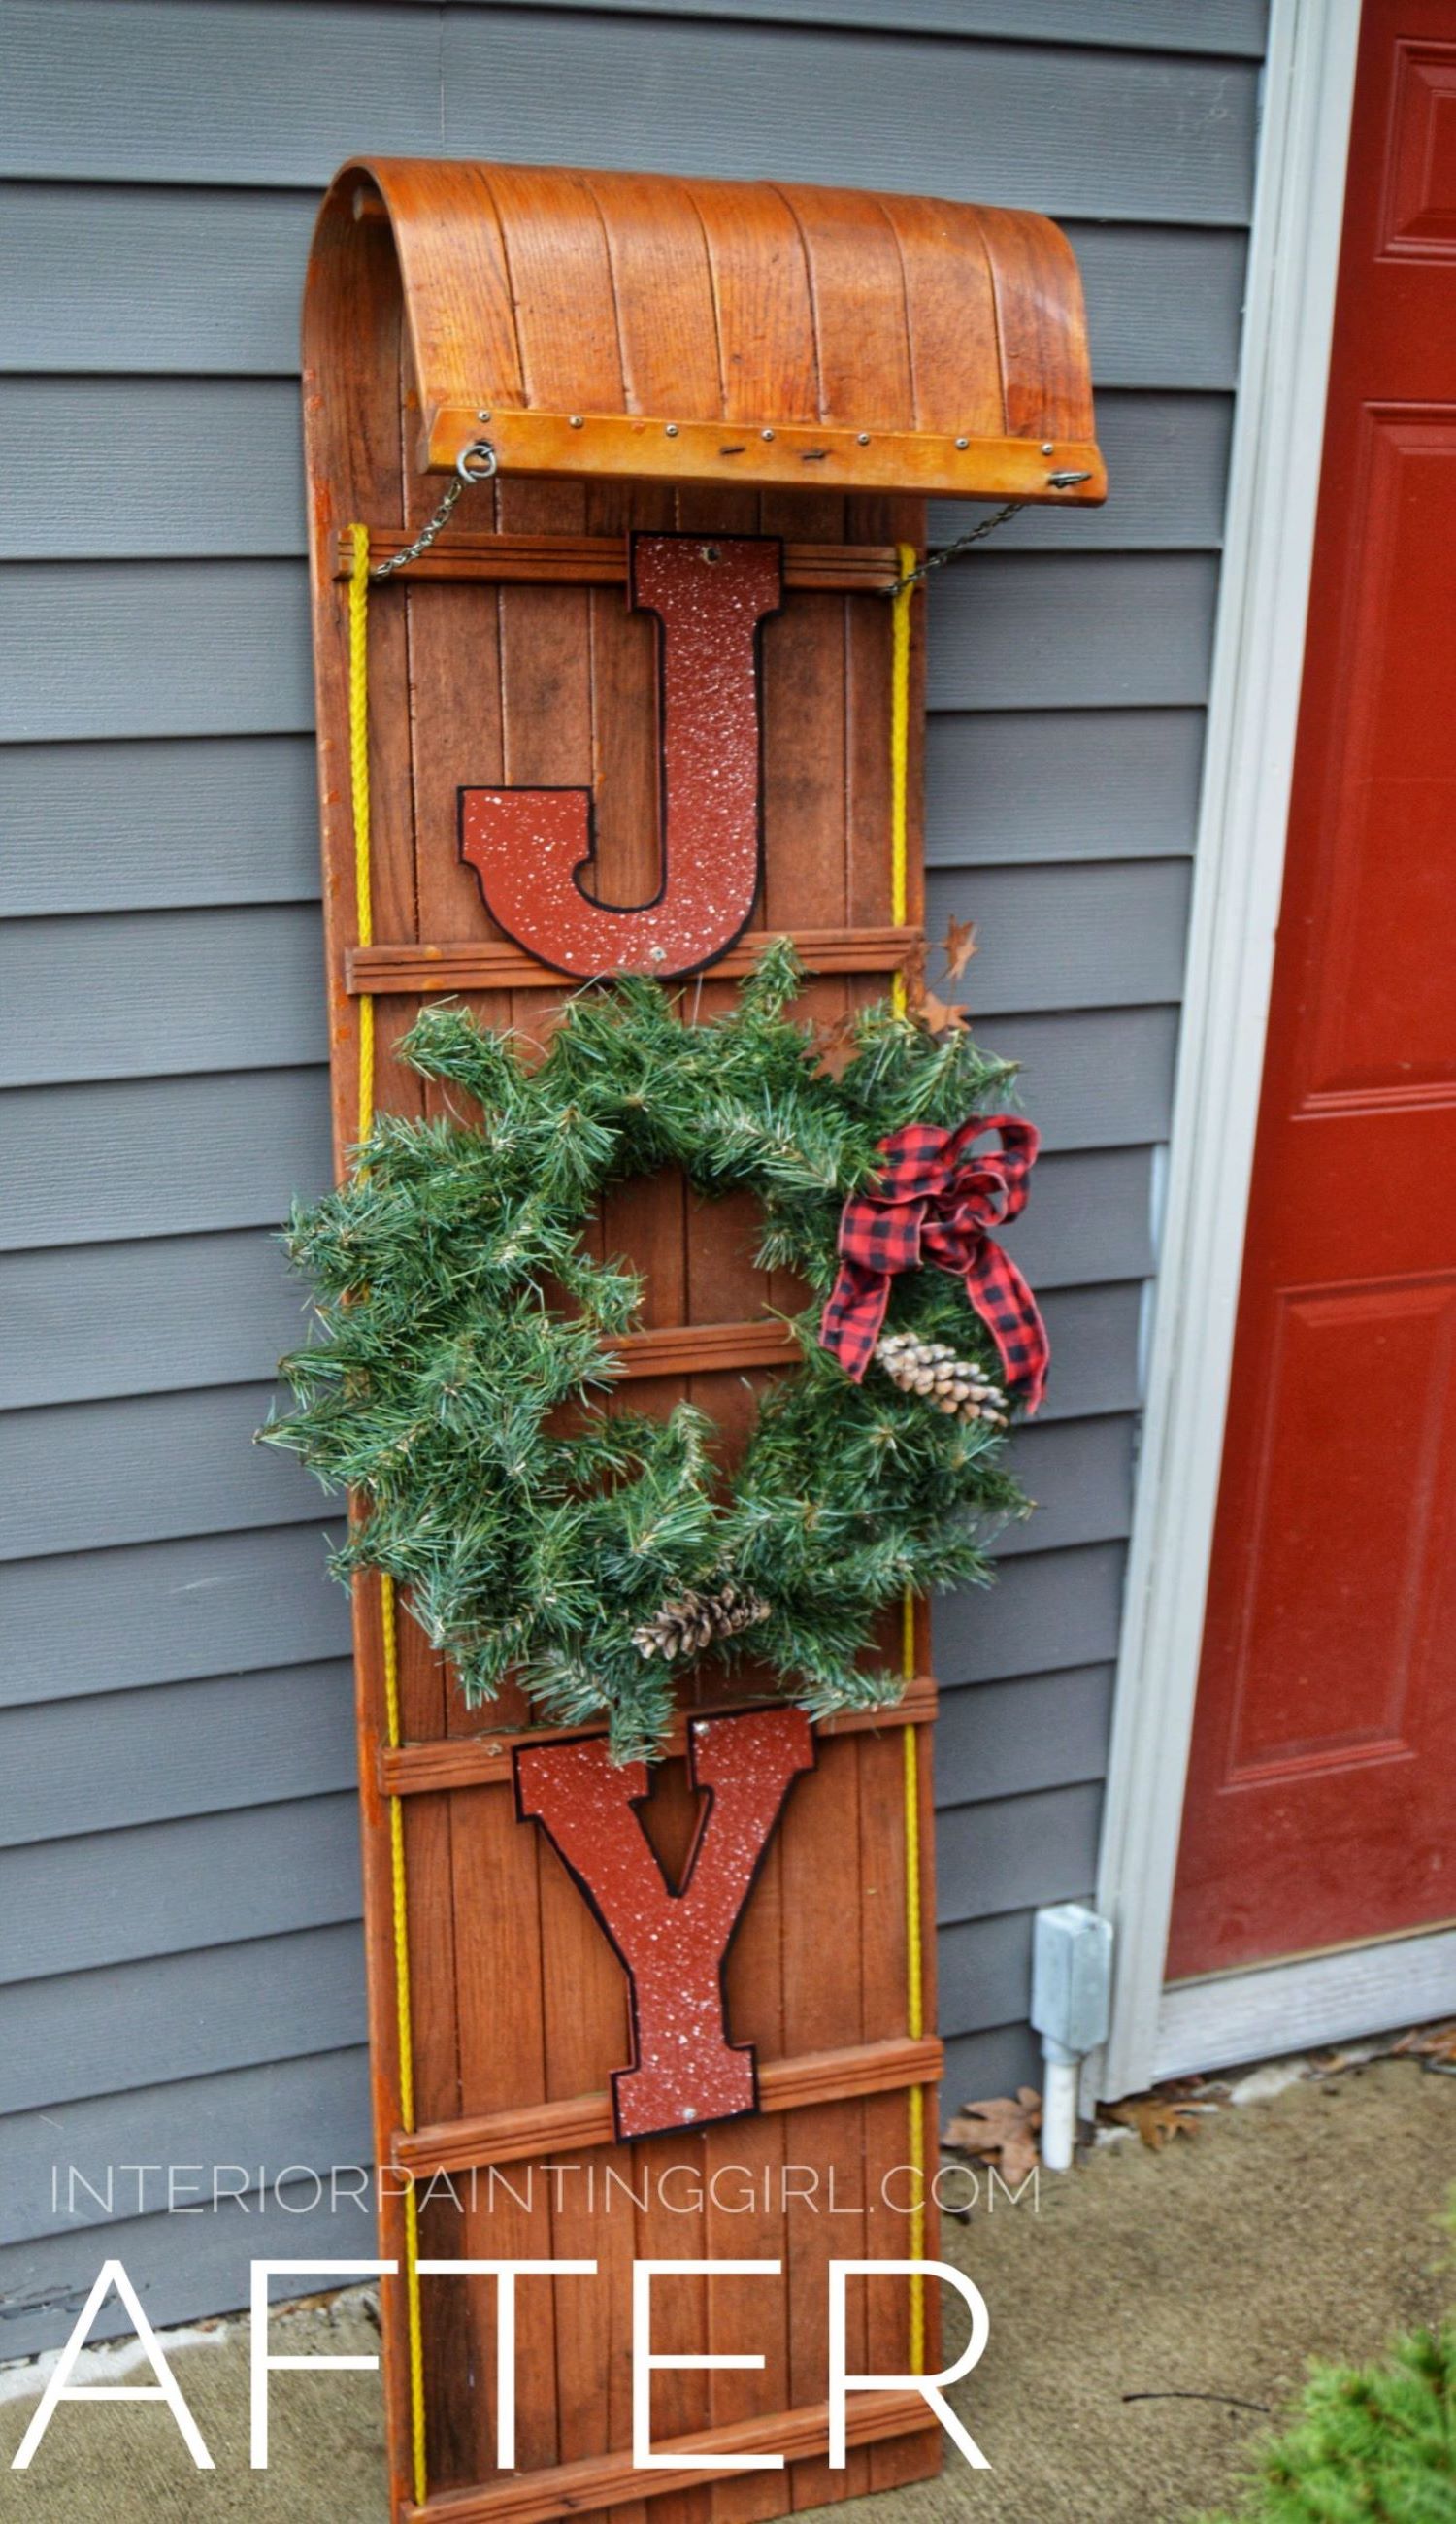 A place for all of my smaller craft painting projects and DIY projects that don't fit elsewhere.
Follow me on Pinterest @