Holiday Painting Project
Upcycling a Vintage Toboggan
I love creativity and upcycling old objects into new décor. Every autumn, I find myself yearning complete some sort of holiday painting project. In previous years it has been signs made from old picture frames and snowmen made from cast-off shutters.
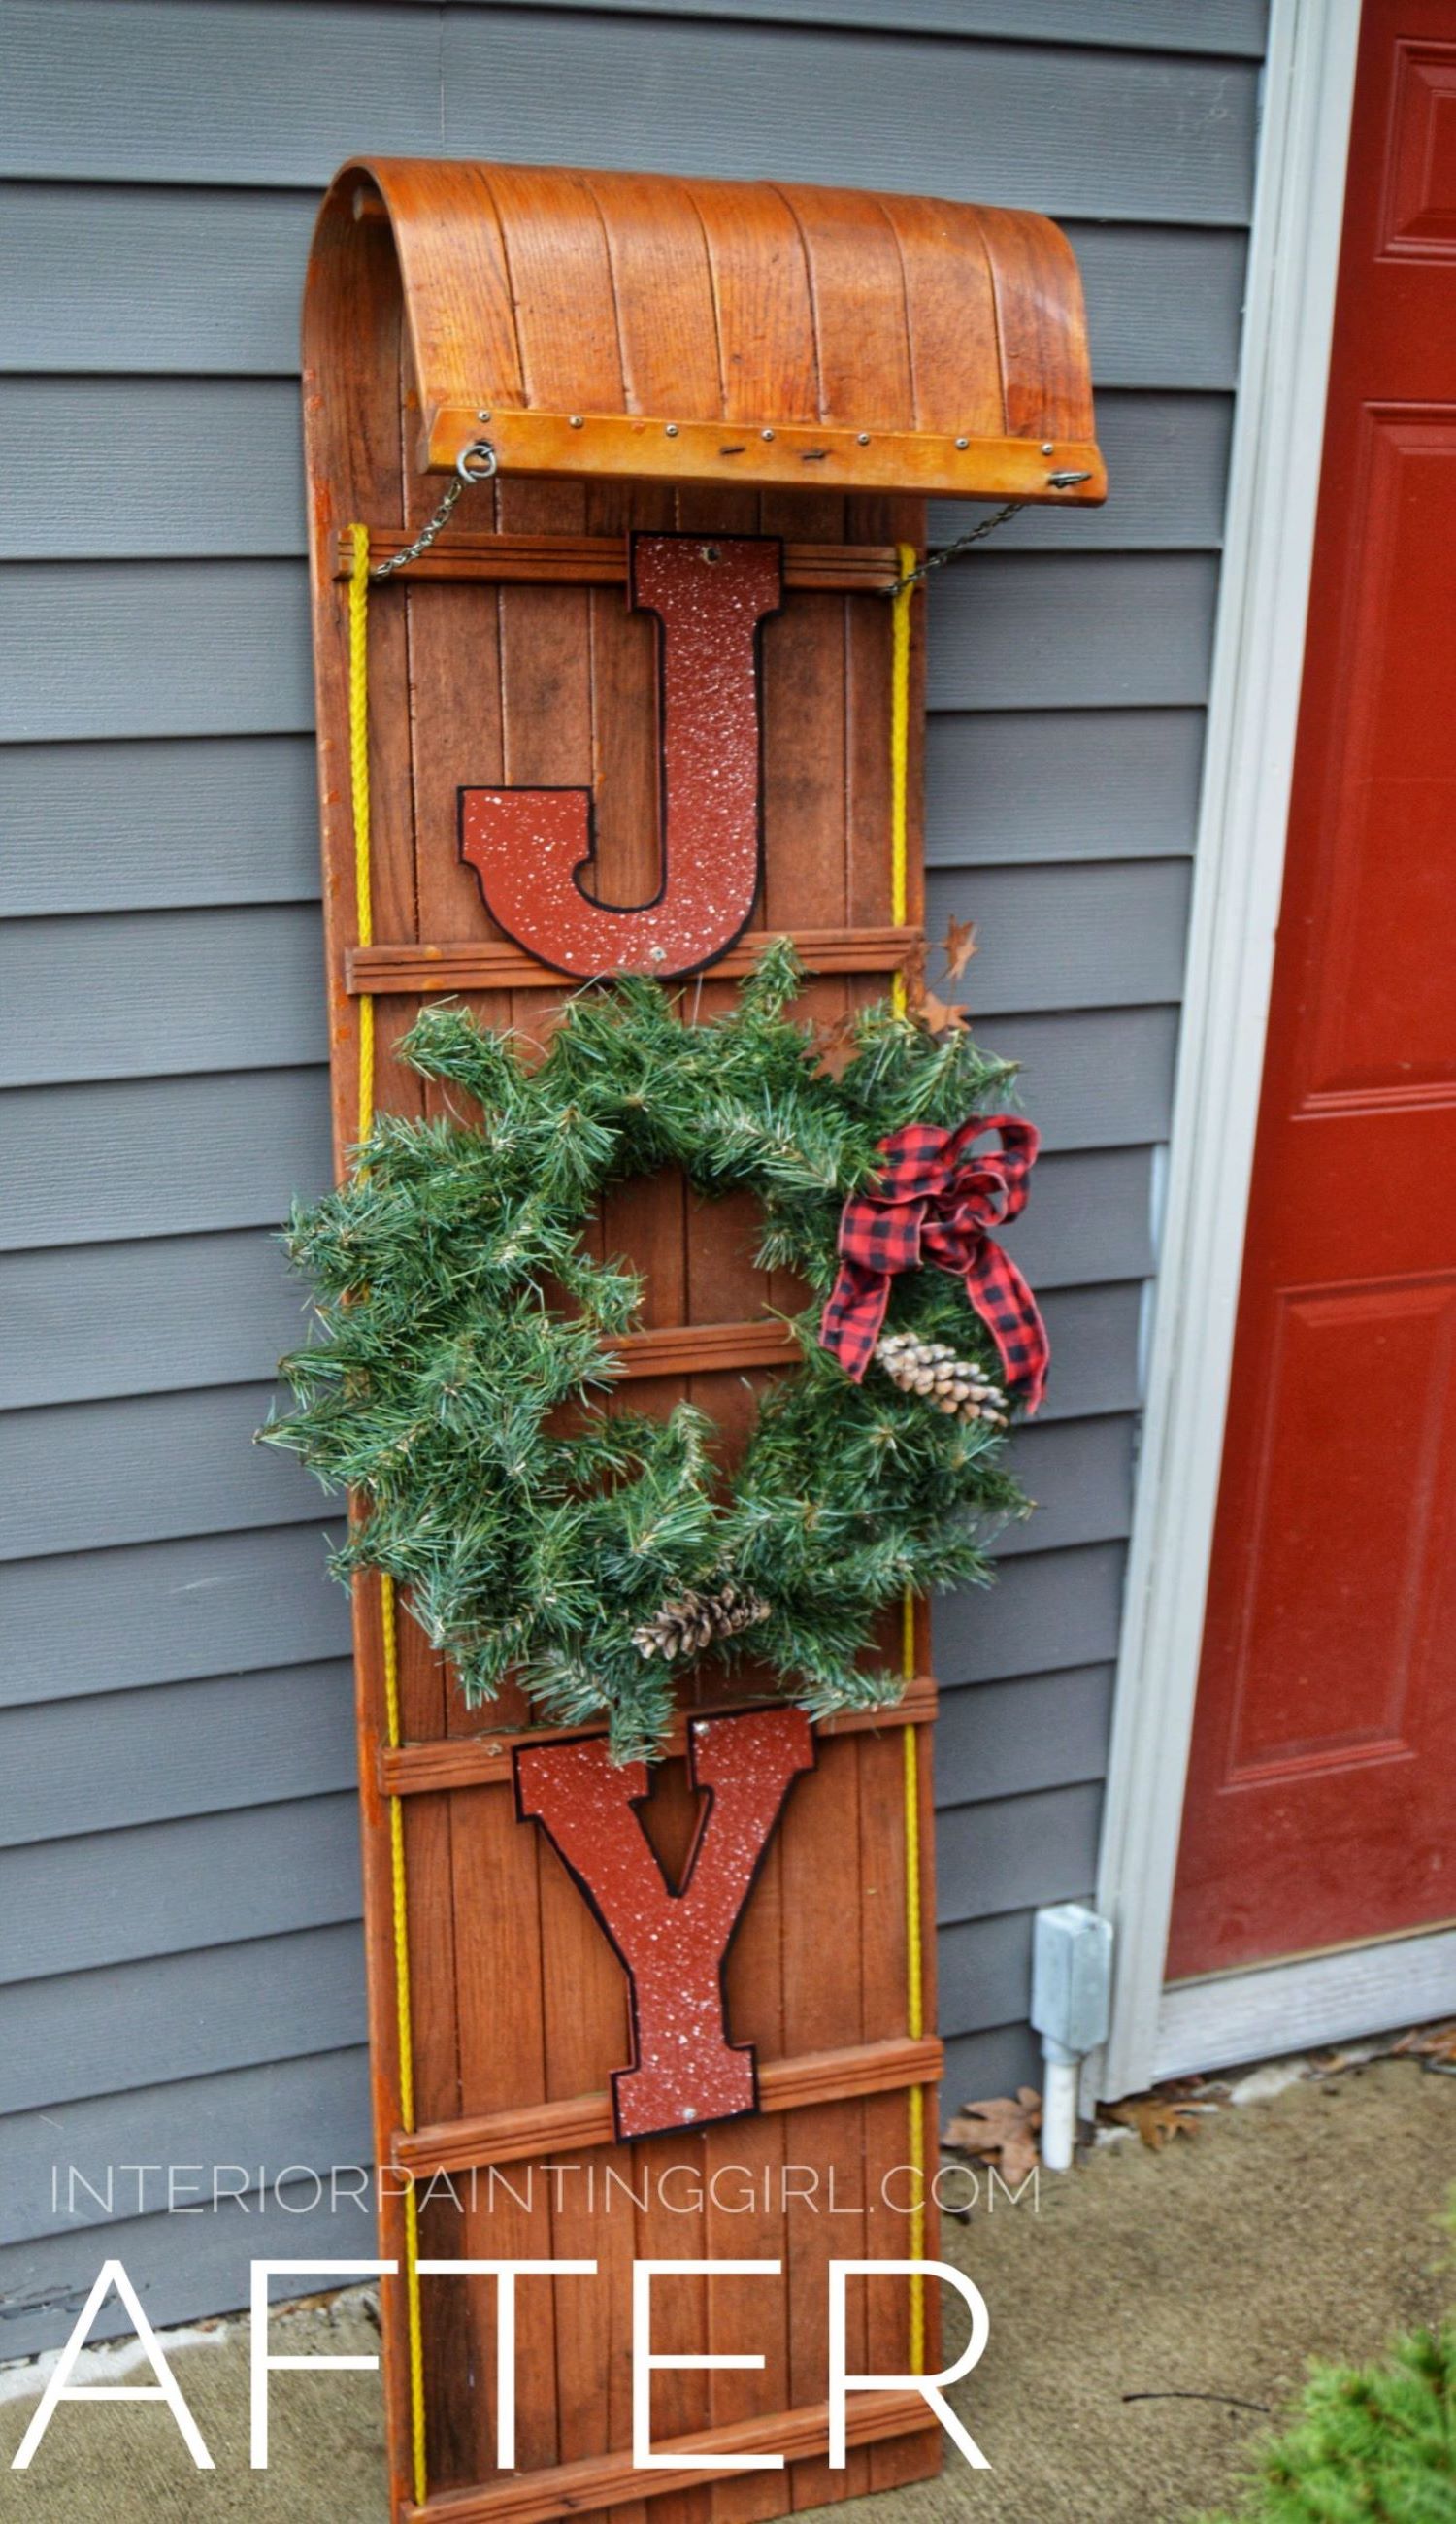
My sister jokingly said to me “you’ll paint ANYTHING that’s standing still!” That may be accurate but just to be ornery, I thought I’d take my chances at something that’s on the move so to speak, like my husband’s childhood toboggan.
I’m always drawn to old family traditions and nostalgia. I like to decorate with vintage pieces and rustic winter décor. The farmhouse and upcycling movement suit me perfectly. So when my in-laws gave me their family toboggan (in rough condition), I knew I had the perfect item for this year’s holiday painting project.
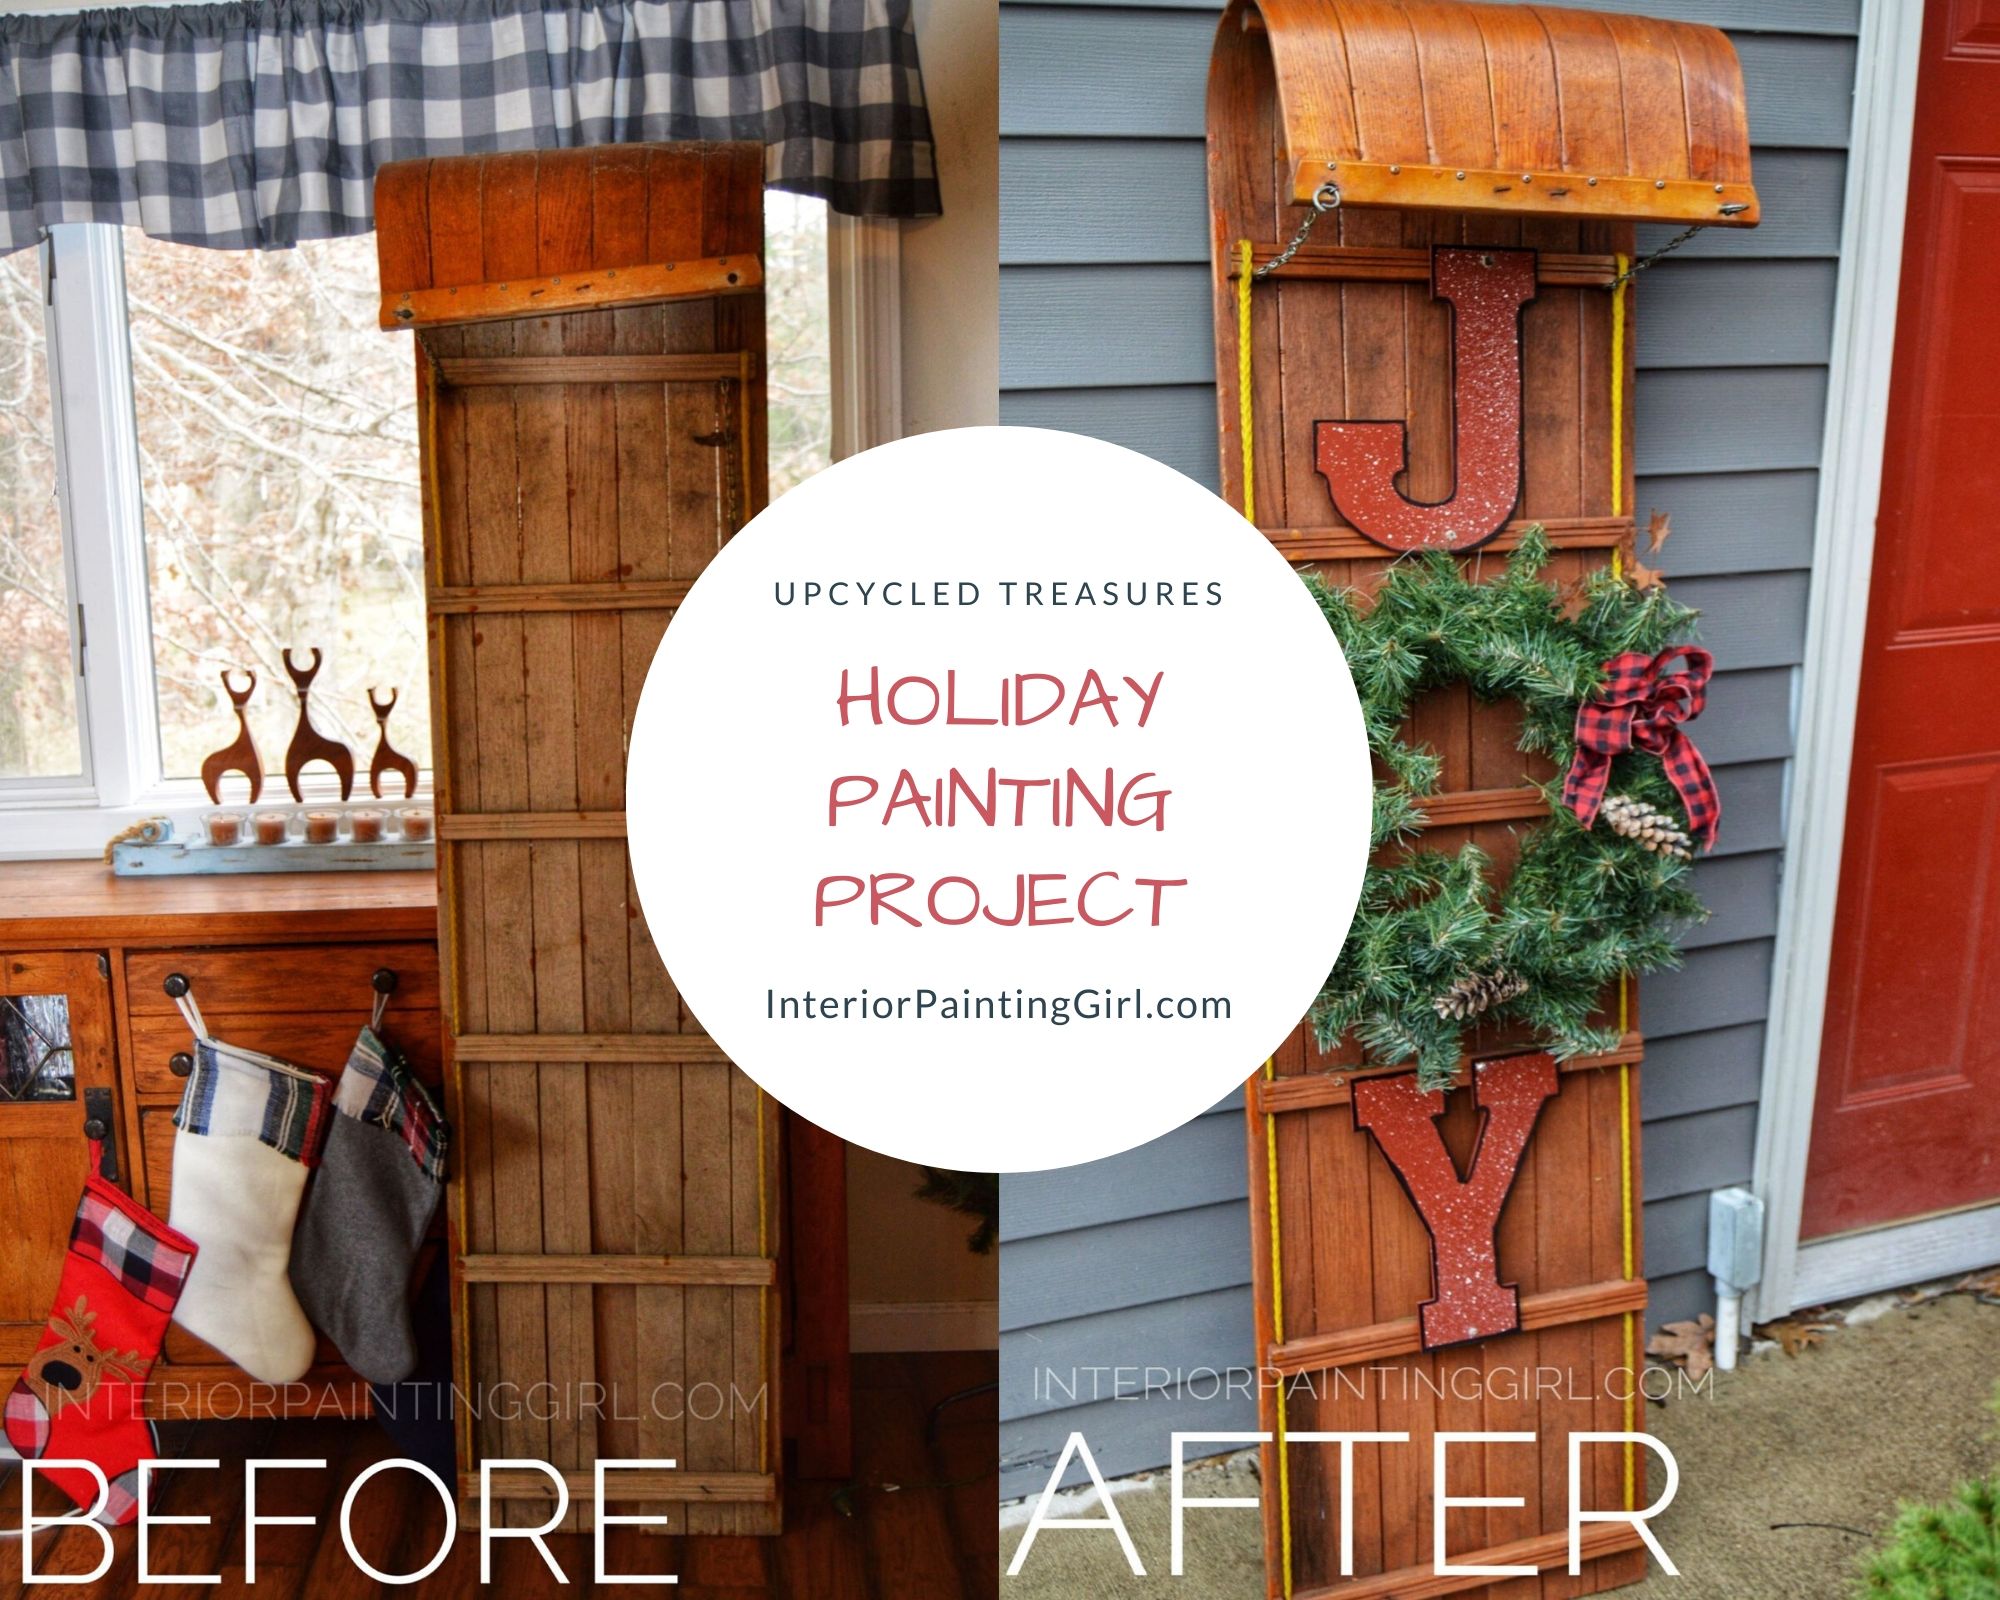
When I first received the sled, there were a few boards coming loose and the head was crooked and one of the head chains had become unattached. Also, the topside (where you would sit) had never been stained or varnished at all, leaving an unmatched finished between top and underside.
I reattached the chain that had worked its way loose with my husband’s help. That helped to correct the crooked part of the head, the loveliest part of the sled. Adding screws to the loose boards helped sturdy the piece up as well.
Now we are ready for the fun part of this holiday painting project. I knew I wanted to do something unique with letters. I had seen some clever ideas with using a circular wreath as a substitution for the letter “O”. So I brainstormed some winter words with the letter “O” in it.
I decided on “JOY” because the toboggan had brought so much joy to my husband’s childhood. You could also use the words SNOW, HOME, TOY, etc….
I’m using a toboggan because it’s what I have available, but there are a thousand fun and unique ways to go about this using whatever sort of garage sale or thrift store pieces you may find, from old runner sleds to skis to antique shutters (like I have used in previous years). Any old or distressed piece can become the canvas for your holiday painting project.
Holiday Painting Project Quick Start Checklist
• Acquire an heirloom piece or vintage holiday or seasonal treasure
• Choose a color scheme or pattern
• Sturdy up the structure with nails/screws/glue and attach missing ropes, chain, gears etc.
• Gather supplies at crafting store or home improvement store
• Paint and stain and seal your piece keeping in mind the paint products needed to accommodate the climate (exterior or interior )
• Accessorize with meaningful, nostalgic and simple pieces
• Display, enjoy, and embrace imperfections
Holiday Painting Project - Step-by-Step
Step 1 : The Letters
Once I decided on the word “JOY”, I went to my local crafting store and bought premade, unfinished letters in the size I thought suitable for the project. There are different fonts and sizes available to you.
You’ll also need to decide on your color scheme. I decided to go with traditional holiday colors and therefore I used red for the letters “J’ and “Y”, remember I am using a wreath as a substitution for the letter “O”. So a green wreath with red letters will make a great, traditional holiday palette.
Next you’ll need to decide if your project will remain indoors or will go out of doors say on a porch or deck etc… The reason I bring this up is because it makes a difference in the type of paint/stain you will use. To be protected outside, perhaps in winter conditions, requires a different type of sealant. I chose to display this indoors so we could really appreciate its grandeur.
Coincidentally, I have red shutters and doors on my home so I just used my leftover paint from those to paint my letters. The paint I had on hand had primer built in so there was no need for a separate application of primer.
If you do not have paint lying around, you can buy small crafting paints at your local crafting supplier or pods of paint at your local paint supplier or lumber yard for about $1-$3.
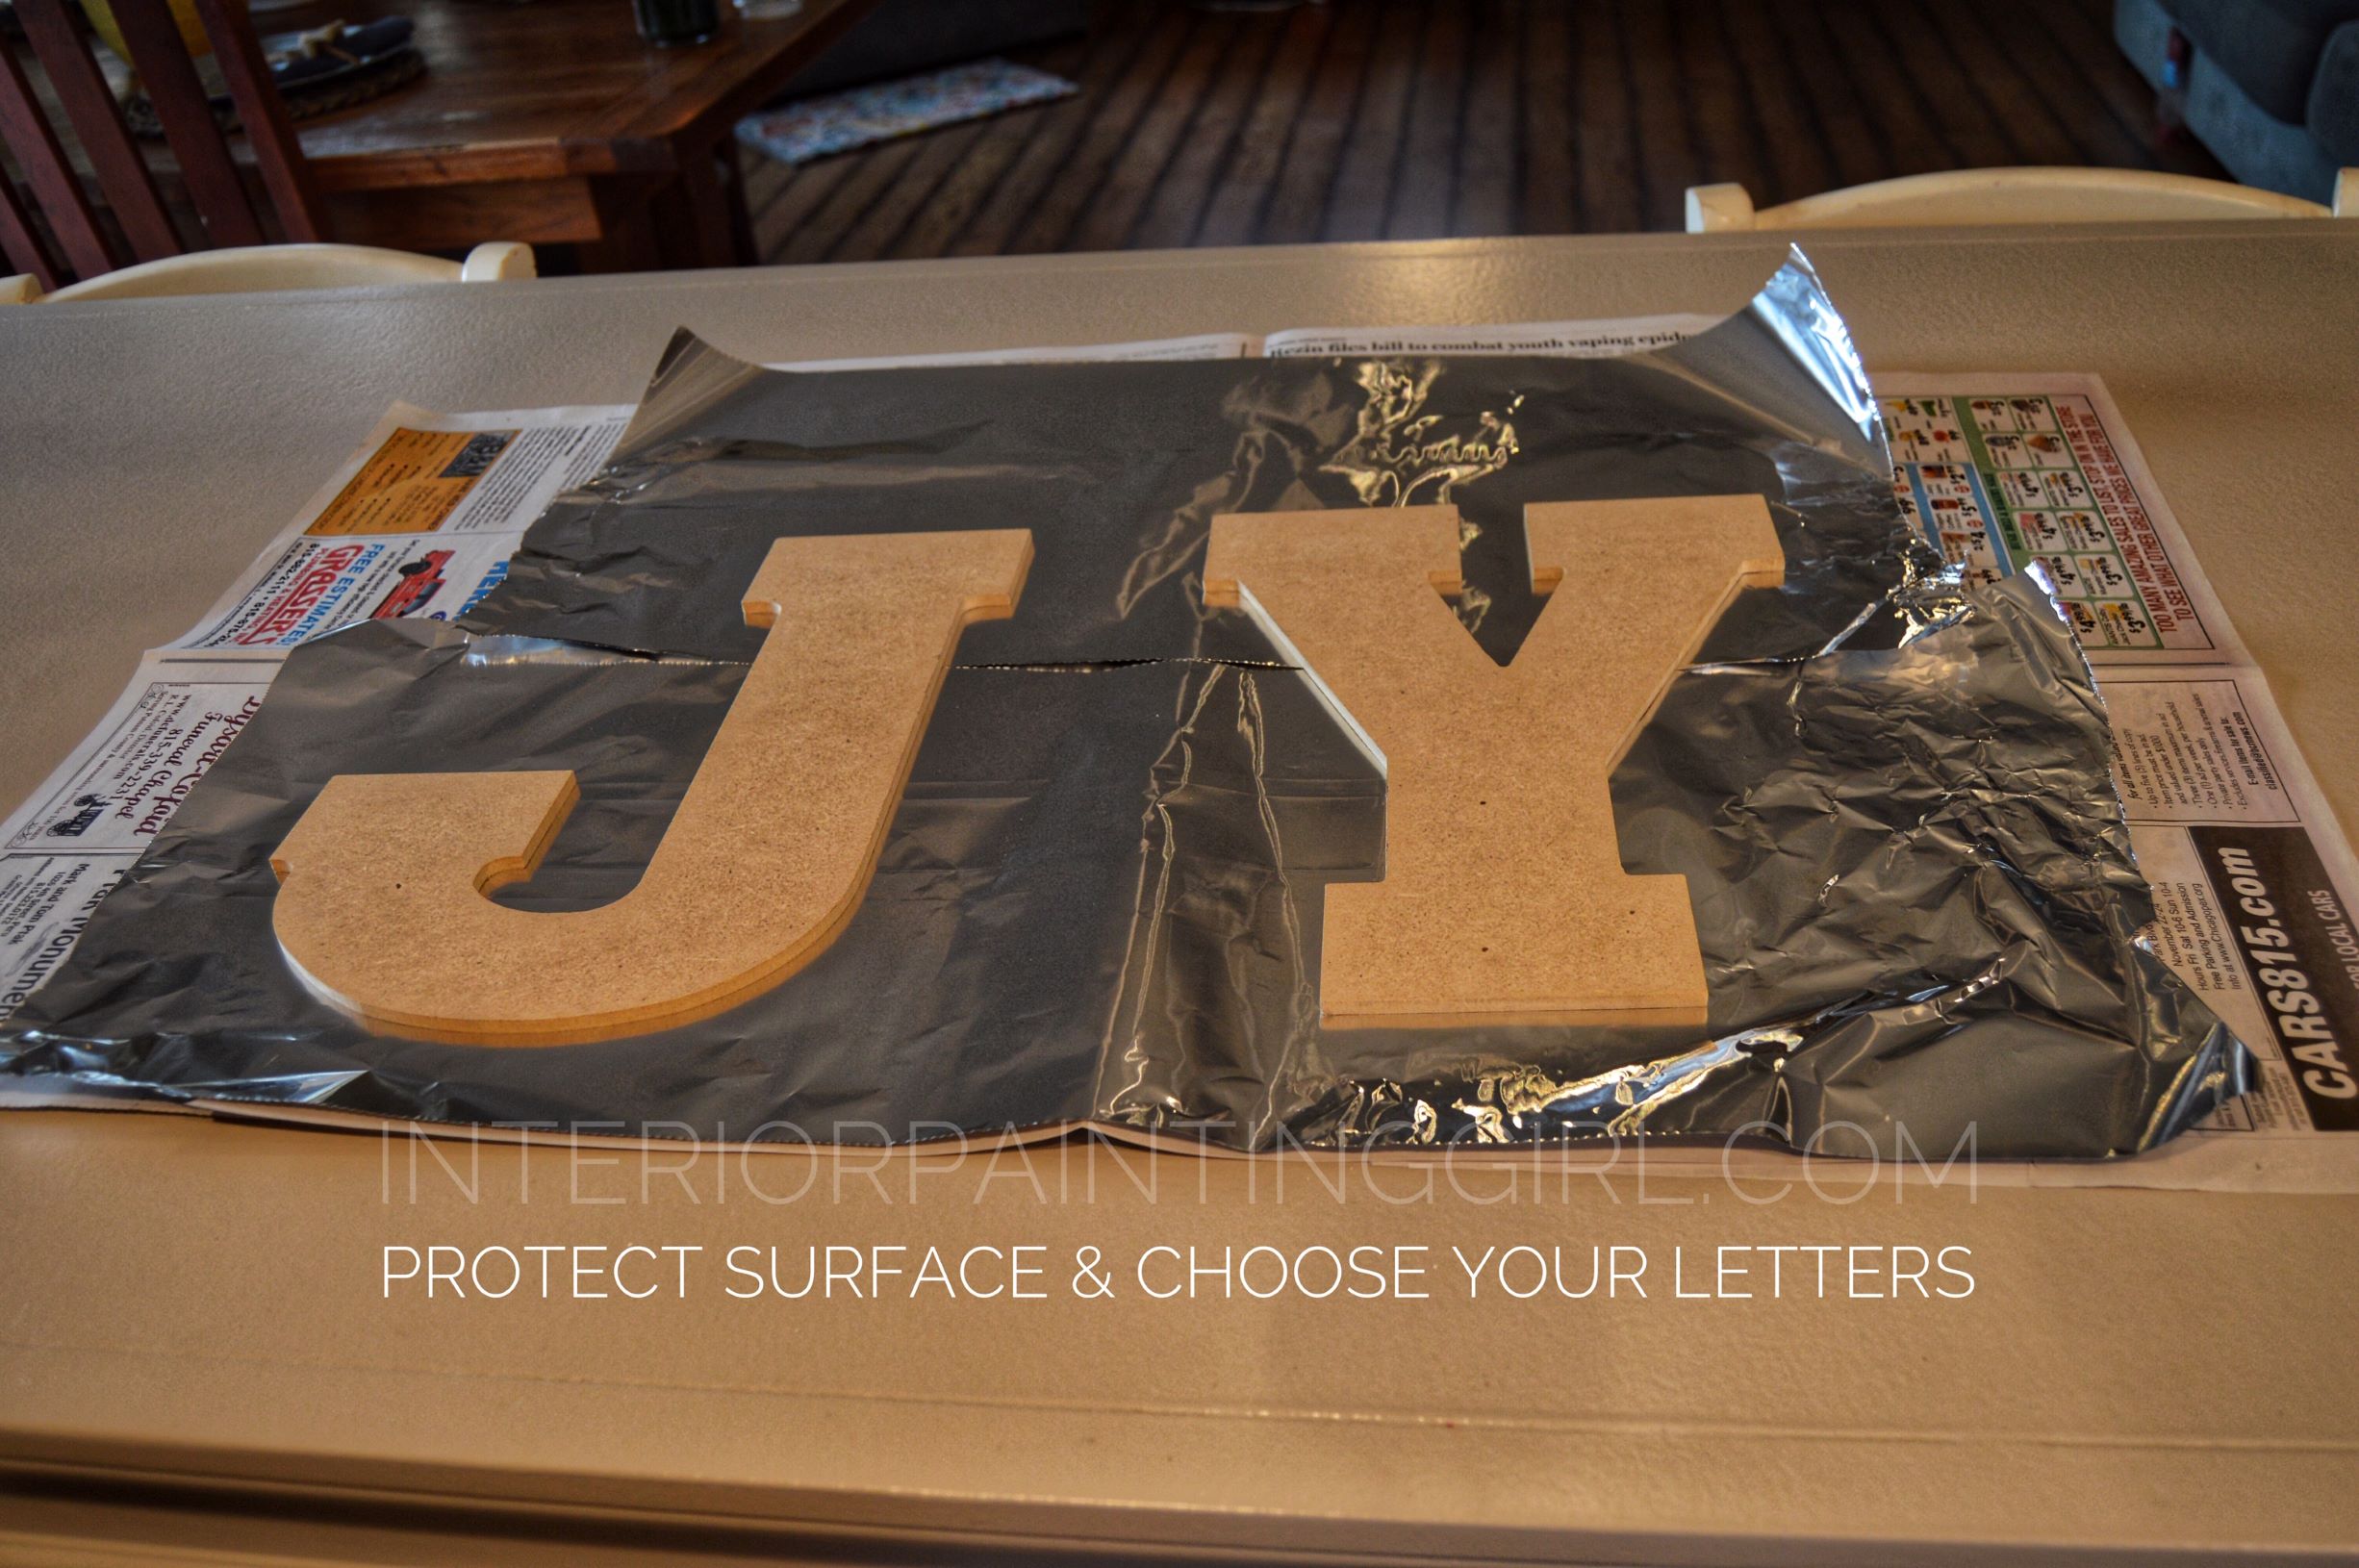
I laid down newspaper to protect my table, then painted both sides of the letters in the event I ever did want to move this outdoors. Protecting wood from the elements is crucial for the longevity of your holiday painting project, hence painting both sides. I recommend doing two coats and a blow dryer made that part a breeze.
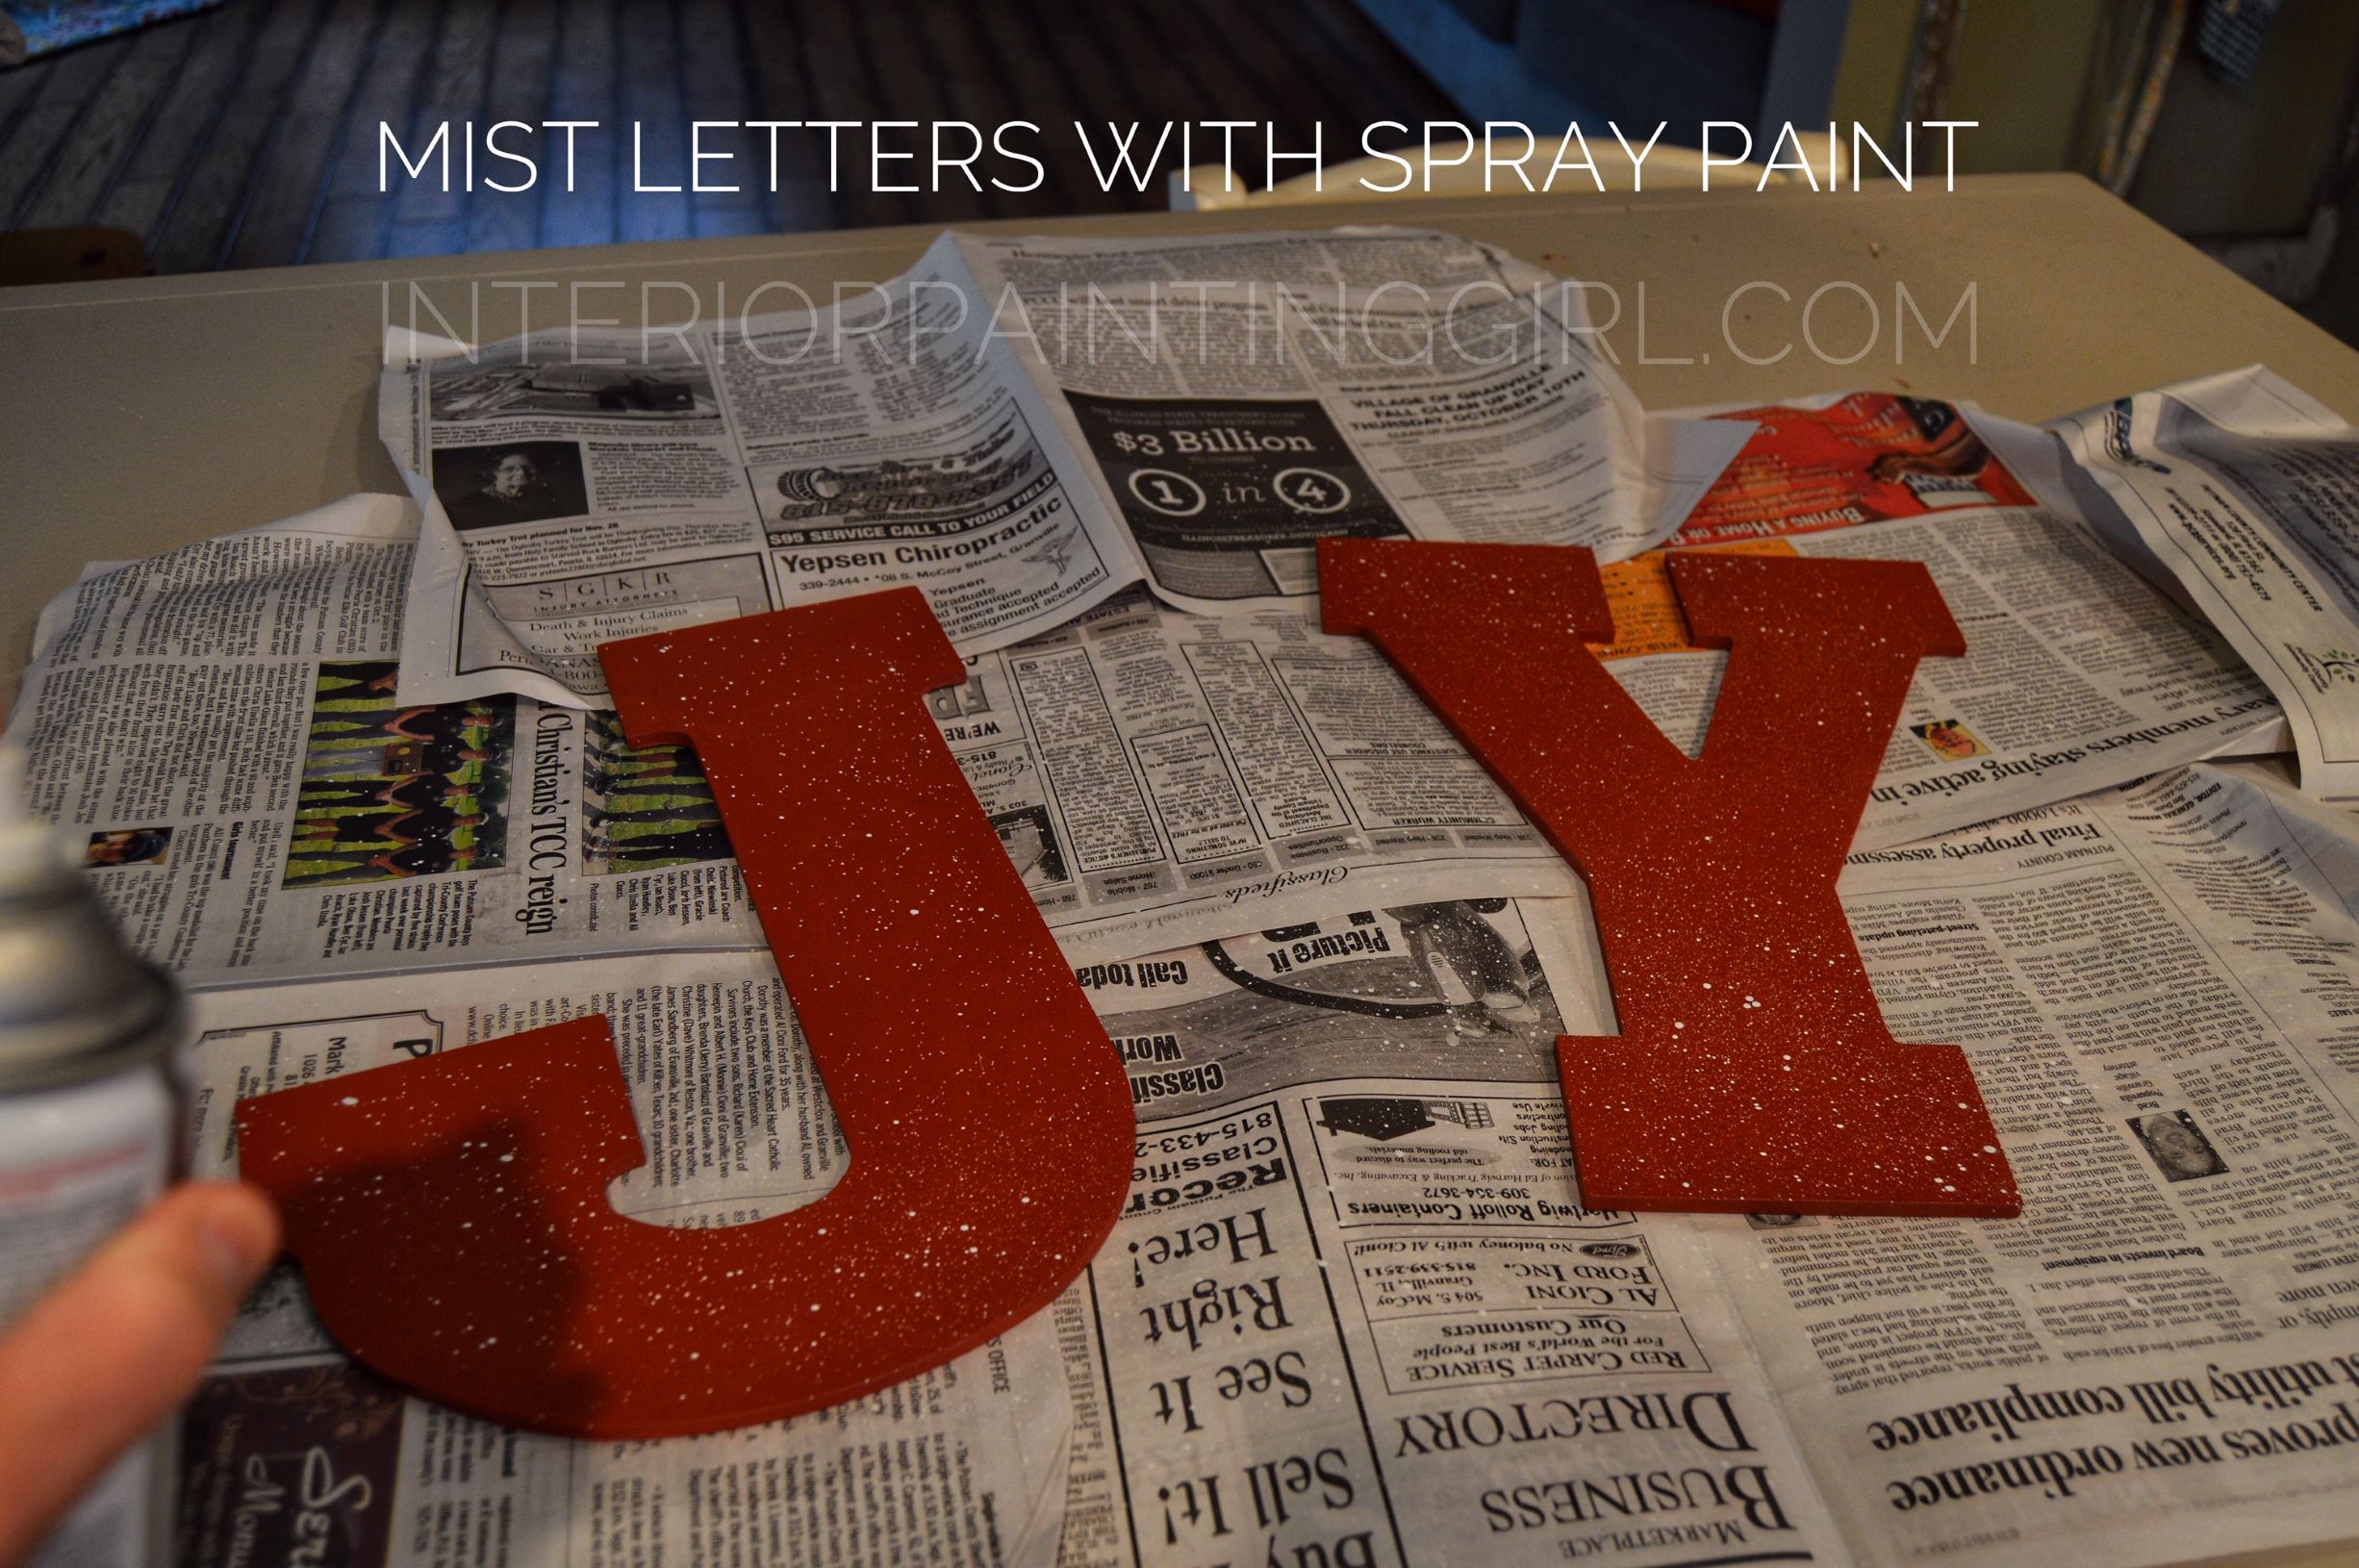
Next, to give the letters some depth and personality I used a can of white spray paint to give the appearance of them being kissed by the snow.
To do this, (shake your can vigorously) simply hold the can about a foot above the letters and only press about ¼- ½ of the way down on the spray paint trigger. This creates a “mist” and will lightly sprinkle the letters with an appearance of snowflakes. I also chose to give the letters some depth by hand painting a black border around the edges with an artist brush.

Step 2 : The Toboggan
As I mentioned before, we had to reattach the chain to straighten out the head of the sled and we made the body sturdy with the addition of a few screws. Please don’t let little imperfections deter you from attempting something like this. They are what add character and authenticity to your project. We could have just as easily forgone this step and the results would be just as beautiful.
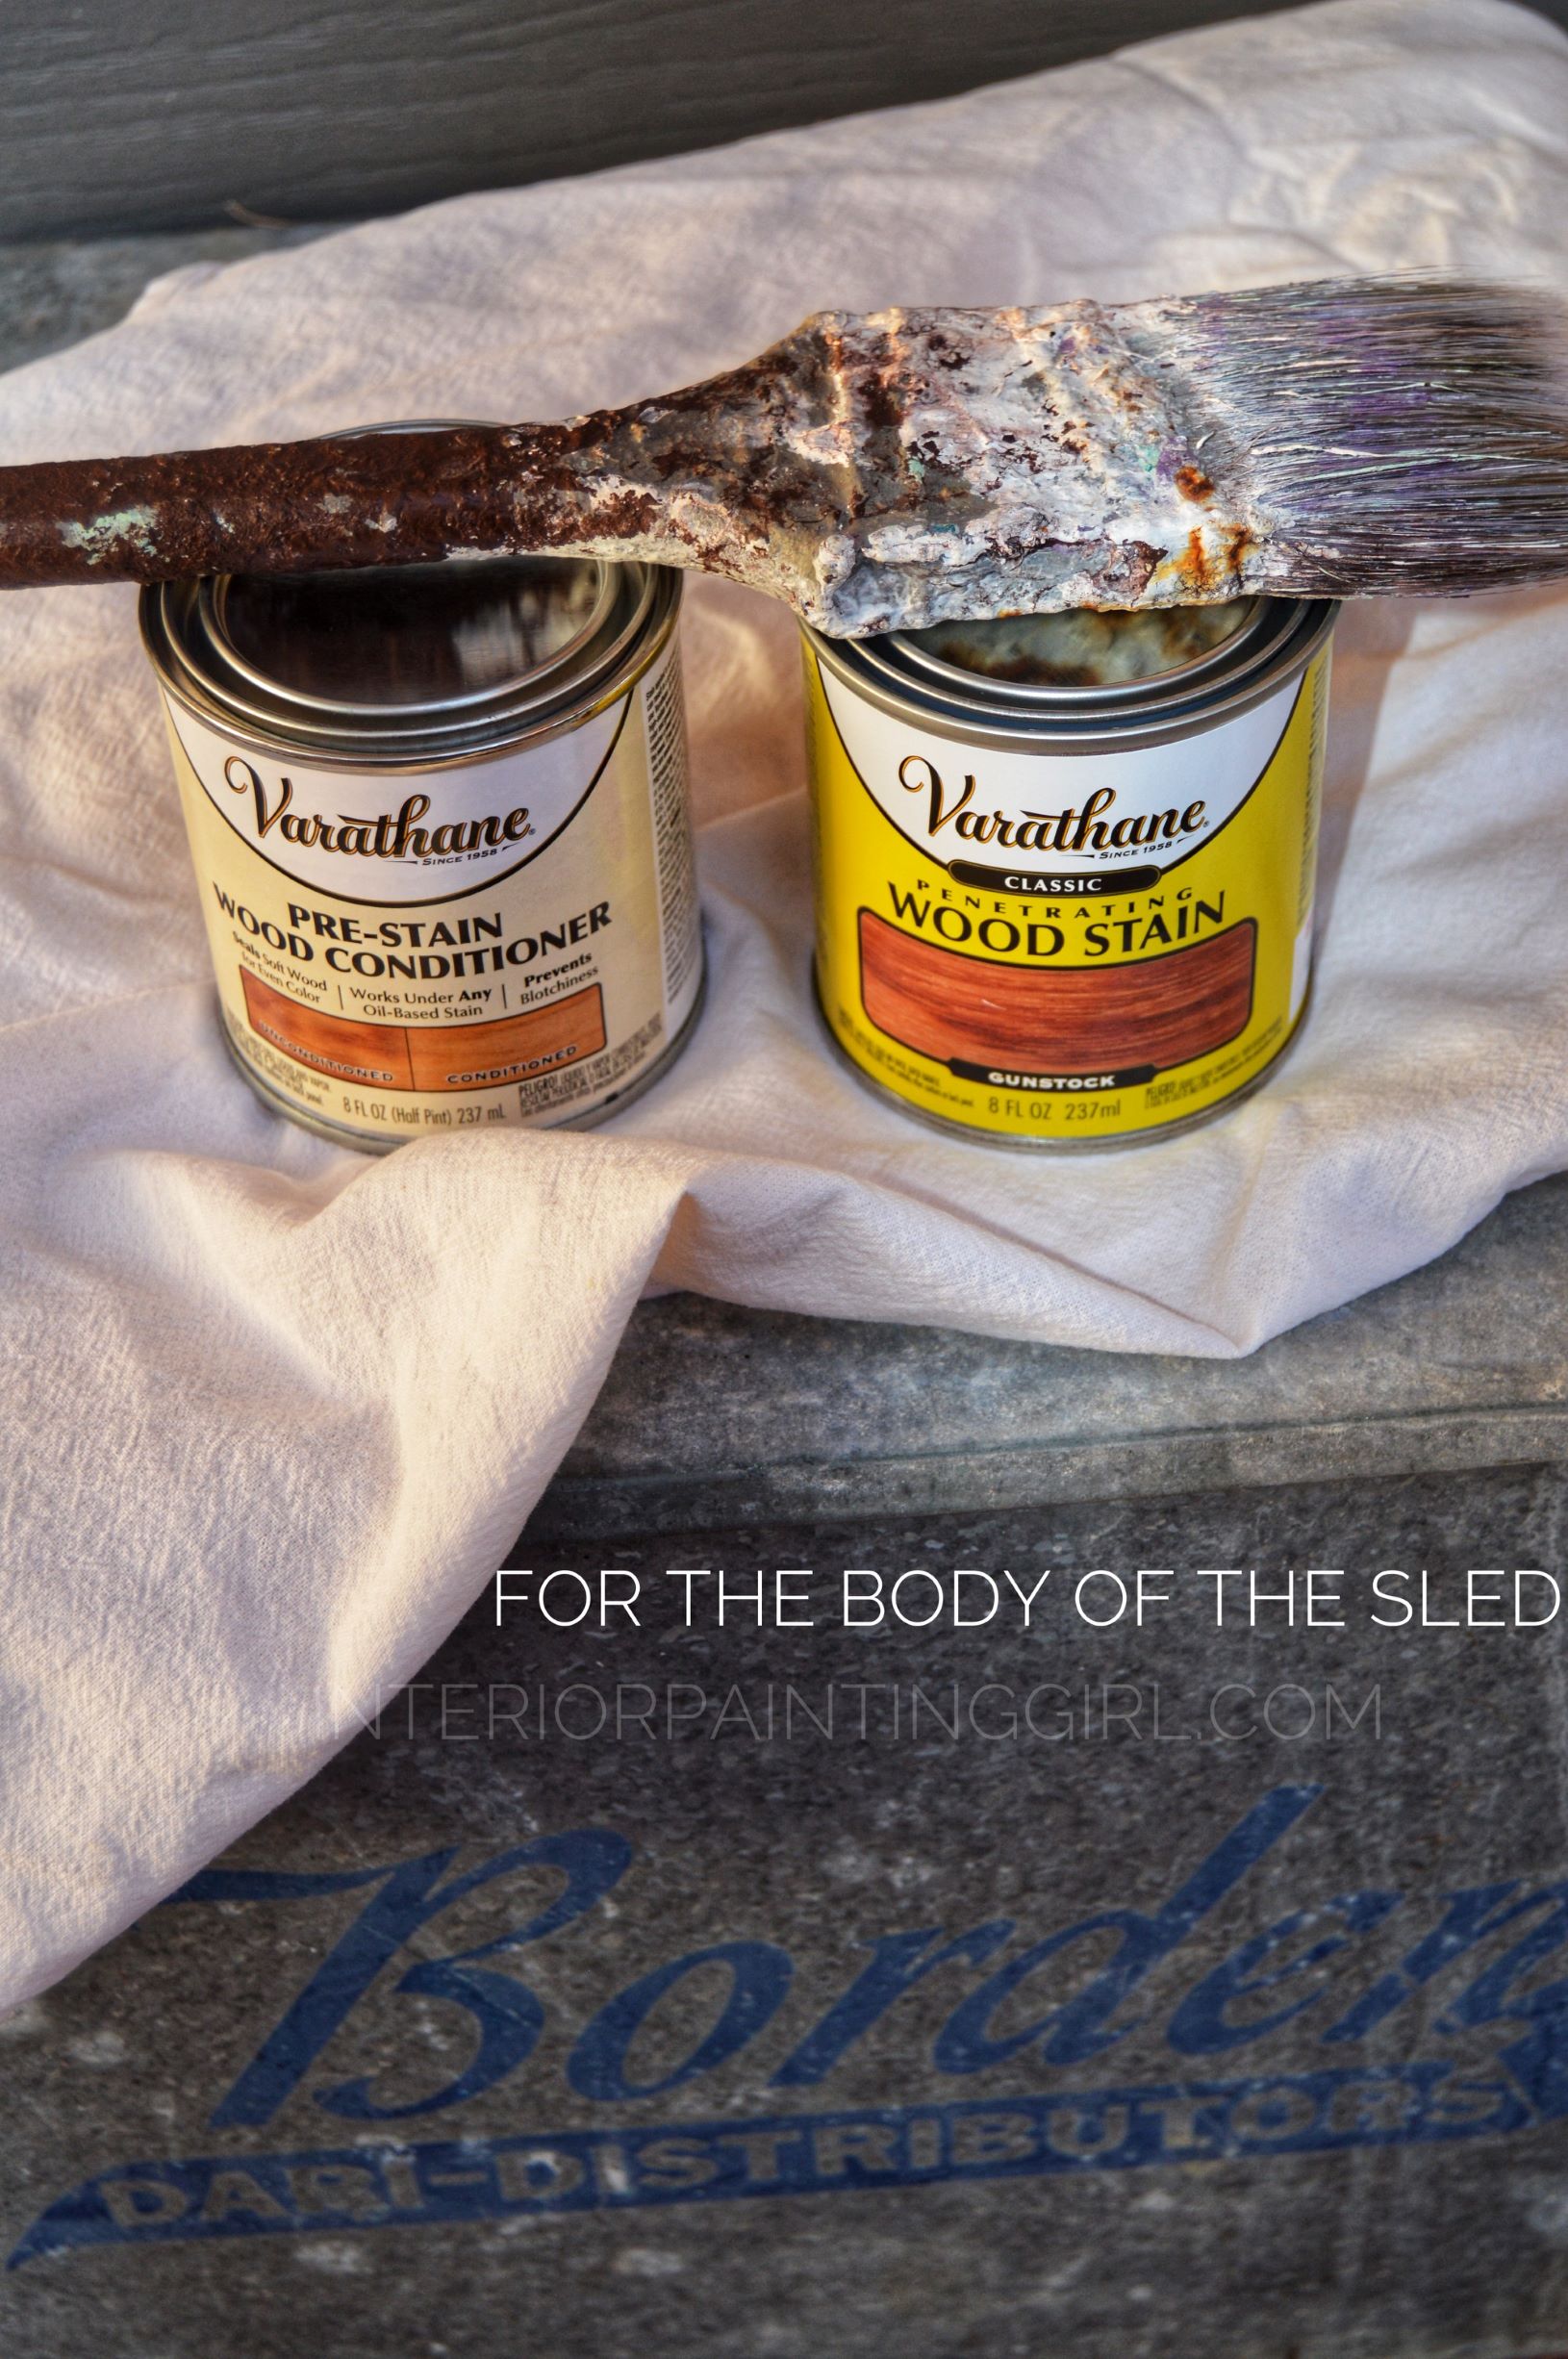
The topside of the sled didn’t have a finish coat on it at all. It was still raw wood. So I decided to match the underside (the well as I could) to the topside. It had a previous stain and shellac on it and I just eyed it up and brought a picture of it with me to the store and bought a stain that matched fairly closely.
Remember matching stains is a guessing game and products today do not match those of yesteryear. Be patient and flexible and do not rely on perfection. This is for fun!
Alternately, you could paint your toboggan versus staining it but in this case the stain matched the other wood pieces in my home and was original to the sled, so I went with it. Allow your creativity to shine here. There is no right or wrong plan when it comes to your heirloom pieces.
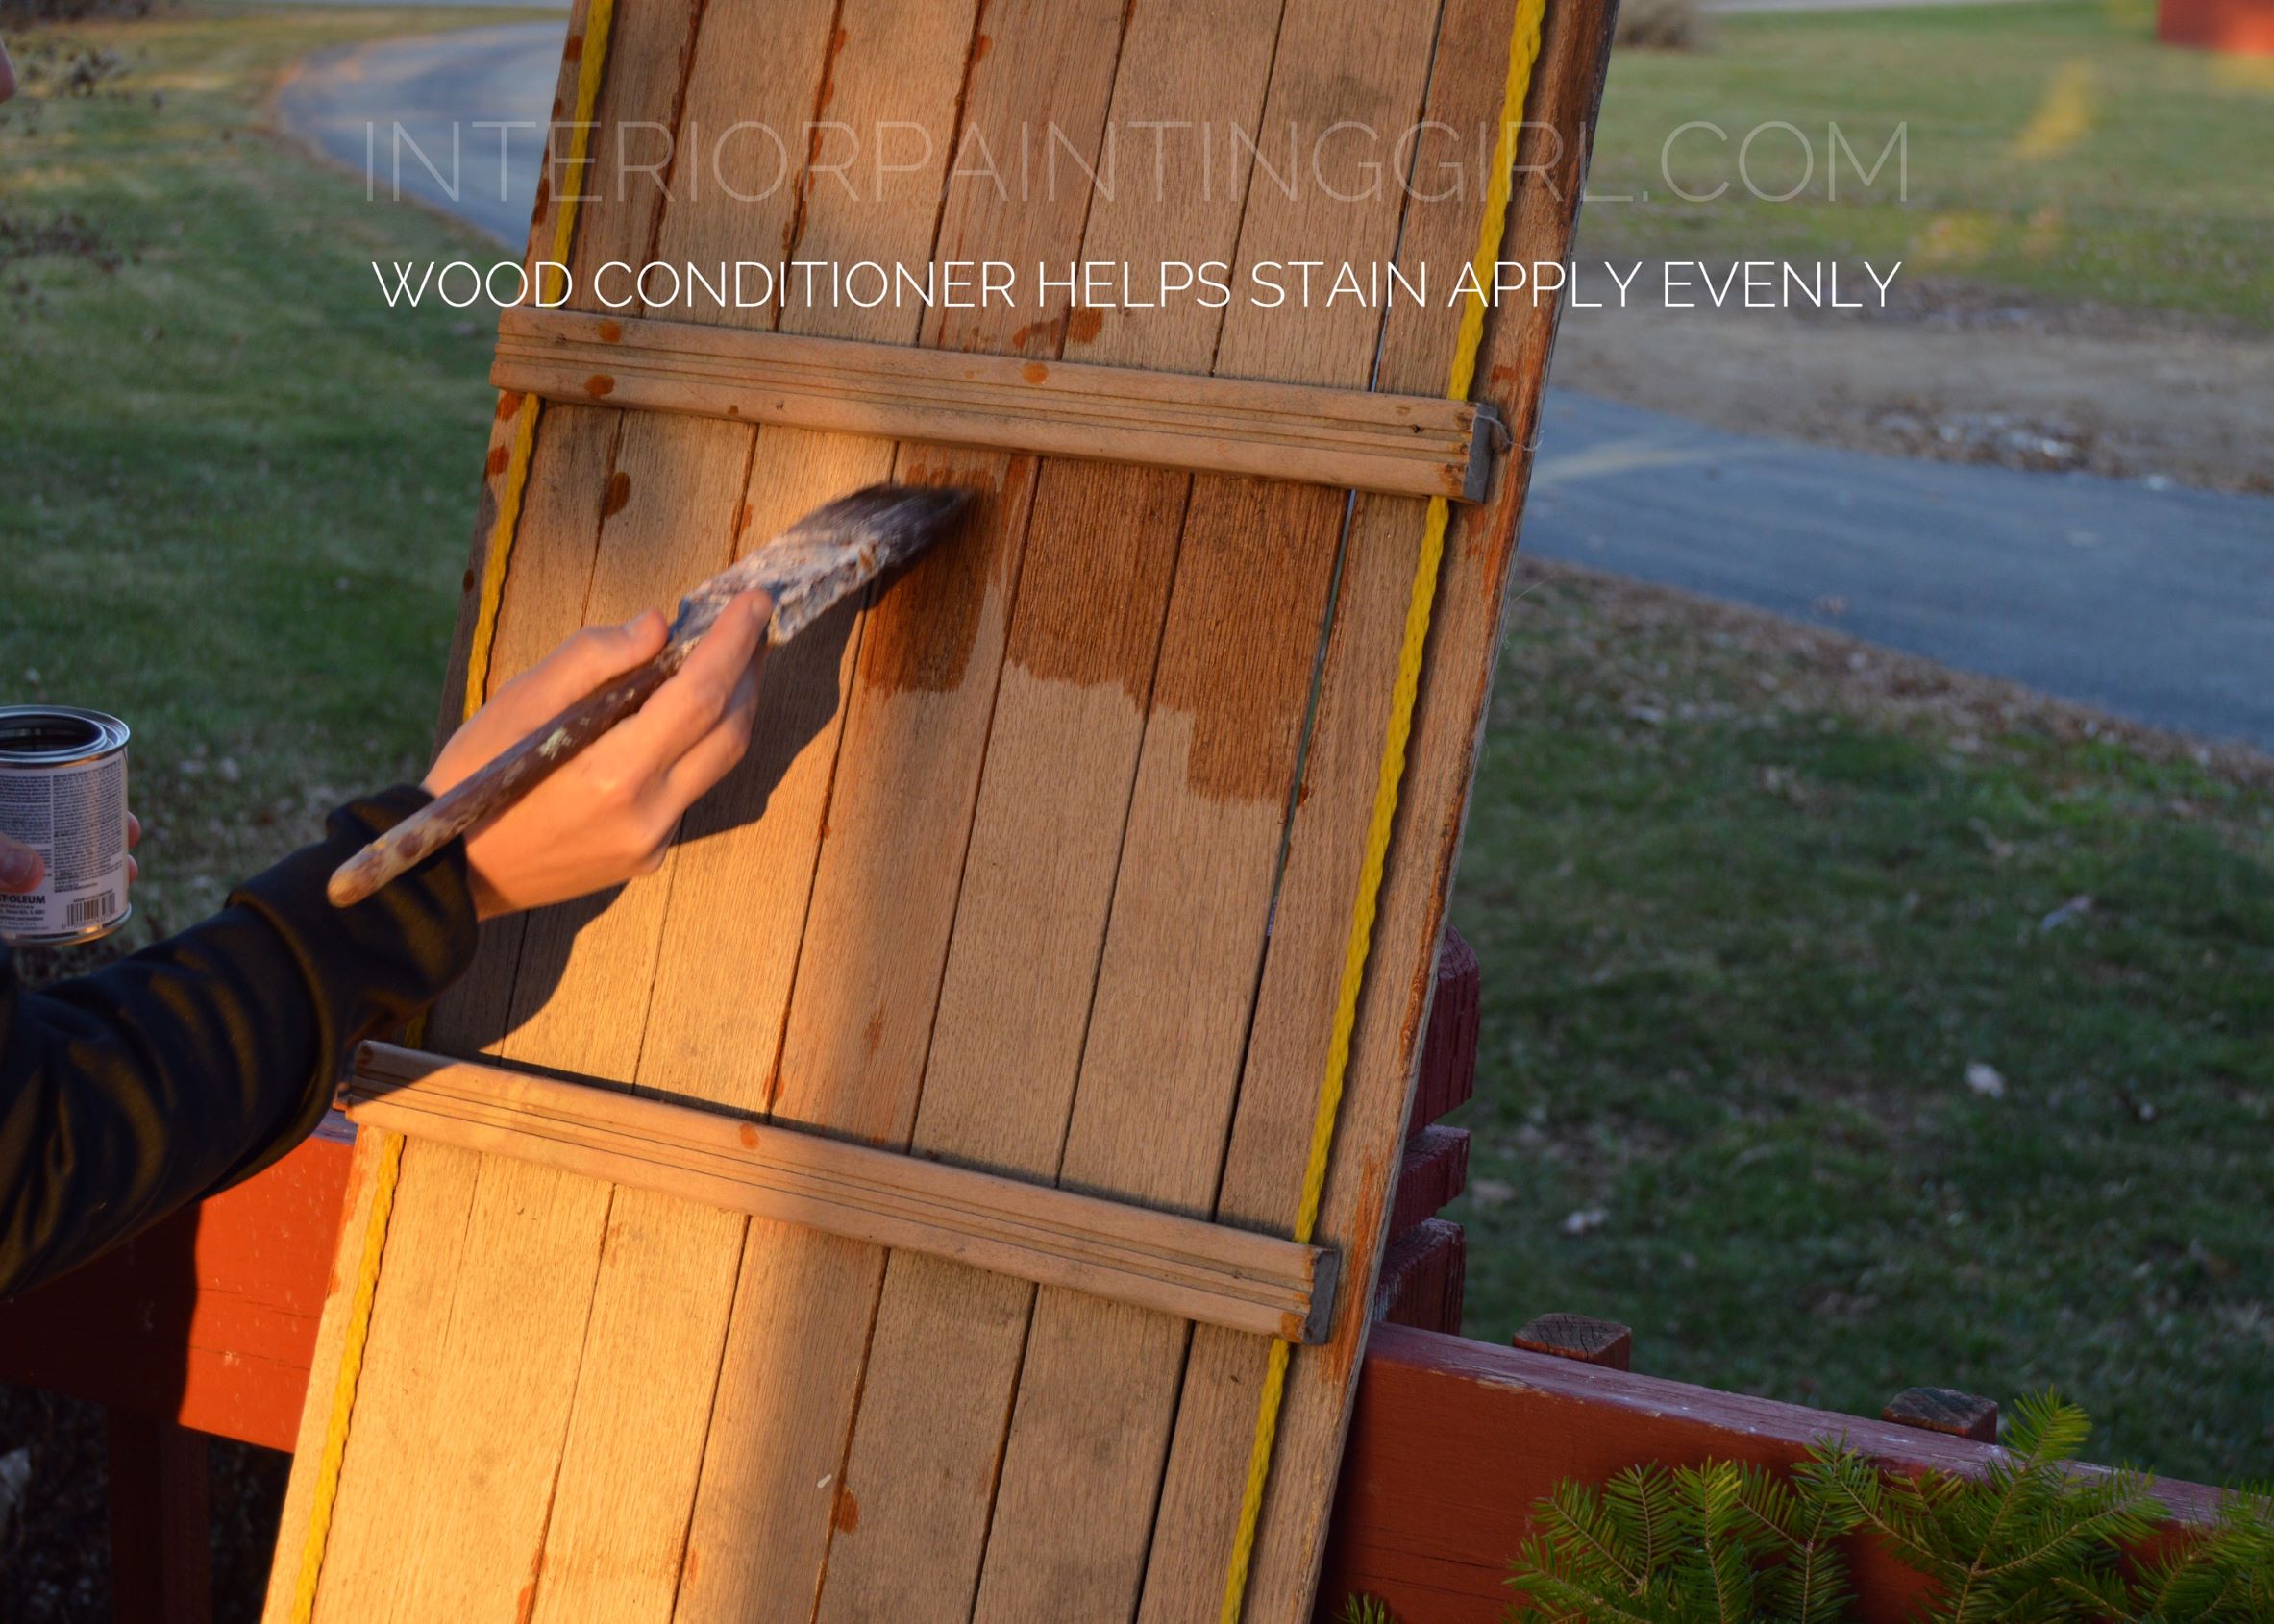
In order to prepare the body of the sled for stain you need to first ensure it is clean and free of dust and debris and apply a wood conditioner. The wood conditioner goes on clear but gives the dry wood a “drink” so to speak and allows for the stain to be applied evenly. Without the wood conditioner, your stain will absorb unevenly and appear blotchy.
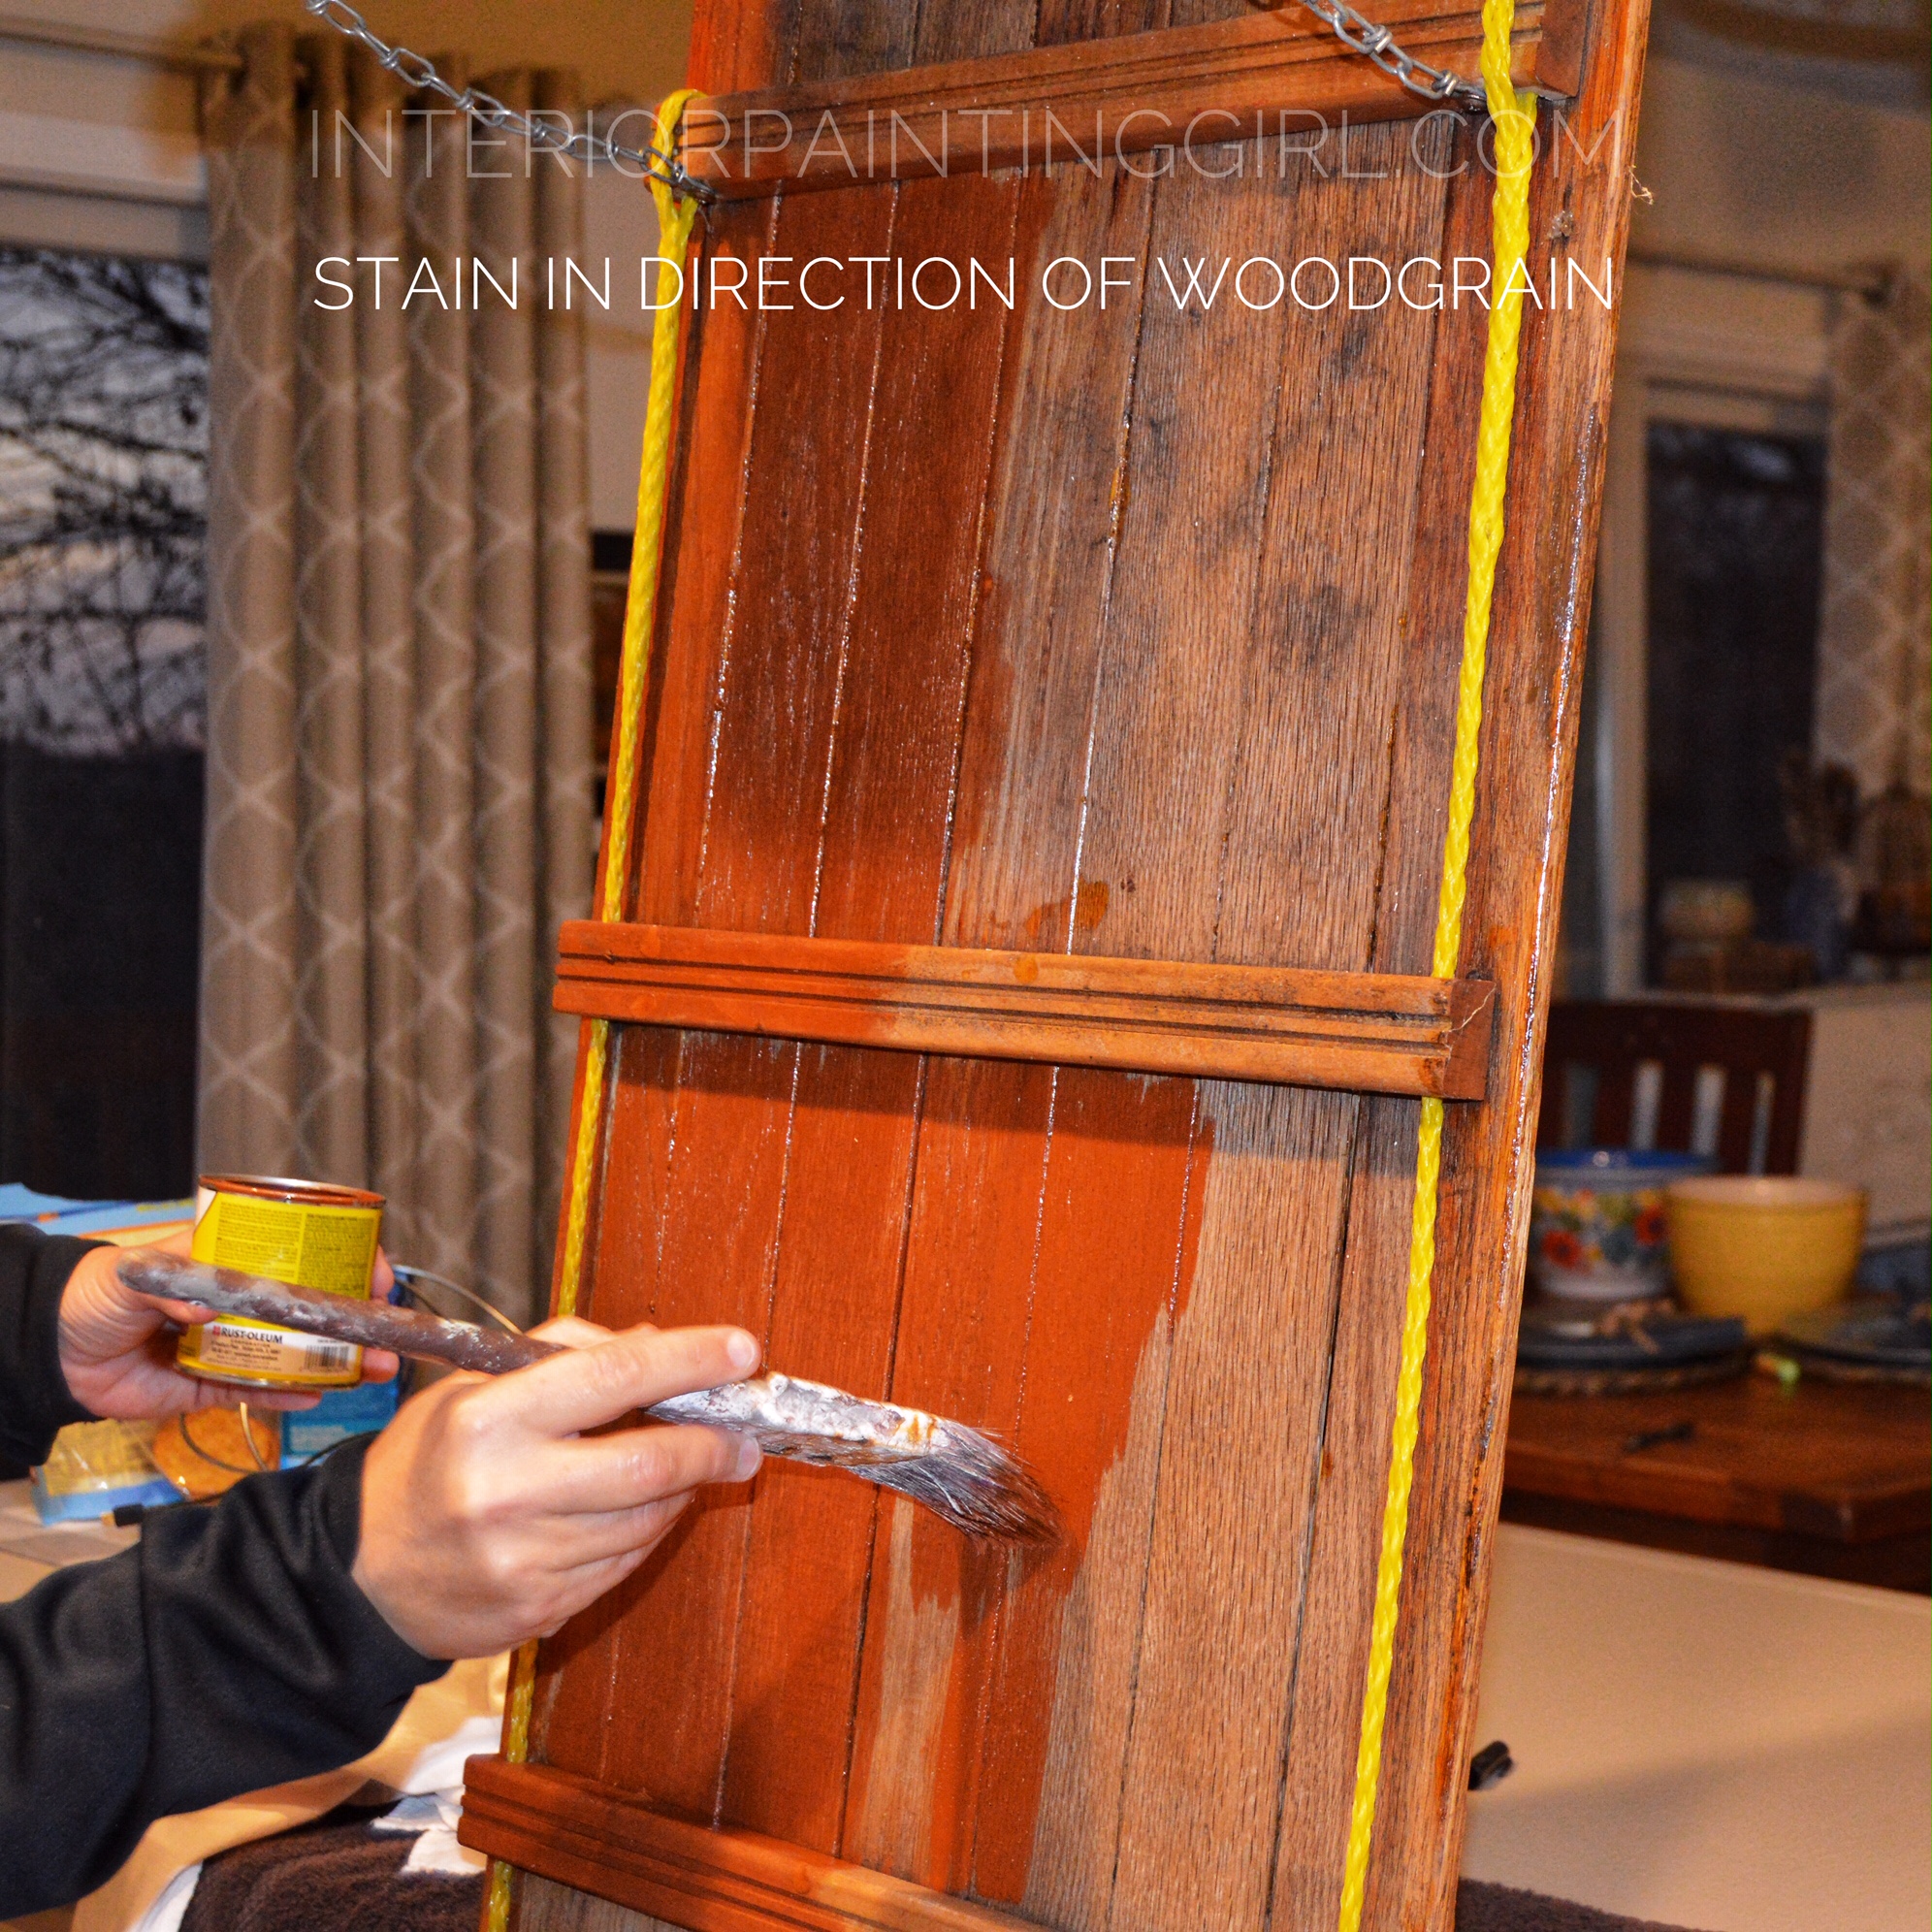
Now it is time to apply the stain. I used the same brush I used to apply wood conditioner, brushing with even strokes in the direction of the wood grain, being sure to hit the sides of the sled and the underneath of the bars as well to coat all surfaces. Stain is runny and thin so apply lightly at first until you get used to the consistency.
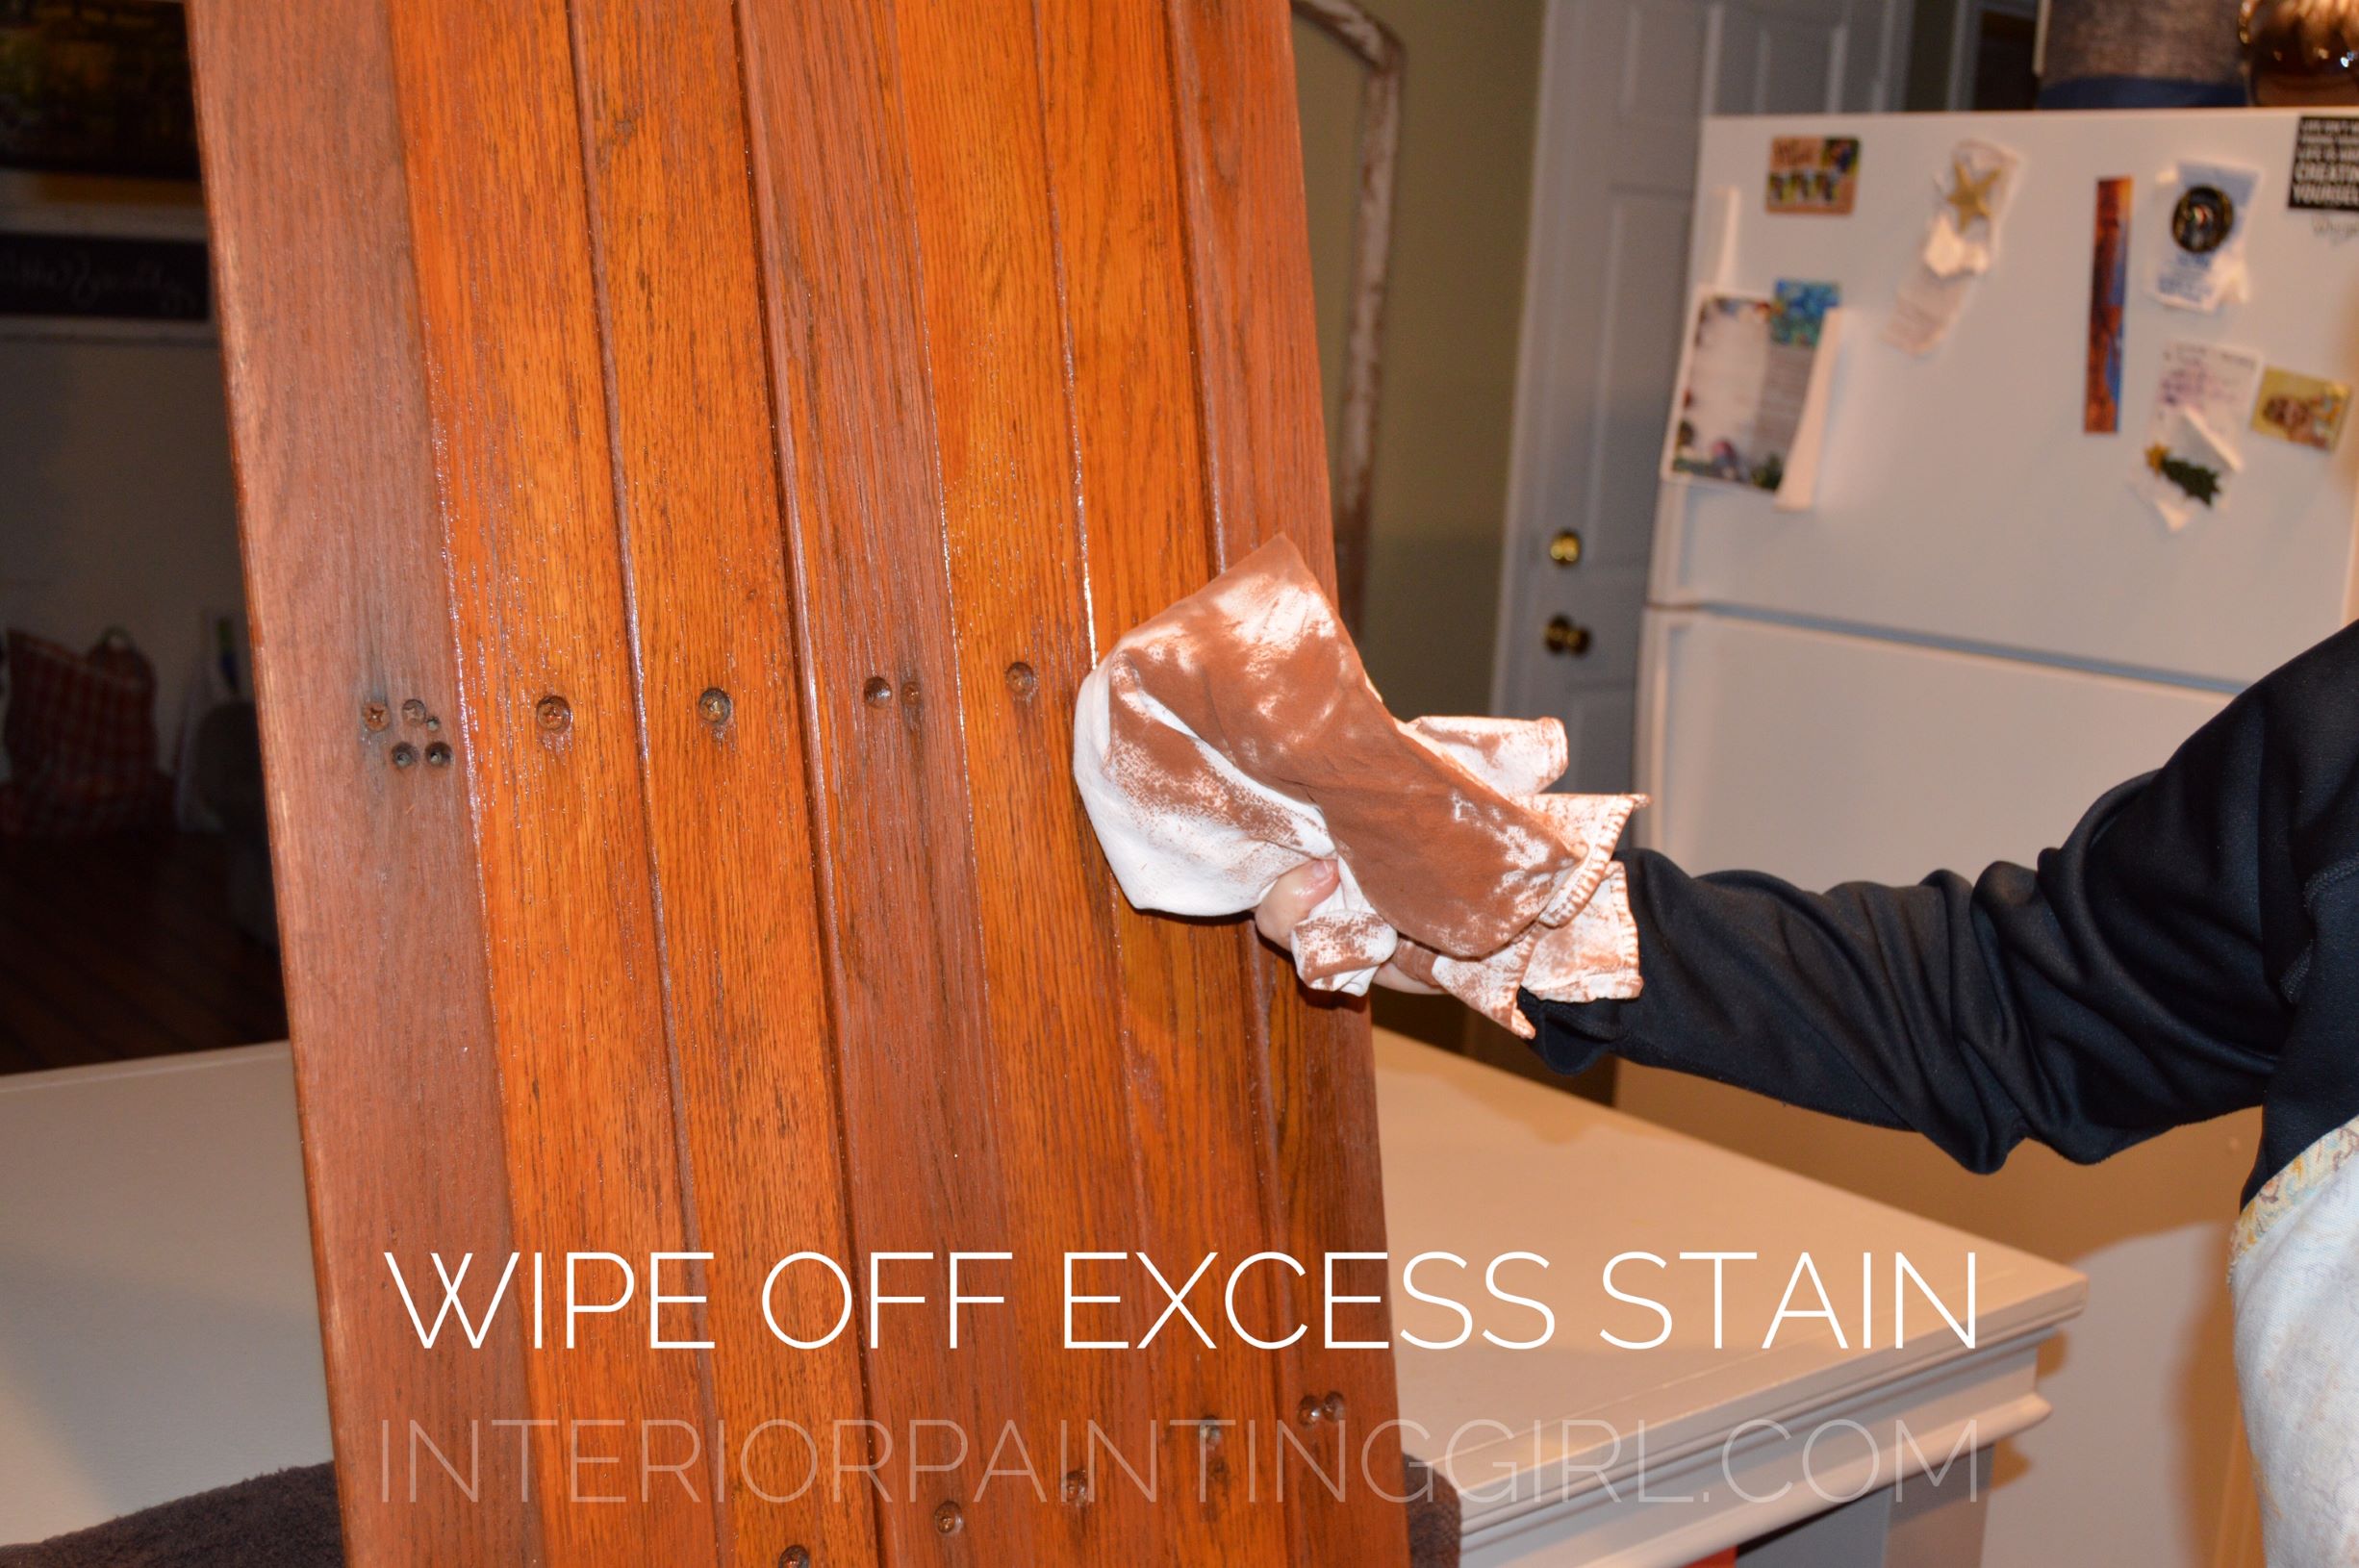
After the stain sits on the surface for about 10 minutes you can take a rag and wipe off the excess. Allow to dry thoroughly (4 hours if it’s water-based and overnight if it’s oil-based) before applying a sealer or polyurethane.
Applying a sealer isn’t necessary if your project will be staying indoors but I chose to do one because it does increase the shine of the stain a bit and also makes surfaces easier to dust and wash if need be. If your project will be going outside, then you’ll want to make sure you get a polyurethane or marine varnish that’s meant for outside conditions.
Clear coat or polyurethane often goes on milky or yellowy but dries clear. If you want to apply more than one coat for extra protection, you’ll need to lightly sand in between coats and wipe down with a rag or cheesecloth.
I did apply a clear coat to my letters as well just for a uniform appearance and extra durability.
Now it is time to apply the stain. I used the same brush I used to apply wood conditioner, brushing with even strokes in the direction of the wood grain, being sure to hit the sides of the sled and the underneath of the bars as well to coat all surfaces. Stain is runny and thin so apply lightly at first until you get used to the consistency.
After the stain has sat on the surface for about 10 minutes you can take a rag and wipe off the excess. Allow to dry thoroughly (4 hours if it’s water-based and overnight if it’s oil-based) before applying a sealer or polyurethane.
Applying a sealer isn’t necessary if your project will be staying indoors but I chose to do one because it does increase the shine of the stain a bit and also makes surfaces easier to dust and wash if need be. If your project will be going outside, then you’ll want to make sure you get a polyurethane or marine varnish that’s meant for outside conditions.
Clear coat or polyurethane often goes on milky or yellowy but dries clear. If you want to apply more than one coat for extra protection, you’ll need to lightly sand in between coats and wipe down with a rag or cheesecloth.
I did apply a clear coat to my letters as well just for a uniform appearance and extra durability.
Step 3 : Attach Letters and Accessories
Yay! We’ve finished the restoration of my husband’s childhood toboggan! Now it’s time for the icing on the cake : the accessorizing.
I chose to keep things simple and rustic. After using a drill and a few screws to attach the letters and a hook to hang the wreath, I added a buffalo plaid bow, a rusty spray of metal stars, and a few pinecones from the yard to complete the look.
This is where you can really get creative and unique, or tie the new crafty piece in to your current color or decorating scheme. Accessories with personal meaning are all the more relevant here! Use special family ornaments passed down from generation to generation to add sparkle. Make the bow out of fabric from your Grandfather’s old flannel. The possibilities are endless.
Consider utilizing a fabric or color from some other part of the room, or finding a scrap of fabric that accentuates your paint or décor colors.
I’m hoping to find a nostalgic picture of my husband and his family tobogganing to add to the center of the wreath to personalize it even more.
Never underestimate the value in giving something like this as a gift. It is sure to bring JOY to your family and friends for many more years to come. And remember “the beauty in handmade is in the imperfections.”
Thank you for taking a seat on my holiday painting project adventure for this year! I hope it inspires you to do something crafty with your family keepsakes this holiday season.


"I did not know how to paint or even what to paint, but I knew I had to begin." Margaret Atwood, Cat's Eye
Join my monthly email newsletter, "Dip & Swipe", for professional tips, how-to articles, color and decorating ideas, projects, and much more!
Recent Articles
-
Repurpose Old Windows
Dec 10, 21 06:32 PM
 Learn how to repurpose old windows by upcycling them into shabby chic decor.
 -
Upcycling a Toolbox
Dec 08, 21 10:22 PM
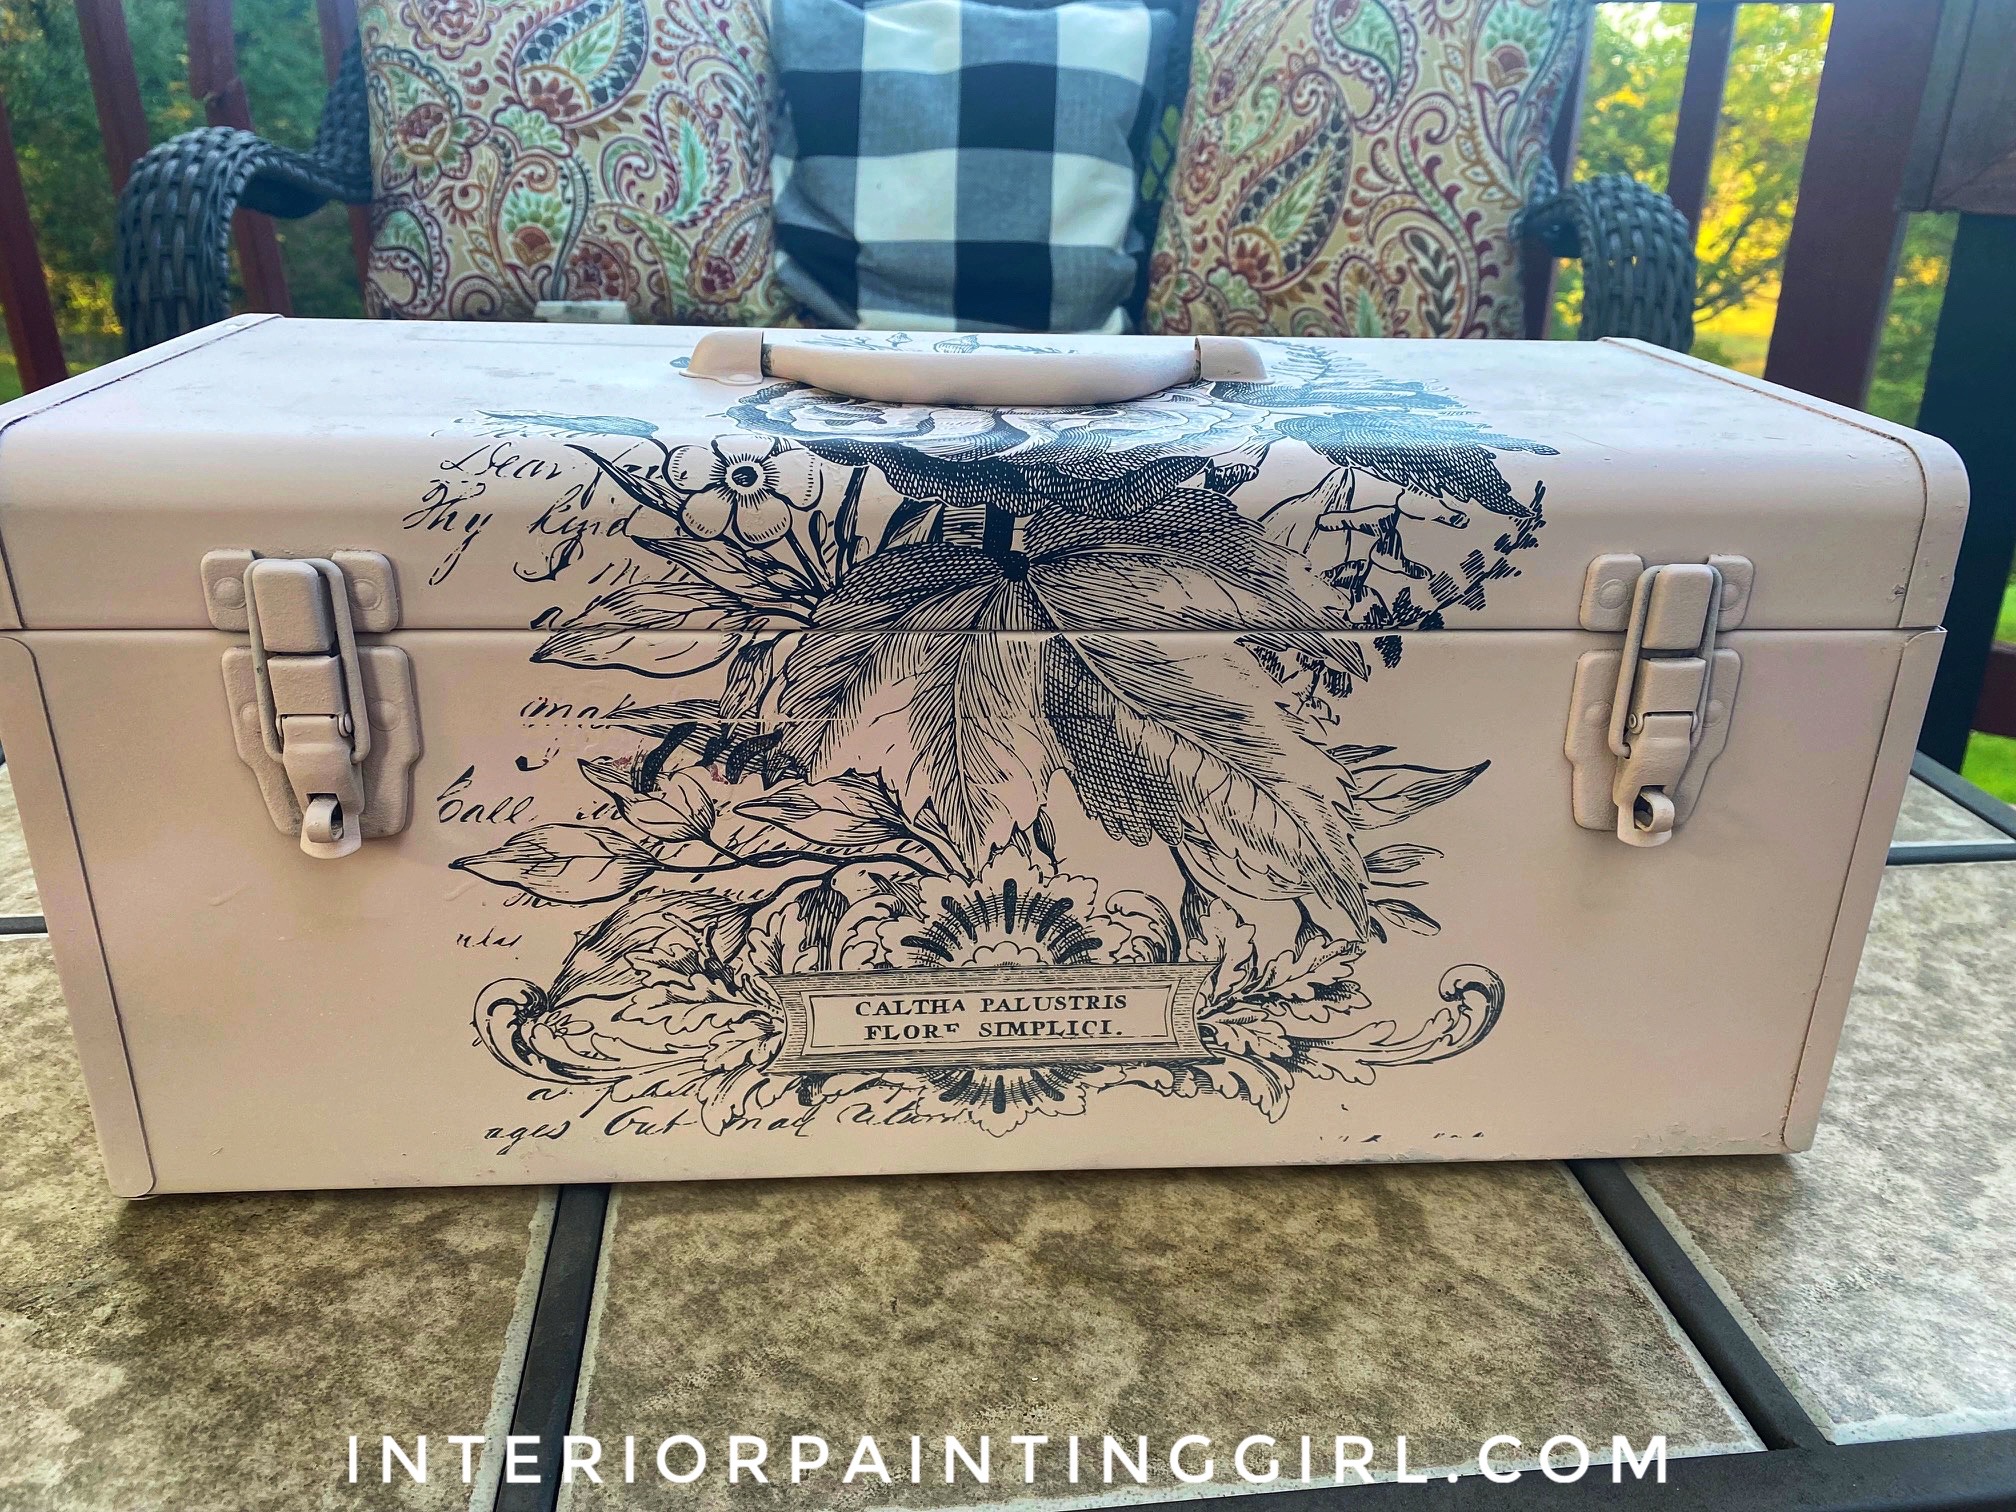 In this craft painting project, I upcycle an old toolbox with fresh paint and an appliqué.
 -
Craft Painting Projects
Dec 08, 21 08:13 PM
 A place for all of my smaller craft painting projects and DIY projects that don't fit elsewhere.
Follow me on Pinterest @